
Ready to amaze your friends and family with your dog’s impressive repertoire of tricks? Teaching your dog a new trick, especially advanced ones, is an incredibly rewarding experience that strengthens your bond and provides vital mental stimulation. Beyond the entertainment value, mastering these skills can contribute to earning prestigious AKC Trick Dog titles, recognizing your dog’s intelligence and your dedication.
For a successful training journey, you’ll primarily need three things: patience, time, and plenty of high-value dog treats or their favorite toys if they are highly toy-motivated. If you utilize clicker training, have your clicker ready to precisely mark the moment your dog performs the desired behavior. Always choose a quiet, distraction-free environment to optimize your training sessions. This guide will walk you through a variety of advanced tricks, offering clear, step-by-step instructions to help you and your furry friend embark on this exciting adventure. Whether you’re aiming to teach your dog to come to you or tackle more complex maneuvers, consistent positive reinforcement is your best ally.
Essential Foundations for Trick Training
Before diving into complex tricks, ensure your dog has a solid grasp of basic obedience. A strong foundation in commands like “sit,” “stay,” and “down” will make learning new tricks significantly easier. Remember, trick training is not just about showing off; it’s a fantastic way to boost your dog’s confidence, improve their focus, and provide an outlet for their natural instincts. Always keep sessions short, positive, and fun to maintain your dog’s enthusiasm.
How to Teach Your Dog to Catch
Teaching your dog to catch is a classic trick that can be both fun and useful. It requires a bit of hand-eye (or paw-eye) coordination.
Step-by-Step Guide:
- Start Close: Position your dog directly in front of you. Get their full attention by holding a high-value treat.
- Gentle Toss: Using an underhand throw, gently toss the treat directly towards their mouth.
- Reward Success: If your dog successfully catches the treat, immediately offer enthusiastic praise and another treat.
- Manage Misses: If they miss, try to quickly retrieve the treat before they can eat it off the ground. This helps them understand the goal is to catch, not just eat.
- Repeat and Progress: Practice a few times in each short training session. Once your dog consistently catches tossed treats, introduce lightweight toys they enjoy. Toss the toy gently, praising and treating when they make the catch.
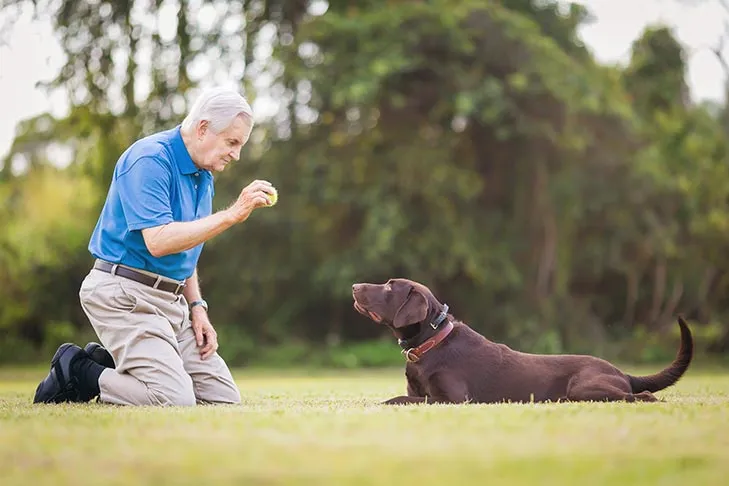 A yellow Labrador Retriever sits attentively, ready to catch a tennis ball about to be thrown by a senior man, on a grassy field.
Consistency is key to refining their catching abilities. Remember to keep it positive and exciting!
How to Teach “Under the Bridge”
This charming trick involves your dog crawling underneath your raised knees, creating a “bridge.” It’s a great exercise for flexibility and body awareness.
Step-by-Step Guide:
- Set Up: Sit comfortably on the floor with your knees raised, forming a triangular “bridge.” Ensure you have enticing treats or toys readily available.
- Lure Through: Place your dog on one side of your body. Hold a treat or toy in your hand on the other side, reaching it under your legs. Let your dog sniff the lure.
- Guide the Crawl: Slowly lower the treat/toy towards the ground, moving it under your legs. As your dog follows the lure, their body will naturally lower and they will crawl through.
- Praise and Reward: As soon as your dog comes through your legs, offer immediate praise and the treat or toy.
- Add a Cue: After several successful repetitions, introduce a verbal cue like “under” or “bridge” as your dog starts to move under your legs.
- Fade the Lure: Once your dog consistently performs the trick with the verbal cue, gradually reduce your reliance on the treat lure. Soon, you’ll be able to give the verbal cue, and your dog will go “under the bridge” on command.
How to Teach Your Dog to Speak
Teaching your dog to “speak” on cue can be a fun party trick and even helpful for managing excessive barking if taught correctly. The easiest method is “capturing” a naturally occurring behavior.
Step-by-Step Guide:
- Prepare: Have a supply of treats ready.
- Capture the Bark: The next time your dog naturally barks (out of excitement, at a doorbell, etc.), immediately mark that behavior with a chosen verbal cue (e.g., “talk,” “speak”) and give them a treat. If you use a clicker, click precisely as they bark to make the connection even clearer.
- Repeat and Reinforce: Continue to mark and reward every natural bark that occurs. Your dog will start to understand that barking, when you cue it, earns a reward.
- Control Barking: To prevent your dog from barking excessively or at inappropriate times, it’s crucial to only reward them when they bark in response to your cue. If they bark randomly, ignore it. This teaches them to offer the bark on demand, not incessantly.
- Practice: Once your dog understands the concept, you can prompt them slightly (e.g., hold a treat up, wait for a bark, then cue and reward) to solicit the behavior more intentionally.
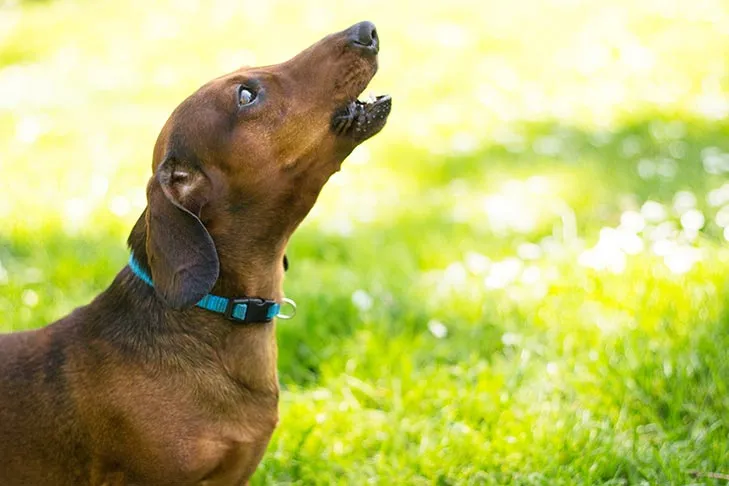 A long-haired Dachshund sits in a grassy yard, head tilted, howling or barking with its mouth open, showcasing its vocal nature.
Teaching speak requires careful timing and consistency to ensure your dog understands the command and doesn’t develop a habit of nuisance barking.
How to Teach Leg Weaves
Leg weaving is an impressive trick that demonstrates great coordination between you and your dog. It involves your dog moving in a figure-eight pattern through your legs.
Step-by-Step Guide:
- Safe Environment: Begin in a safe, open area without a leash, to prevent it from getting tangled around your legs.
- Initial Lure (Through Legs): Stand with your legs wide apart. Hold a treat in one hand behind your legs. Bend your knees slightly and use the treat to lure your dog to walk between your legs. Praise and treat as they pass through.
- Around One Leg: Once comfortable going through, use another treat to guide your dog not only through your legs but also around one of your legs until they return to stand in front of you. Allow them to lick or nibble the treat to keep them engaged. Praise and treat upon their return.
- Around the Other Leg: Repeat the previous step, guiding them through and around your other leg.
- Combine for Figure-8: When your dog confidently follows the lure through and around both legs individually, it’s time to link the movements into a fluid figure-eight pattern. Start by luring through and around your right leg, then immediately guide them through and around your left leg before finally rewarding them.
- Fade the Lure: Gradually phase out the visible treat lure, using an empty hand to guide them. Once they follow your empty hand, introduce a verbal cue like “weave” or “legs.”
- Physical Cue: With more practice, your bending knees and body language will become the primary physical cue for the trick, allowing you to eventually remove the empty-handed lure.
- Add Movement: Once mastered while standing still, teach them to weave while you walk forward. Start with large, slow steps, reintroducing the treat lure initially to build confidence. As they gain experience, phase out the lure and gradually increase your walking speed and decrease step size to polish the trick. This trick is a great way to incorporate more complex dog commands into their routine, building on foundational skills.
How to Teach Your Dog to Shake Hands
“Shake hands” is a popular and relatively straightforward trick to teach, showcasing your dog’s polite manners.
Step-by-Step Guide:
- Prompt the Paw: Hold your open hand out to your dog, palm facing up. Ignore any licking or sniffing. Wait patiently until your dog paws at your hand (they might do this out of curiosity or frustration).
- Mark and Reward: The moment your dog’s paw touches your hand, immediately mark the behavior (with praise or a clicker) and give them a treat.
- Repeat for Consistency: Continue practicing until your dog consistently paws at your outstretched hand.
- Build Duration: Now, start to build the duration. Wait for their paw to rest on your hand for a second or two before clicking/praising and rewarding. Gradually increase this duration.
- Add Verbal Cue: Once your dog reliably places their paw on your hand and holds it, introduce a verbal cue like “shake” or “hello” as you offer your hand.
- Refine the Gesture: Begin to flatten your hand and hold it vertically (as if you’re about to shake someone’s hand), keeping a treat in it initially. Introduce a gentle, up-and-down shaking motion before treating your dog. This helps them understand the full “shaking” action.
- Fade the Lure: Eventually, you’ll be able to offer your hand with the verbal cue, and your dog will shake without needing a visible treat. Incorporating this into your routine is one of the easy dog tricks to teach your puppy that builds confidence.
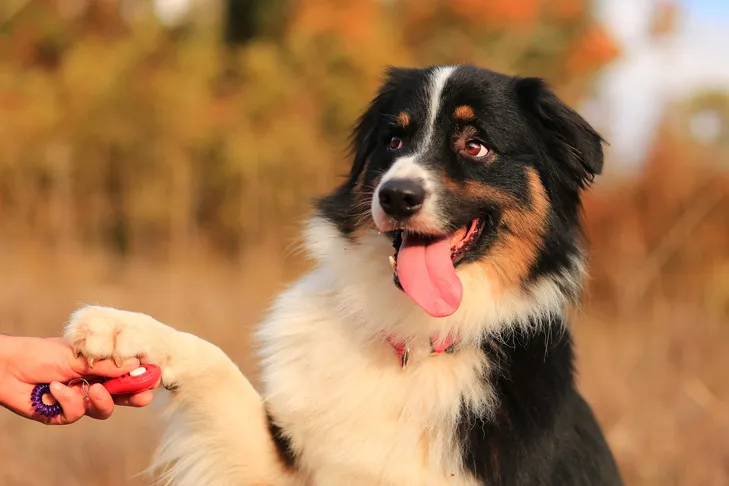 An Australian Shepherd looks up intently, gently placing its paw on a person's hand, practicing to give paw outdoors on a sunny day.
This trick also helps improve your dog’s body awareness and responsiveness to subtle cues.
How to Teach “Yes” and “No” (Head Nods and Shakes)
This advanced trick makes it seem like your dog can answer questions, adding a delightful layer of interaction. It involves teaching separate cues for nodding “yes” and shaking their head “no.”
Teaching “Yes” (Head Nod):
- Lure the Nod: Hold a high-value treat in a closed fist (or use a distinct hand signal like pointing a finger upwards). Slowly move the hand with the treat (or your chosen hand signal) up and down, encouraging your dog to follow it with their nose, creating a nodding motion.
- Reward: As your dog’s head follows the lure in a nod, immediately praise and give the treat.
- Fade the Treat: After consistent success, try the motion with an empty hand. When your dog nods, praise and treat with your other hand.
- Establish Cue: The closed fist or hand signal will become the physical cue. You can then introduce a verbal cue like “yes” or “nod.”
Teaching “No” (Head Shake):
- Distinct Lure: Use a different, clearly distinguishable hand signal for “no” (e.g., a closed fist with your pointer finger extended sideways, or a specific side-to-side hand motion).
- Lure the Shake: Hold a treat in this “no” hand signal and slowly move it from side to side. Your dog will follow the lure with their head, creating a head-shaking motion.
- Reward: When your dog moves their head from side to side, praise and reward.
- Fade and Cue: With practice, the new hand signal will become the physical cue. Introduce a verbal cue like “no” or “shake head.”
- Practice Both: Once both are established, practice “yes” and “no” separately, then begin to mix them up to ensure your dog understands the distinct cues. This adds an engaging element to your easy commands to teach your puppy repertoire.
How to Teach Your Dog to Bow
The “bow” is an elegant trick where your dog lowers their front end while keeping their rear end up. It’s also a great stretch for them!
Step-by-Step Guide:
- Starting Position: Have your dog standing in front of you.
- Lure into Bow: Hold a treat in your hand and get your dog’s attention. Slowly lower the treat towards the ground, guiding your dog’s nose down between their front legs and back towards their chest or belly.
- Achieve Bow: As your dog follows the treat, they will naturally move into the bow position (front legs down, rear up).
- Praise and Treat: Immediately praise and reward your dog. To prevent them from collapsing into a “down” position, toss a treat slightly away after rewarding the bow to get them to stand up again.
- Troubleshooting: If your dog consistently goes into a “down” instead of a “bow,” a helpful tip from Penny Leigh, CPDT-KA, Director of the AKC GoodDog Helpline, is to lightly place a hand or finger on your dog’s stomach, just below their loin, as you lure. This provides a gentle physical cue that you’re not asking for a full “down.”
- Fade the Lure: Once your dog reliably bows with the food lure, start using an empty hand to guide them. Reward with a treat from your other hand after they complete the bow.
- Add Verbal and Physical Cues: When they follow the empty-hand lure, introduce a verbal cue like “bow” or “fancy.” With practice, your dog will build the strength and coordination to hold the bow longer. You can also evolve your own physical cue for this trick, perhaps by slightly bowing or curtsying yourself.
 A black French Bulldog sits with its front paws extended and its rear up, in a playful bow position, on a vibrant green lawn.A bow is not only impressive but also a beneficial stretch for your dog, promoting flexibility and strength.
How to Teach Your Dog to Make a Circle (Spin/Twirl)
This dynamic trick involves your dog spinning in a circle on command, which is great for building agility and focus.
Step-by-Step Guide:
- Get Attention: With a treat or toy, get your dog’s attention.
- Lure a Circle (One Direction): Hold the lure just above your dog’s nose and slowly move your hand in a large circle. Your dog will naturally follow the treat/toy, walking in a circle.
- Praise and Treat: As they complete the circle, praise and reward.
- Add Verbal Cue: After a few repetitions, when your dog consistently follows the lure in one direction, introduce a verbal cue like “spin” or “twirl” as they circle.
- Lure Other Direction: Use the same technique to lure your dog to spin in the opposite direction.
- Distinct Cue for Other Direction: When they consistently follow the lure in the second direction, add a distinct verbal cue (e.g., “around,” or simply “spin left/right”).
- Fade the Lure: Once your dog reliably spins in both directions with verbal cues, use the circular hand motion without a treat in your hand. When your dog spins, praise and treat. This builds on foundational first commands to teach your puppy by adding a new dimension.
How to Teach Your Dog to Play Peekaboo (Between Legs)
“Peekaboo,” or “middle,” is a functional trick where your dog comes and sits/stands between your legs. It’s useful for navigating tight spaces and keeping your dog close.
Step-by-Step Guide:
- Starting Position: Stand in front of your dog, both of you facing the same direction.
- Lure Through: Hold a treat in your hand to get your dog’s attention. Lure them forward through your legs.
- Praise and Treat: As soon as your dog comes between your legs, praise and reward.
- Add Verbal Cue: After a few repetitions, introduce a verbal cue like “middle” or “peekaboo” as your dog moves between your legs.
- Release and Repeat: Once your dog is in position, use a release cue (if you have one, like “okay” or “break”) or toss a treat away to encourage them to move out of position, ready for the next practice.
- Fade the Lure: With consistent practice, you’ll be able to fade out the treat lure, and your dog will respond to the verbal cue alone to come into the Peekaboo position. This trick enhances your dog’s responsiveness and body awareness, making them more attentive to your guidance.
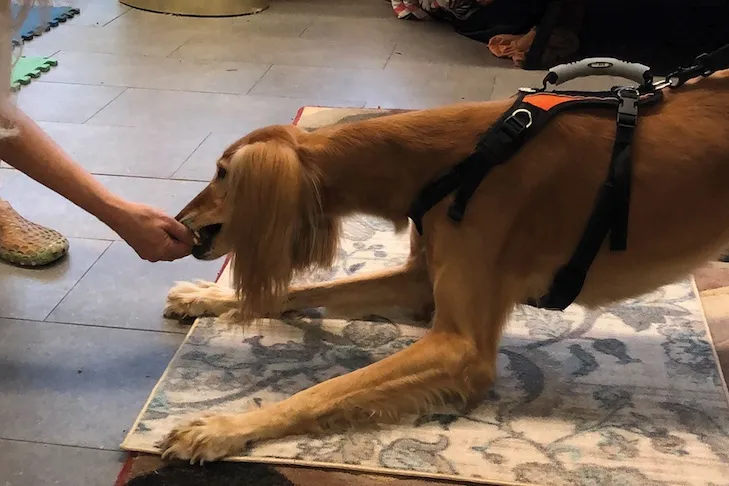
 A small, dark-colored dog sits patiently between a person's legs, looking up, in a "peekaboo" or "middle" position, demonstrating a close bond and training.
This trick is practical for crowded environments, providing a safe and close position for your dog.
Conclusion
Teaching your dog a new trick is a journey of discovery, patience, and immense satisfaction. From the simple catch to complex leg weaves, each trick you master not only expands your dog’s abilities but also deepens the bond you share. These activities provide crucial mental enrichment, combat boredom, and offer a positive outlet for your dog’s energy, contributing to a well-behaved and happy companion. Remember that consistency, positive reinforcement, and keeping training sessions enjoyable are the cornerstones of success. Embrace the process, celebrate every small victory, and watch your “Dog Care Story” unfold into a tale of remarkable companionship and intelligence. If you encounter challenges, consider consulting with a certified professional dog trainer to further refine your techniques.