
Bringing joy to your canine companion often involves delicious, healthy treats. For many dog owners, especially those with furry friends who have sensitivities, dental issues, or simply a discerning palate, finding the perfect snack can be a challenge. That’s where homemade Pumpkin Dog Treats Recipe No Peanut Butter comes in, offering a wholesome, soft, and irresistible option that caters to their specific needs. This simple recipe, requiring just four ingredients and less than 30 minutes, is a game-changer for busy pet parents looking to provide the best for their beloved pups.
Whether your dog is an energetic youngster or a beloved senior, these easy-to-chew treats are packed with natural goodness. They are designed to be soft, making them ideal for older dogs or those with missing teeth or dental discomfort. Plus, by omitting peanut butter, we address common allergy concerns and keep the fat content low, a thoughtful consideration for less active or weight-conscious dogs.
Why Choose Peanut Butter-Free Pumpkin Dog Treats?
While peanut butter is a popular ingredient in many dog treat recipes, it’s not always the best choice. Some dogs have allergies or sensitivities to peanuts, and store-bought versions often contain added sugars, xylitol (a toxic sugar substitute), or excessive fats. Opting for a peanut butter-free pumpkin dog treats recipe ensures you avoid these potential issues, offering a safer and healthier alternative.
The soft texture of these treats is a significant benefit, particularly for senior dogs. As dogs age, their teeth can become sensitive, or they may lose some, making crunchy treats difficult and uncomfortable to eat. These soft bites melt in their mouth, ensuring they can enjoy every morsel without pain. They are also a fantastic option for dogs recovering from dental procedures. My own chihuahua, Sugar, truly appreciated these softer treats when she had teeth pulled; breaking them into smaller pieces made them even easier for her to manage.
Another advantage is the low-fat nature of these treats. Many commercial dog treats are high in fat, which can contribute to weight gain and pancreatitis in susceptible dogs. By using pumpkin and applesauce, we create a moist, flavorful treat that’s naturally lower in calories and fat, making it a guilt-free indulgence.
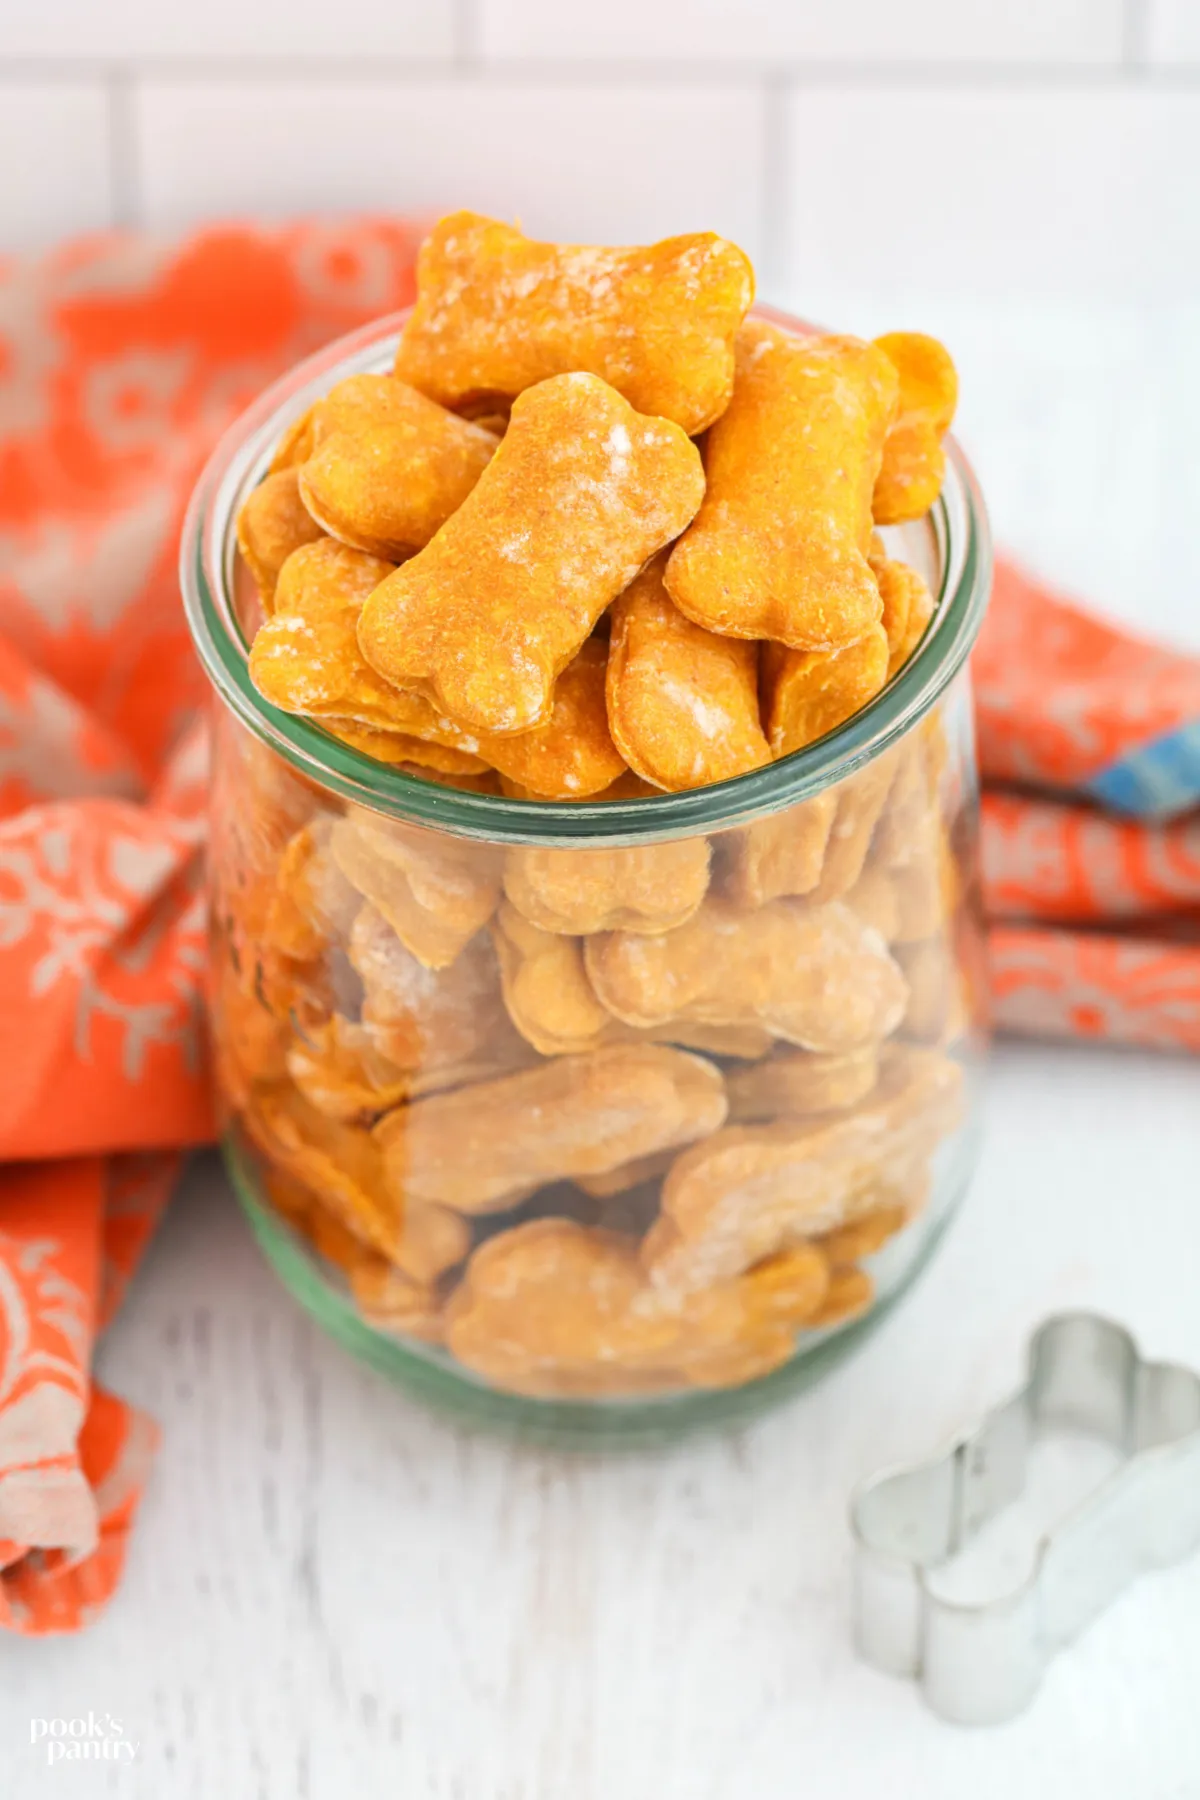 Soft, homemade pumpkin dog treats without peanut butter, stored in a glass jar for freshness.
The Benefits of Pumpkin for Your Dog
Pumpkin isn’t just a delicious ingredient; it’s a nutritional powerhouse for dogs. Pure pumpkin puree is packed with essential vitamins and minerals that contribute to your dog’s overall well-being:
- Digestive Health: High in soluble fiber, pumpkin can help regulate a dog’s digestive system. It can firm up loose stools and relieve constipation, acting as a natural remedy for mild gastrointestinal upset.
- Rich in Vitamins & Antioxidants: Pumpkin contains Vitamin A (for vision and immune function), Vitamin C (an antioxidant), and Vitamin E (another powerful antioxidant). It also provides vital minerals like potassium, which is crucial for muscle function and electrolyte balance.
- Hydration: The high moisture content of pumpkin contributes to your dog’s hydration, especially important if they don’t drink enough water.
- Weight Management: Its fiber content helps dogs feel fuller, which can be beneficial for weight management when incorporated into a balanced diet.
When considering treats for specific dietary needs, such as a grain-free pumpkin dog treats option, remember that the core ingredient of pumpkin remains wonderfully beneficial. Pumpkin provides natural sweetness and moisture, reducing the need for other fillers or potentially allergenic ingredients.
Understanding the Simple Ingredients
One of the best aspects of this easy pumpkin dog treat recipe is its simplicity and reliance on common pantry staples. Each of the four ingredients plays a crucial role in creating these delicious and healthy snacks:
- Canned Pumpkin Purée: This is the star ingredient. It provides the signature flavor, moisture, and nutritional benefits. Crucially, ensure you use 100% pure pumpkin purée, not pumpkin pie filling. Pie filling contains added sugars, spices (like nutmeg, which can be toxic to dogs), and other ingredients that are unnecessary and potentially harmful to your pup. You can also use freshly baked and puréed pumpkin, butternut squash, or sweet potato as a substitute for canned pumpkin.
- Applesauce: Unsweetened applesauce contributes to the soft texture and adds a touch of natural sweetness, eliminating the need for any added sugars. It’s another excellent source of moisture and can provide additional fiber. Always choose plain, unsweetened applesauce with no artificial sweeteners or flavors.
- Egg: The egg acts as a binding agent, holding the dough together, and also adds a touch of protein and moisture to the treats.
- Flour: Regular all-purpose flour provides the structure for these treats. However, if your dog has grain sensitivities or you prefer a gluten-free option, you can easily substitute it with whole wheat flour or a suitable gluten-free flour blend (like oat flour or a rice/tapioca blend).
Using fresh, wholesome ingredients means you know exactly what your dog is consuming, free from preservatives and artificial additives often found in commercial treats.
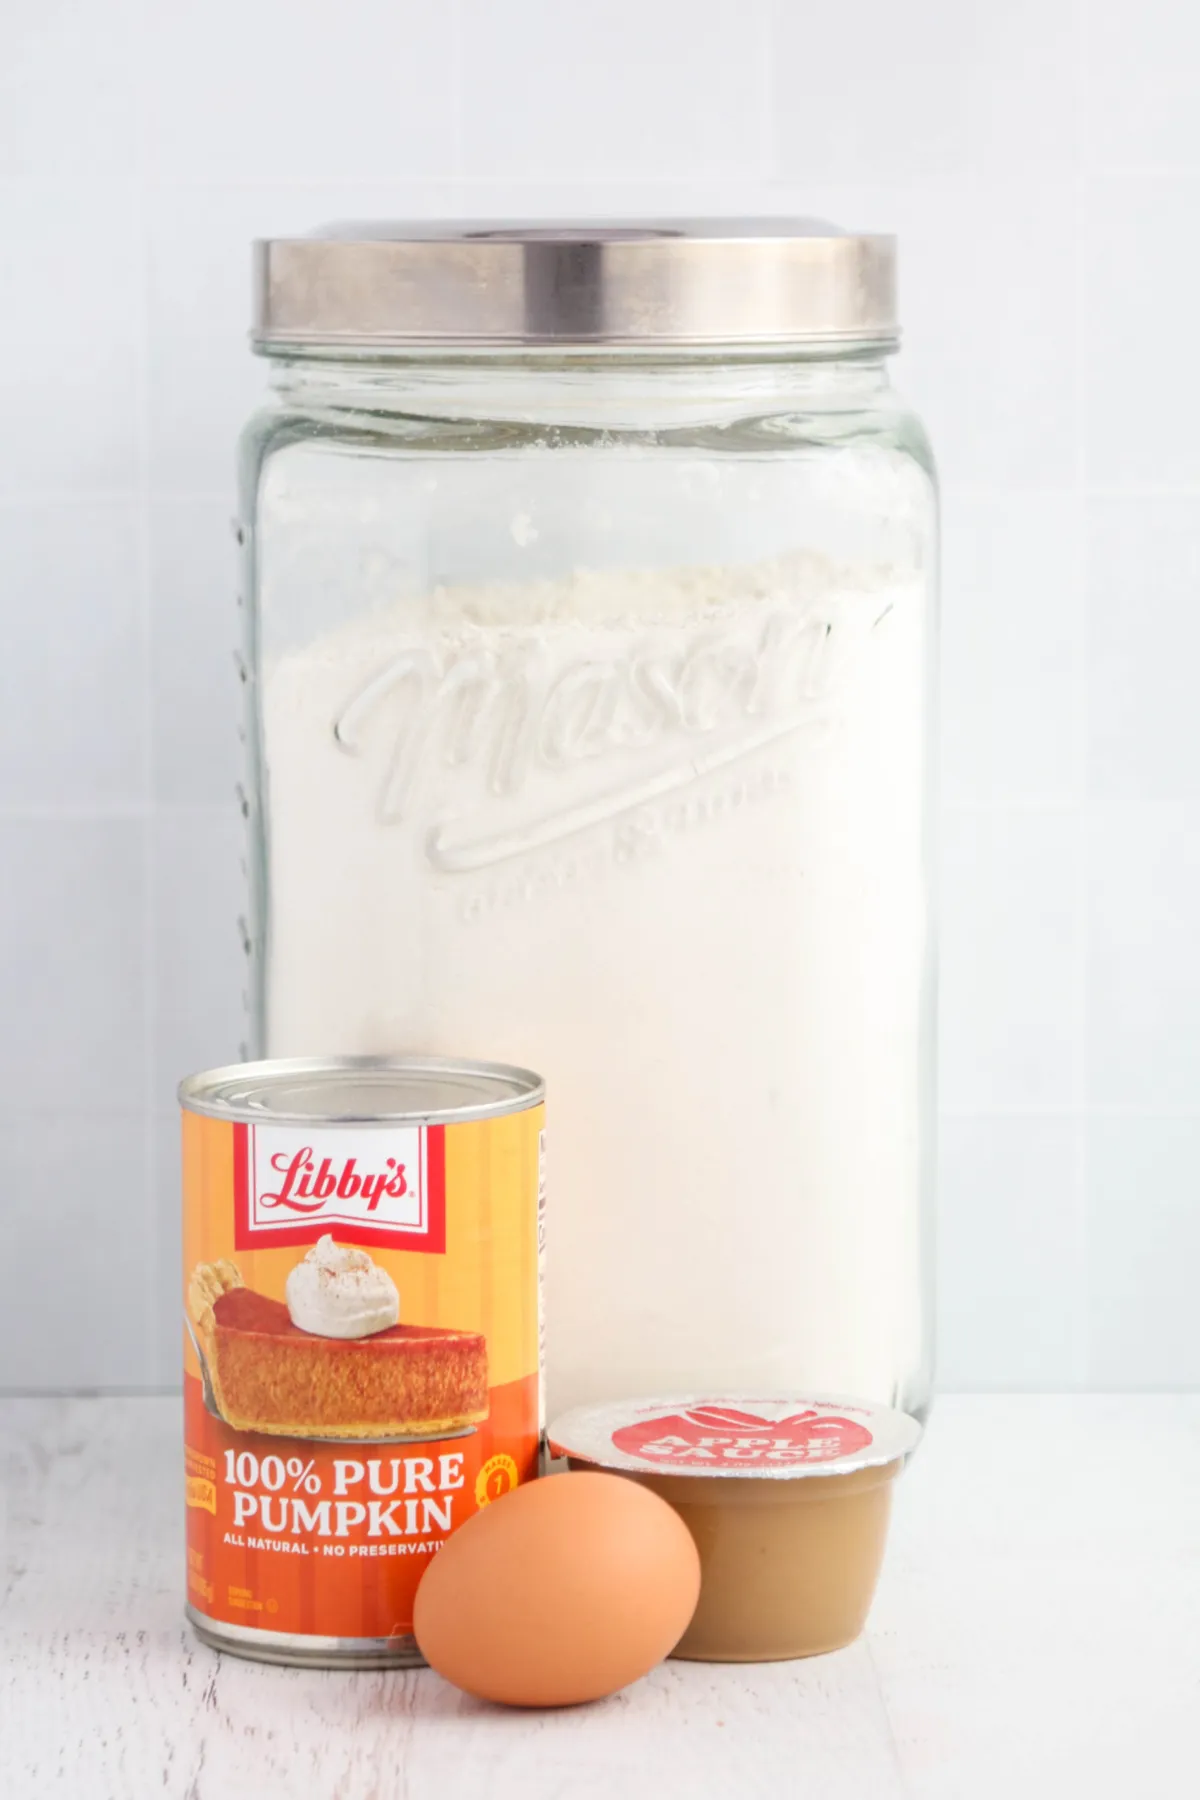 The four simple ingredients: pumpkin puree, applesauce, egg, and flour, laid out for a healthy dog treat recipe.
Crafting Your Homemade Pumpkin Dog Treats (Step-by-Step Guide)
Making these soft pumpkin dog treats is incredibly straightforward. You’ll be surprised how quickly you can whip up a batch of these delectable snacks for your furry friend.
Here’s a quick overview; the full detailed recipe card is at the end of this post:
- Preparation is Key: Start by preheating your oven to 350°F (180°C). Line a baking sheet with parchment paper to prevent sticking and make cleanup a breeze.
- Mix the Wet Ingredients: In a medium-sized mixing bowl, whisk the egg until slightly frothy. Then, add the unsweetened applesauce and pure pumpkin purée. Stir everything together until well combined, creating a smooth, orange mixture.
- Incorporate the Flour: Gradually add the flour to the wet ingredients. Mix until all the flour is incorporated, and a soft, slightly sticky dough forms. This dough is very forgiving and easy to work with. If it seems too sticky, add a tiny bit more flour; if too dry, a tiny splash of water or pumpkin puree.
- Roll and Cut: Lightly flour your countertop or a large cutting board. Turn the dough out onto the floured surface and knead it a few times to ensure uniformity. Using a floured rolling pin, roll the dough out to approximately 1/8-inch thickness.
- Tip: If the dough starts to spring back, cover it with a clean kitchen towel and let it rest for 5 minutes. This allows the gluten to relax, making it easier to roll.
Cut out shapes using your favorite cookie cutters (bone, paw print, or simple circles work well). Dipping your cookie cutter in flour before each cut will help the dough release more easily.
- Tip: If the dough starts to spring back, cover it with a clean kitchen towel and let it rest for 5 minutes. This allows the gluten to relax, making it easier to roll.
- Bake to Perfection: Carefully transfer the cut-out treats to your parchment-lined baking sheet, leaving a small space between each one. Bake for approximately 18 minutes, or until the edges are lightly golden. The treats will puff up slightly and remain soft.
- Cool Completely: Once baked, remove the sheet pan from the oven and allow the treats to cool completely on the pan before offering them to your pup. Cooling ensures they maintain their soft texture and are safe to handle.
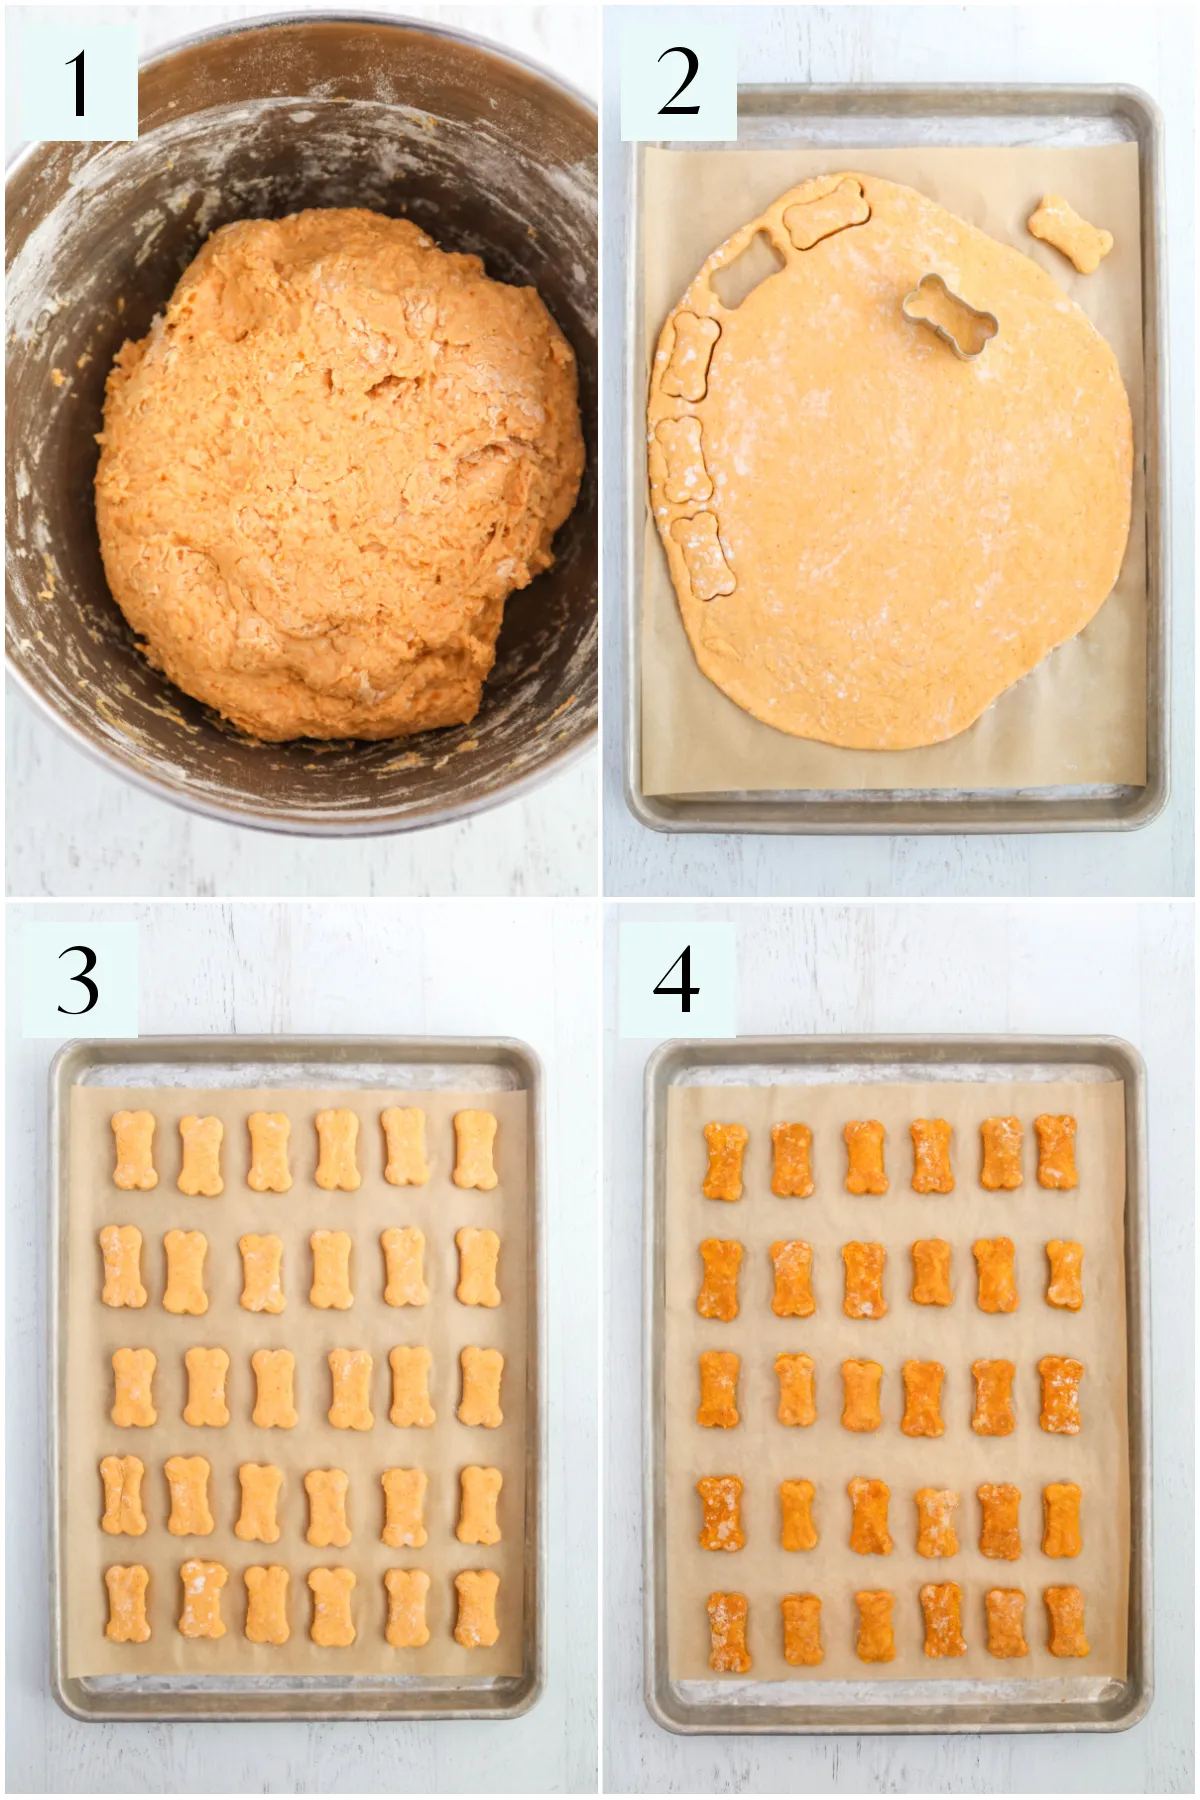 A step-by-step image showing the dough preparation for soft pumpkin dog treats with no peanut butter.
Storage and Longevity: Keeping Treats Fresh
Because these homemade treats are made with fresh, natural ingredients and contain no preservatives, proper storage is crucial to maintain their freshness and prevent spoilage.
- Refrigeration: For short-term storage, place the cooled pumpkin dog treats in an airtight container and store them in the refrigerator. They will stay fresh for up to two weeks. Think of them like any other baked good; they will mold if left at room temperature for an extended period, especially in humid climates.
- Freezing: For longer storage, the freezer is your best friend. Arrange the cooled treats in a single layer on a baking sheet and freeze until solid. Once frozen, transfer them to a freezer-safe airtight container or bag. They will keep well in the freezer for up to three months. This method is ideal for making a large batch and having a ready supply of healthy treats whenever you need them. Simply pull a few out as needed and let them thaw in the refrigerator or at room temperature for a short time before serving.
Storing most of your batch in the freezer and keeping a small handful in the refrigerator for daily use ensures your pup always gets the freshest possible treat. For more ideas on preserving homemade snacks, explore vet-approved homemade frozen dog treats.
Frequently Asked Questions About Pumpkin Dog Treats
Here are some common questions about making and storing these delicious pumpkin treats for your dog:
- How long will these treats stay fresh?
As mentioned, when stored in an airtight container in the refrigerator, these treats will stay fresh for up to two weeks. In the freezer, they can last for up to three months. - Can I store these dog treats on the counter?
No, it is not recommended to store these homemade treats on the counter for more than a day or two. Without preservatives, they are susceptible to mold, especially in warmer or humid environments. Always store them in the refrigerator or freezer. - Can I use fresh pumpkin instead of canned?
Absolutely! If you have fresh pumpkin (or butternut squash/sweet potato), you can bake or steam it until very soft, then purée it. Just ensure it’s plain, without any added seasonings or sugar. - Are these treats suitable for dogs with no teeth?
Yes, their soft and moist texture makes them an excellent choice for dogs with no teeth or severe dental issues. For very sensitive mouths, you can tear them into even smaller pieces. This recipe is an ideal choice for soft homemade treats for dogs with no teeth. - What if my dog has grain allergies?
You can easily substitute all-purpose flour with a grain-free alternative like oat flour, coconut flour (use less as it’s very absorbent), or a commercial gluten-free flour blend suitable for baking. Remember that these substitutions might slightly alter the dough’s consistency, so adjust liquid slightly if needed.
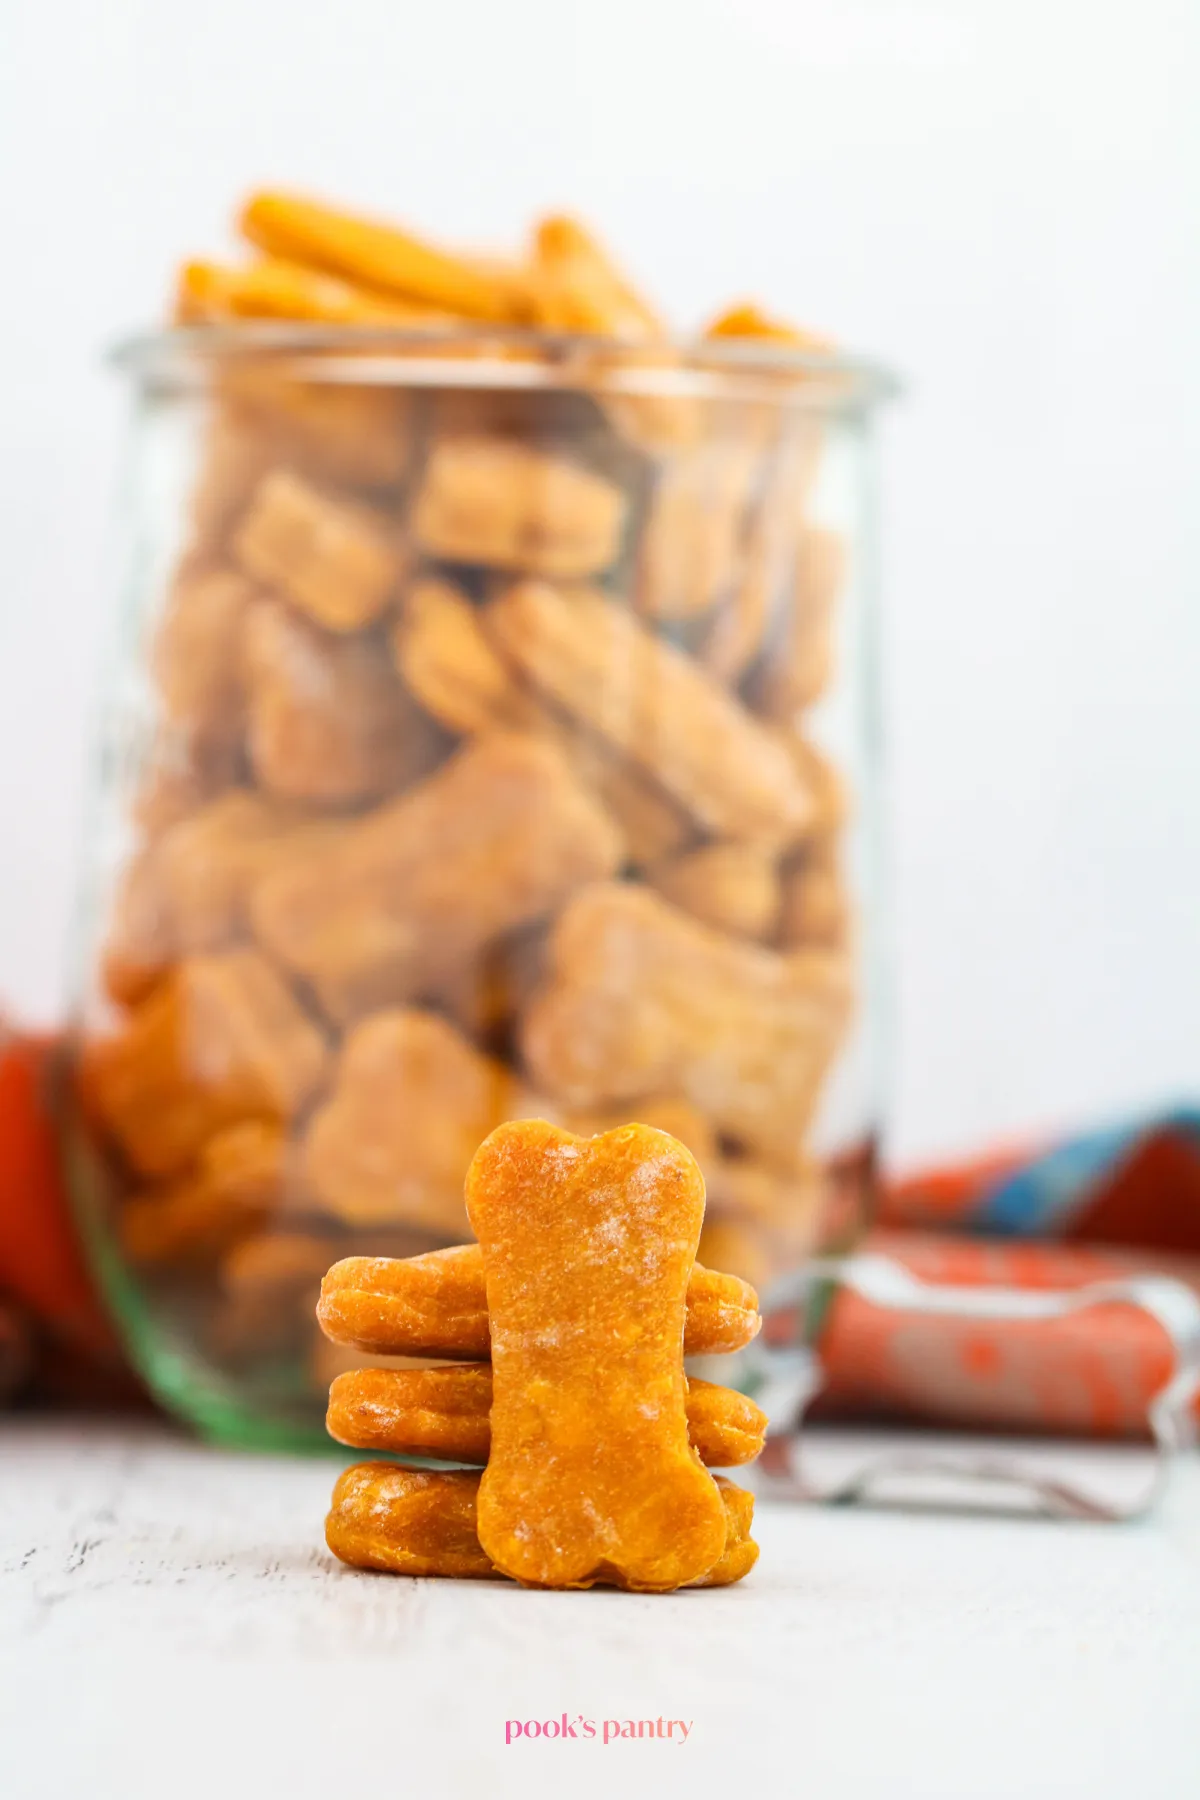 Healthy pumpkin treats, ideal for older dogs or those with sensitive teeth, stacked next to a storage jar.
Essential Tools for Your Dog Treat Bakery
You don’t need fancy equipment to make these homemade pumpkin dog treats. Most of what you need you likely already have in your kitchen:
- Mixing Bowls: A medium-sized bowl for combining ingredients.
- Whisk or Spatula: For mixing.
- Rolling Pin: To roll out the dough evenly.
- Cookie Cutters: Bone-shaped, paw-print, or simple round cutters make for appealing treats. A 2-inch cutter is a good size for most dogs.
- Parchment Paper: Essential for lining baking sheets, ensuring treats don’t stick and for easy cleanup.
- Baking Sheet: For baking the treats.
- Airtight Container: For storing fresh treats in the refrigerator or freezer.
Soft Pumpkin Dog Treats Recipe: No Peanut Butter
Yields: Approximately 85 small treats (using a 2-inch cutter)
Prep time: 5 minutes
Cook time: 18 minutes
Total time: 23 minutes
Equipment
- Medium mixing bowl
- Whisk
- Rolling pin
- Cookie cutters
- Parchment paper
- Baking sheet
- Airtight container for storage
Ingredients
- 3 ½ cups (420g) all-purpose flour (or whole wheat, or a suitable gluten-free alternative)
- 1 cup (244g) pure pumpkin purée
- 1 large egg
- ½ cup (113g) unsweetened applesauce
Instructions
- Preheat Oven: Preheat your oven to 350°F (180°C). Line a baking sheet with parchment paper.
- Combine Wet Ingredients: In a medium bowl, whisk the egg. Add the unsweetened applesauce and pure pumpkin purée. Stir until well combined.
- Form Dough: Gradually add the flour to the wet mixture, mixing until all the flour is incorporated and a soft, pliable dough forms.
- Roll Out Dough: Lightly flour your countertop or a large clean surface. Turn the dough out and knead it a few times to ensure it’s uniform. With a floured rolling pin, roll the dough to approximately 1/8-inch thickness.
- Cut & Bake: Use your favorite cookie cutters to cut out treats. Gather any dough scraps, re-roll, and cut out additional treats until all the dough is used. Place the cut-out treats on the prepared baking sheet, leaving a small space between them.
- Bake: Bake for approximately 18 minutes, or until the edges are lightly golden. The treats will remain soft.
- Cool: Remove from the oven and let the treats cool completely on the baking sheet before serving to your pup.
Notes
- Cookie Cutter Size: This recipe yields about 85 small treats using a 2-inch cookie cutter. If you use larger cutters for bigger dogs, you will get fewer treats, and you may need to increase the baking time by a few minutes.
- Pumpkin Purée: Always use 100% pure pumpkin purée, not pumpkin pie filling, which contains added sugar and spices harmful to dogs.
- Applesauce: Ensure the applesauce is plain and unsweetened. Check the ingredients list: it should ideally contain only apples, water, and perhaps vitamin C.
- Perishability: These homemade treats do not contain preservatives. Store them in an airtight container in the refrigerator for up to 2 weeks, or in the freezer for up to 3 months for best results.
- Dough Release: Dipping your cookie cutter in flour before each cut helps the dough release more easily and prevents sticking.
- For other delicious peanut butter-free pumpkin treats to add to your rotation, we have more options!
Nutrition (per 1 treat, approximate)
- Calories: 22 kcal
- Carbohydrates: 4g
- Protein: 1g
- Cholesterol: 2mg
- Sodium: 1mg
Conclusion
Creating your own pumpkin dog treats recipe no peanut butter is a rewarding experience that offers numerous benefits for your dog. From catering to dental needs and allergies to providing a low-fat, nutrient-rich snack, these homemade treats are a testament to your care and dedication. It’s a simple, cost-effective way to ensure your dog enjoys wholesome, safe, and delicious rewards without any artificial additives or harmful ingredients.
By following this easy recipe, you can effortlessly provide your furry family member with soft, flavorful treats they will absolutely adore. Remember, consistency in diet and regular vet check-ups are key to a healthy pet. Always consult with your veterinarian regarding your dog’s specific dietary needs and any new additions to their diet.
Ready to bake up some love? Give this recipe a try and watch your dog’s tail wag with delight! For more tips on ensuring your dog’s diet is safe and healthy, you might also be interested in learning what specific breeds like Cocker Spaniels should avoid.