
As devoted pet parents, we constantly seek ways to show our dogs love, and what better way than with wholesome, homemade treats? Just like humans, dogs can have unique dietary needs, with many experiencing sensitivities to common ingredients like grains. This often leads to digestive upset, skin issues, or general discomfort. Understanding these concerns, we’ve crafted the perfect solution: an easy homemade grain-free pumpkin peanut butter dog treats recipe. This simple recipe uses just three natural ingredients, ensuring a healthy, delicious, and safe snack for your beloved canine companion, especially those with sensitive stomachs or specific dietary requirements. Providing your furry friend with healthy food for dogs is a top priority for any pet parent, and these treats are a wonderful addition to their diet.
Why Choose Grain-Free Treats for Your Dog?
The popularity of grain-free dog food and treats has soared, and for good reason. While not all dogs require a grain-free diet, many benefit significantly from it. Grains like wheat, corn, and soy can be common allergens or difficult for some dogs to digest, leading to symptoms such as itchy skin, chronic ear infections, paw licking, vomiting, and diarrhea. Opting for grain-free alternatives can alleviate these issues, promote better gut health, and contribute to overall vitality. By eliminating potential irritants, you’re not just offering a treat; you’re actively supporting your dog’s well-being and comfort. This recipe offers a fantastic way to provide a tasty reward without the worries of grain-related sensitivities.
The Wholesome Power of Pumpkin for Dogs
Pumpkin is more than just a seasonal favorite; it’s a superfood for dogs, especially when used in their treats. This vibrant squash is packed with essential nutrients and offers numerous health benefits. Rich in fiber, pumpkin aids in healthy digestion, helping to regulate bowel movements and soothe upset stomachs. It’s often recommended by veterinarians for dogs experiencing diarrhea or constipation. Beyond digestion, pumpkin provides an excellent source of Vitamin A (for vision and immune function), Vitamin C (an antioxidant), Vitamin E, and important minerals like potassium.
In this specific recipe, pumpkin plays a dual role: it not only contributes vital nutrients but also acts as a natural binder, eliminating the need for eggs or other common binding agents. Furthermore, pumpkin has a unique ability to draw moisture out of other ingredients during baking, which is crucial for achieving perfectly dried treats that store well without burning. This makes it an ideal ingredient for our Pumpkin Dog Treats Recipe Grain Free, offering both health benefits and practical baking advantages.
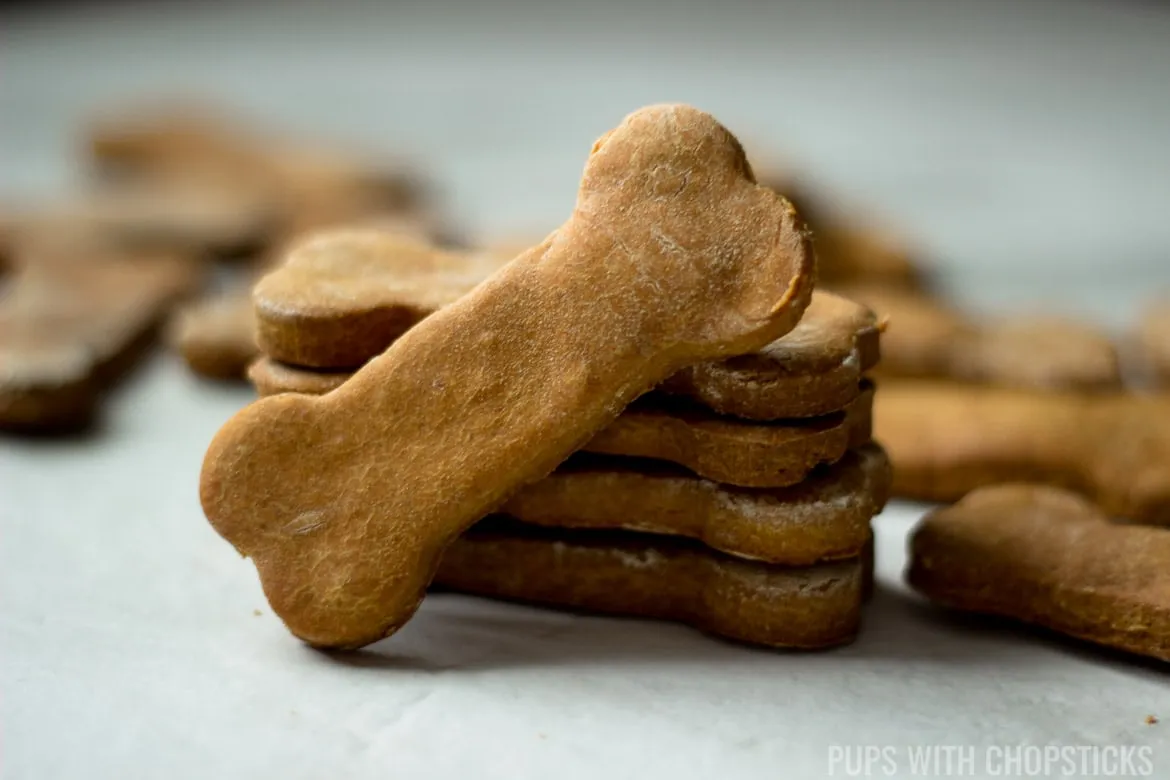 Close-up view of freshly baked grain-free pumpkin peanut butter dog treats, showcasing their golden brown color and texture.
Understanding Your Key Ingredients
Creating truly beneficial homemade dog treats starts with selecting the right ingredients. For our grain-free recipe, quality and safety are paramount.
Peanut Butter: The Creamy Delight
Peanut butter is a beloved ingredient for many dogs, but careful selection is critical. When choosing peanut butter for your dog’s treats, always read the ingredient label meticulously. It is crucial to ensure it contains no xylitol, an artificial sweetener highly toxic to dogs, even in small amounts. Look for natural peanut butter where the oil separates from the peanut solids, indicating fewer additives. The ideal peanut butter should list only peanuts (and perhaps a small amount of salt, though unsalted is best) as its ingredients, free from added sugars, salts, or preservatives.
Pure Pumpkin Purée: Not Pie Filling!
Pumpkin purée is a cornerstone of this recipe, offering both flavor and incredible health benefits. However, it’s essential to distinguish between 100% pure pumpkin purée and pumpkin pie filling. Always opt for 100% pure canned pumpkin purée, which should contain only pumpkin. Pumpkin pie filling, on the other hand, typically includes added sugars, spices (like nutmeg, which can be harmful to dogs), and other ingredients that are unsuitable for canine consumption. Double-check the label to guarantee you’re getting the pure, wholesome pumpkin your dog deserves.
Chickpea Flour: The Grain-Free Base
To ensure these treats are truly grain-free, we use chickpea flour. Also known as garbanzo bean flour, besan, or gram flour, chickpea flour is an excellent gluten-free alternative to traditional wheat flour. It provides the necessary structure for the treats while keeping them accessible for dogs with grain sensitivities. This flour is widely available in most supermarkets or ethnic grocery stores. While exploring various options for your dog’s diet, understanding alternatives for commercial foods, such as what makes the best kibble for dogs or healthiest wet dog food, can further enhance your pet’s nutritional intake.
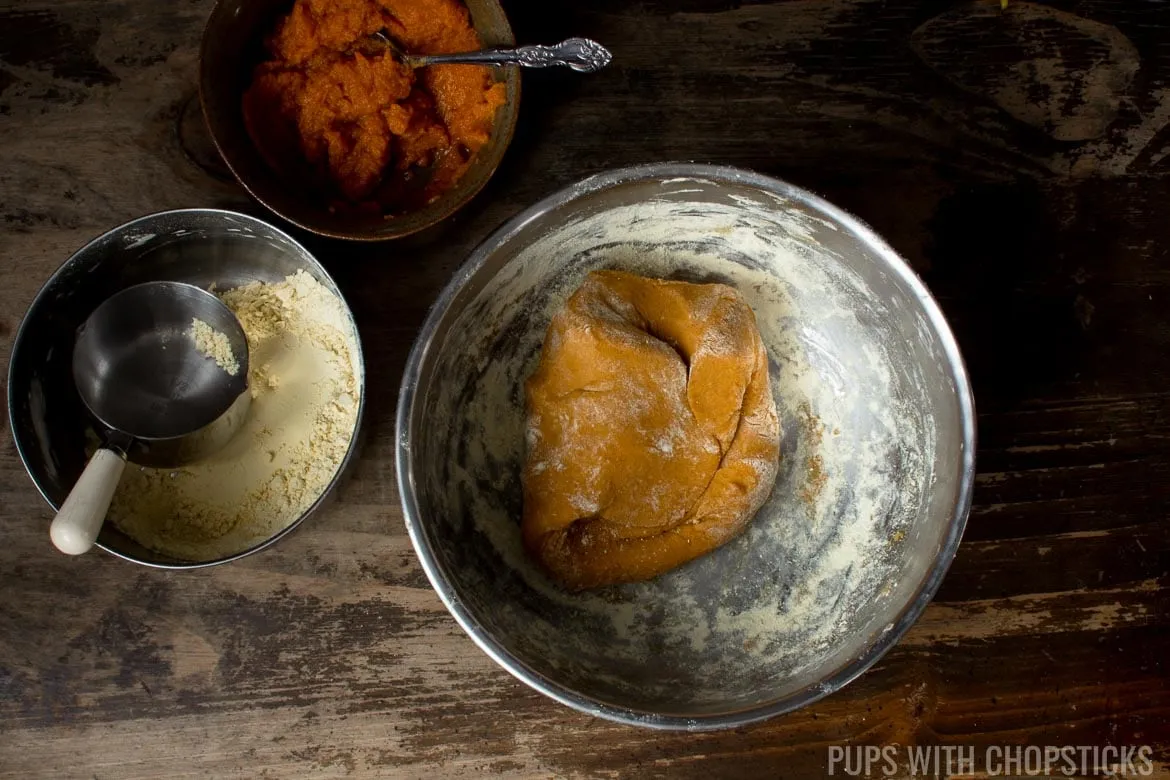 Homemade grain-free pumpkin dog treat dough in a mixing bowl, demonstrating the ideal play-doh consistency before shaping.
Step-by-Step Guide: Crafting Your Pumpkin Dog Treats
Making these grain-free pumpkin dog treats is wonderfully simple, requiring minimal effort for maximum canine happiness.
Making the Perfect Dough
- Combine Ingredients: In a large mixing bowl, add the chickpea flour, pure pumpkin purée, and natural peanut butter. Use your hands to thoroughly combine and knead the mixture until it forms a cohesive dough ball.
- Adjust Consistency: The dough should have a consistency similar to play-doh – firm enough to hold its shape but pliable. If the dough feels too sticky, gradually add chickpea flour, one tablespoon at a time, kneading after each addition until the desired smooth, non-sticky texture is achieved.
- Chill the Dough: Once the dough is ready, cover it tightly with plastic wrap and refrigerate for at least one hour. This chilling step is crucial as it stiffens the dough, making it much easier to roll out and cut into shapes.
Shaping Your Treats
- Prepare Your Workspace: After chilling, remove the dough from the fridge and unwrap it. Line a cookie sheet or baking pan with parchment paper and keep it nearby.
- Flour Your Surface: Liberally sprinkle chickpea flour onto your clean counter or work surface, and lightly dust your rolling pin as well.
- Roll Out the Dough: Place the dough on the floured surface and sprinkle a bit more chickpea flour on top, gently rubbing it over the surface. Roll out the dough to a uniform thickness of about ¼ to ½ inch. If the dough starts to stick, dust both sides frequently and flip it often while rolling.
- Cut Your Shapes: Use your favorite cookie cutters to create fun shapes. To prevent sticking, dip your cookie cutter in chickpea flour between each cut. If you don’t have cookie cutters, no problem! Your pup won’t mind if you simply use a knife to cut the dough into small squares or rectangles, making the process even quicker. Whether you’re making large treats for big breeds or smaller, bite-sized dog food recipes for small dogs, ensure the size is appropriate for your pet.
- Arrange on Baking Sheet: Carefully place the cut-out shapes onto the prepared parchment-lined baking sheet, leaving approximately ½ inch of space between each treat.
 Grain-free pumpkin dog treat dough being rolled out and cut into bone shapes using a cookie cutter on a floured surface.
The Art of Baking & Drying Grain-Free Treats
Achieving the perfect texture for these grain-free pumpkin dog treats involves a two-stage process: baking and then drying. This method prevents burning while ensuring the treats are properly dried out for optimal storage.
- Preheat Oven: Preheat your oven to 350°F (177°C).
- Initial Bake: Bake the dog treats for 20-30 minutes. This initial bake will cook the treats through.
- Drying Process (Crucial Step):
- For Electric Ovens: After 30 minutes, turn off the oven completely. Prop the oven door ajar (just a small crack) and leave the treats inside for an additional 20-30 minutes. Electric ovens tend to retain heat more effectively, and this method uses residual, indirect heat to dry the treats without over-baking or burning the bottoms.
- For Gas Ovens: After 30 minutes, turn off the oven but keep the oven door closed. Gas ovens typically cool down faster, so leaving the door closed helps to utilize the residual heat for drying.
- Monitor Regularly: Regardless of your oven type, check the bottoms of the treats every 10 minutes during the drying phase to ensure they are not burning.
- Cooling and Hardening: Once the drying process in the oven is complete, remove the treats and let them cool at room temperature for at least 5 hours. For even greater hardness and dryness, leave them out on a large plate for a few days before storing. This extra air exposure significantly improves their shelf life and texture.
Proper Storage for Long-Lasting Freshness
Correct storage is key to extending the shelf life of your homemade pumpkin dog treats grain free. Because these treats are designed to be dry, moisture is their enemy.
- Avoid Refrigeration and Airtight Containers: Do not store these treats in the refrigerator or in fully airtight containers. Doing so can trap moisture, leading to condensation and causing the treats to become soft, moldy, and spoil faster.
- Prioritize Airflow: The more airflow your storage method provides, the better. Ideal options include:
- Metal Tins: These allow for some air circulation while protecting the treats.
- Partially Zipped Ziplock Bags: If using Ziplock bags, leave them about 90% zipped, allowing a small opening for air exchange.
- Shelf Life: When stored properly at room temperature with good airflow, these grain-free pumpkin treats can last for 1-2 months.
By following these storage guidelines, you can ensure your dog enjoys fresh, wholesome homemade treats for weeks to come. For more proven and safe homemade treat ideas, check out our collection of homemade pumpkin dog treats recipes vet approved.
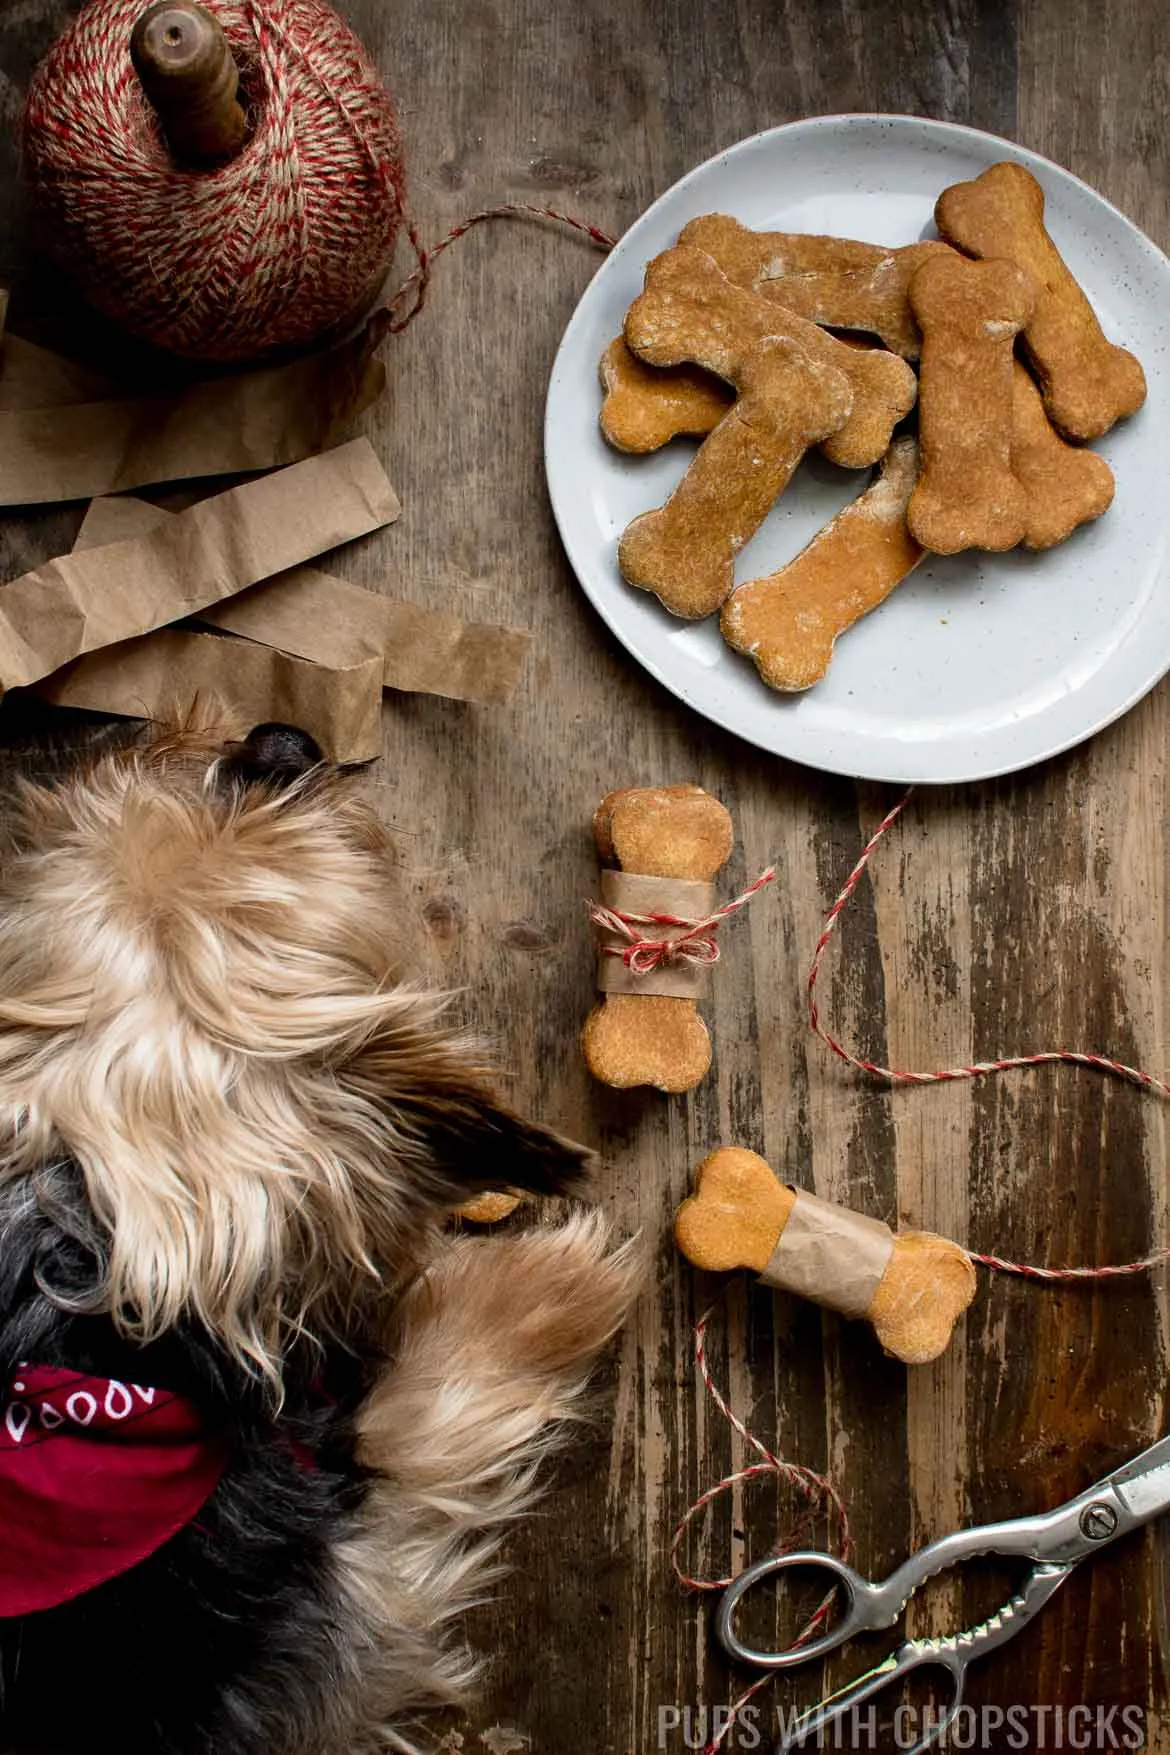 A happy dog eagerly sniffing freshly made homemade grain-free pumpkin treats, tied with twine, symbolizing a delicious and healthy snack.
Conclusion
Creating your own grain-free pumpkin peanut butter dog treats is a rewarding experience that benefits both you and your furry friend. This simple, 3-ingredient recipe offers a wholesome, delicious, and safe alternative for dogs with grain sensitivities, providing peace of mind knowing exactly what your pet is consuming. With the digestive benefits of pumpkin and the delicious appeal of natural peanut butter, these treats are sure to become a favorite. Embrace the joy of homemade goodness and give your dog the healthy, happy life they deserve. Try this recipe today and watch their tail wag with delight!
Recipe Card
Homemade Grain-Free Pumpkin Dog Treats (3 Ingredients)
An easy and simple homemade grain-free peanut butter pumpkin dog treats recipe, made with 3 ingredients for dogs with sensitivities to grains. A special treat this time of year for our furry sidekicks!
- Prep Time: 20 minutes
- Cook Time: 1 hour
- Total Time: 1 hour 20 minutes
- Course: Dog Treats
- Cuisine: Pet
- Servings: 16 medium treats (or 32 small treats)
- Calories: 94kcal
Ingredients
- 1 cup Chickpea Flour (also known as besan or gram flour)
- ½ cup Pure Pumpkin Purée (100% pumpkin, NOT pie filling)
- ½ cup Natural Peanut Butter (xylitol-free, no added sugars or salts)
Instructions
Making the Dough
- In a large bowl, combine the chickpea flour, pure pumpkin purée, and peanut butter with your hand and knead it until it forms a dough ball. If the dough feels very sticky, keep adding chickpea flour 1 tablespoon at a time until the dough is smooth and not sticky. It should be the consistency of play-doh.
- Once the dough has come together, cover it in plastic wrap and keep it in the fridge for 1 hour. This will make the dough stiffer and easier to cut shapes out of.
- Once the dough has been chilled in the fridge for an hour, take it out of the fridge and plastic wrap.
- Line a cookie sheet or baking pan with parchment paper and set it close by.
- Sprinkle chickpea flour liberally on the counter you are rolling out the dough on. Dust the rolling pin as well.
- Sprinkle a bit of chickpea flour on the dough and rub it gently on until there is a light coating on it, then roll out the dough to about ¼ inch to ½ inch thickness.
- Note: If the dough is still sticky, it might stick to the counter – to address that, dust the dough frequently on both sides and flip it often while you are rolling it out.
- Use a cookie cutter and cut out shapes in the dough. It is crucial to dip the cookie cutter in the chickpea flour in between each cut to prevent the dough from sticking to it. If you don’t have a cookie cutter, you can cut them into squares or rectangles with a knife.
- Place the cut out shapes on the parchment paper with about ½ inch between each dog treat.
Baking & Drying it Out
- Pre-heat the oven to 350°F (177°C).
- Bake the dog treats for 20-30 minutes.
- After 30 minutes have passed, if you have an electric oven, turn off the oven and open the oven door ajar for another 20-30 minutes. (Electric ovens usually run hotter than gas ovens). If you have a gas stove, keep the oven door closed instead. We want to use indirect heat to dry out the dog treats so we don’t burn the bottoms.
- Check the bottoms every 10 minutes to make sure they don’t burn.
- Once they are done drying out in the oven, let them cool at room temperature for at least 5 hours. They harden and dry out more if you leave them out for a few days. I like to usually leave them on a large plate for a few days before storing them in a metal container.
Storing the Treats
- These can be stored at room temperature for 1-2 months, as long as there is good airflow to them. You don’t want to put them in the fridge or an airtight container since it can create and trap moisture and cause them to go bad faster.
Notes
- When buying pumpkin purée, make sure it contains no sugar, xylitol, or spices in it. It should list 100% pumpkin purée on the ingredients label. We don’t want to use pumpkin pie filling.
- Make sure to use 100% natural peanut butter (the kind where the oil and the peanut butter separate). The ingredient list should only contain peanuts, with no sugar, xylitol, salt, fillers, or preservatives.
Nutrition
- Calories: 94kcal
- Carbohydrates: 9g
- Protein: 5g
- Fat: 5g
- Saturated Fat: 1g
- Sodium: 1.6mg
- Potassium: 163mg
- Fiber: 2g
- Sugar: 2g
- Vitamin A: 1196IU
- Vitamin C: 1mg
- Calcium: 11mg
- Iron: 1mg