
Taking a break from the saddle and giving your horse a well-deserved day off can be a rewarding experience, not just for your equine partner, but for you too. Today’s project is about creating something practical and versatile: DIY ground poles. This is an ideal activity for horse owners looking to expand their training equipment without a significant financial outlay.
These homemade ground poles are not only functional for ground exercises but can also double as jump rails, making them a valuable addition to your equestrian toolkit. The best part? They are surprisingly simple and inexpensive to make. You can craft a set of 10 poles for under $60.00, and with proper care, they will be ready for use in just a couple of days.
 Making ground poles
What You’ll Need
To embark on this rewarding DIY project, gather the following supplies:
- 10 Cherry tone landscape timbers: These are specifically recommended for their affordability and suitability for jump construction. Most home improvement stores carry similar landscaping timbers if Cherry tone is unavailable.
- 1 Gallon Kilz 2 primer (water-based): This primer is excellent for sealing the wood and preparing it for paint. If you plan on making more poles or other jumping equipment, purchasing a larger 2-gallon bucket might be more economical.
- 4 tubes of acrylic painters caulk: This is crucial for filling any splits or cracks in the timbers, adding to their durability and sealing the wood.
- 1 package of sandpaper: For smoothing out rough areas on the timbers.
- Paintbrush: For applying the primer and paint.
It’s helpful to have a dedicated workspace where you can set up the timbers for sanding and painting. If you don’t have sawhorses, even paint cans can be used to elevate the poles off the ground.
Step-by-Step Guide to Making Your Ground Poles
Follow these simple steps to create your durable and functional ground poles:
1. Sanding The Timbers
Begin by removing any staples or tags from the ends of the landscape timbers. Next, sand down all the rough areas on each pole. You don’t need to achieve a perfectly smooth finish, but focus on removing any sharp edges or splinters. Once sanded, set the timbers aside to prepare for the next step.
2. Fill and Caulk
Many landscape timbers can have inherent splits and cracks. The painter’s caulk is an excellent and inexpensive solution for filling these imperfections. Typically, one tube of caulk can cover the splits on about three to five rails, depending on the severity. Applying caulk not only fills gaps but also helps to seal the wood, providing an added layer of protection, especially if your poles will be stored outdoors.
Making ground poles
3. Paint The Poles
With the timbers caulked and any filling complete, it’s time to paint. Apply several thin coats of primer, allowing approximately one hour of drying time between each coat. Thin coats result in a smoother finish and prevent paint runs. If you start this process in the morning, you can achieve three to four coats of primer by the afternoon.
Making ground poles
After applying the final coat, allow the poles to dry overnight. They should be ready for use the following day, and you’ll be incorporating them into your training routine tomorrow!
Different Ground Pole Exercises
Once your ground poles are ready, a variety of exercises can enhance your horse’s training:
- Trot Poles: Lay them in a straight line at appropriate intervals for trot poles. This encourages impulsion, rhythm, and proper leg engagement.
- Half Circle Pattern: Arrange the poles in a curved pattern to improve suppleness and steering.
- Raised Poles: You can elevate one end of the poles slightly to introduce a small jumping exercise, preparing your horse for more advanced work.
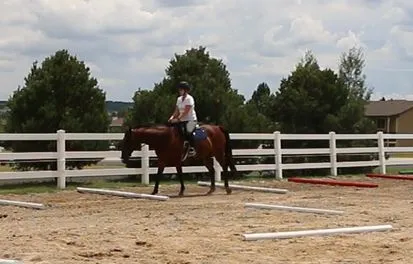
Making ground poles
A particularly useful application is using ground poles as a template for designing jump courses. If you have a specific course in mind, laying out the ground poles first allows you to visualize and “ride” the course before setting up actual jumps. This makes it much easier to make adjustments to the stride and flow of the course. It’s a practical way to fine-tune your strategy, especially on days when the weather is less than ideal for extensive physical exertion.
Making ground poles
This project offers a fun and engaging break from traditional riding, providing a valuable training tool that you’ve created yourself. Enjoy the satisfaction of building something useful for your horse, and be sure to mark Day 16 off your challenge list!
Making ground poles