
The NVK TC-20 Dog Training Collar is designed to assist in correcting unwanted behaviors and reinforcing desired actions in dogs. This guide provides a detailed overview of the collar’s components, features, operation, and essential safety information for effective and responsible use.
Components of the NVK TC-20
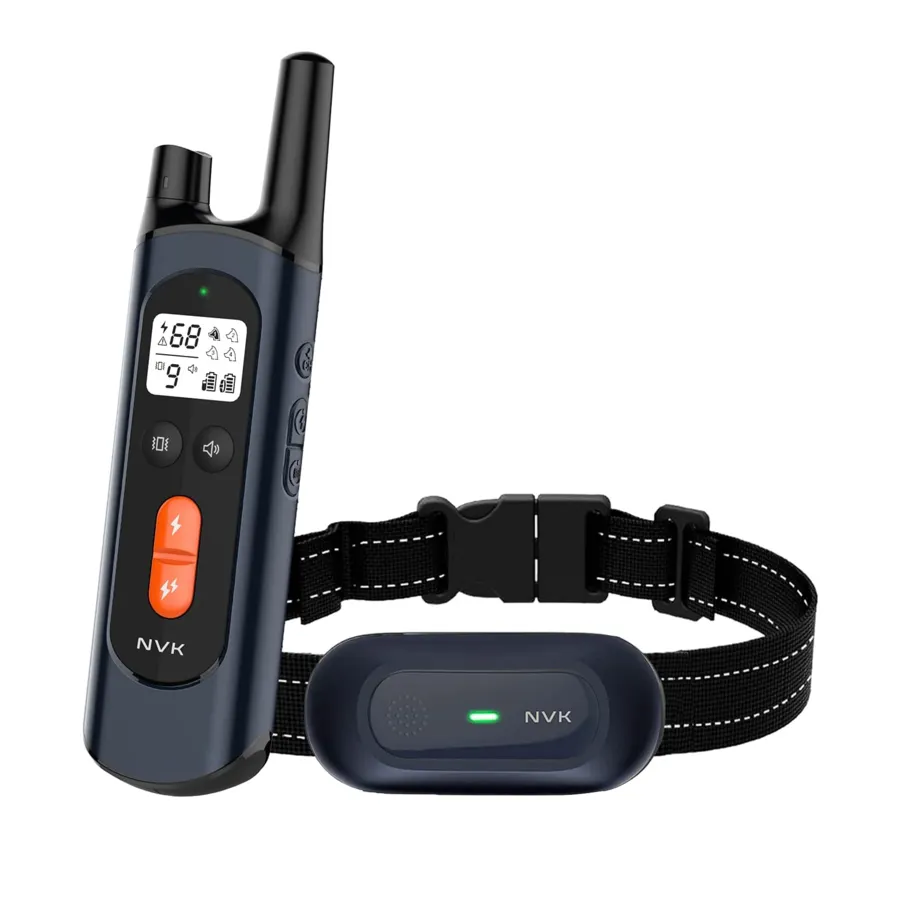
The NVK TC-20 system includes several key components to facilitate training:
- Handheld Remote: The primary control unit for issuing commands.
- Receiver: The collar worn by the dog, which receives signals from the remote.
- Charging Cable: Used to power both the remote and the receiver.
- Wrist Strap: For convenient carrying of the remote.
- User Manual: This document, providing comprehensive instructions.
- Test Light Tool: Used to test the static stimulation function and assist with contact point adjustments.
- Long Contact Points: For dogs with thicker coats.
- Silicone Caps: To provide a softer contact for the dog’s skin.
 NVK Dog Training Collar
Understanding the System
Handheld Remote and Screen
The handheld remote features a clear display screen that shows battery status, selected mode, and intensity levels.
Receiver Collar
The receiver collar is designed to be comfortable yet effective, with contact points that deliver stimulation.
Important Safety Information
User safety and your dog’s well-being are paramount. Please adhere to the following guidelines:
- WARNING: This device is not intended for use with aggressive dogs. Aggressive dogs can pose a severe risk of injury to themselves and others. Consult a veterinarian or certified trainer if you are unsure about the suitability of this product for your dog.
- CAUTION: This product is a training device, not a toy, and should be kept away from children.
- Risk of Skin Damage: Improper fit or prolonged use can lead to skin irritation or sores.
- Ensure the collar is not worn for more than 12 hours per day.
- Reposition the collar on the dog’s neck every 1 to 3 hours.
- Check the fit regularly to prevent excessive pressure.
- Never attach a leash directly to the electronic collar, as this can create undue pressure on the contact points. If using a separate collar for a leash, ensure it does not put pressure on the electronic collar.
- Clean the dog’s neck area and the collar contacts weekly with a damp cloth.
- Inspect the contact area daily for any signs of rash or sores. Discontinue use immediately if any irritation is found and consult your veterinarian if the condition persists beyond 48 hours.
Operating the NVK TC-20
Charging the Collar and Remote
Connect the charging cable to both the remote and receiver. A green light indicates that charging is complete.
Fitting the Receiver Collar
Proper fit is crucial for the collar’s effectiveness and safety. The contact points must make direct contact with the dog’s skin on the underside of the neck. You should be able to comfortably fit one finger between the collar and the dog’s neck.
Turning the Remote and Receiver On/Off
To turn on the receiver, press and hold the power button for 3 seconds. Turn it off when not in use to conserve battery life.
Keypad Lock
The security keypad can be locked or unlocked to prevent accidental activation of commands.
Training Commands
The NVK TC-20 offers three distinct training commands:
Beep Tone Command
This command delivers a non-adjustable beep tone to the collar.
Vibration Command
This command delivers a vibration to the collar. The intensity can be adjusted by holding the vibration level button and rotating the level regulator.
Static Stimulation Command
This command delivers a static stimulation to the collar, with adjustable intensity levels from 1 to 99. The “Static +” button provides a setting 10% higher than the current level. Intensity is adjusted by holding the static level button and rotating the level regulator.
Finding the Best Static Level for Your Dog
It is crucial to find the lowest effective static level for your dog. Follow these steps:
- Begin with Level 10 and press the static button to observe your dog’s reaction.
- Gradually increase the stimulation level until your dog reliably responds.
- If your dog does not respond at Level 50, check the collar fit. For dogs with thick or long hair, consider using the longer contact points or trimming the hair around the contact points.
- If your dog still shows no reaction after these steps, refer to the “How to Use Test Light Tool” section.
Main Features
The NVK TC-20 boasts several key features:
- Vibration, Tone, and Static training modes.
- 9 adjustable vibration levels and 99 adjustable static levels.
- Dual battery status display for both the remote and receiver.
- The receiver collar is IPX7 waterproof, while the remote is not.
- Remote range of 1000-1600 feet.
- Long-lasting Lithium Polymer battery.
- Large digital display for easy readability.
- Supports up to four receiver collars with a single remote.
- Features a magnetic charging port.
Using the Test Light Tool
Static Function Test
- Ensure both the remote and receiver collar are powered on.
- Place the test light tool’s contacts onto the receiver’s contact points.
- Press a static button on the remote. The test light will illuminate, confirming the static function is working.
Adjusting Contact Points
The test light tool can also assist in tightening or loosening the contact points. For dogs with shorter coats, use the shorter contact points or install the silicone caps. For dogs with thicker coats, use the longer contact points, or install the silicone caps for a gentler experience.
Training Tips for Unwanted Behavior
When addressing issues like excessive barking, follow these training steps:
- Place a separate, non-metallic collar on your dog’s neck above the receiver collar and attach a 8-10 foot leash. Ensure this extra collar does not put pressure on the receiver’s contact points.
- Hold both the leash and the remote transmitter.
- Determine your dog’s recognition level for stimulation.
- When your dog barks, press the stimulation button and issue a command such as “No” or “No barking.”
- Release the stimulation immediately after your dog stops barking and offer verbal praise.
- If your dog doesn’t respond to the stimulation, gradually increase the intensity level by 3 to 5.
- Practice this exercise in various locations to ensure generalization.
Pairing the Receiver
(Note: The set is typically paired from the factory. This step is for re-pairing or pairing additional receivers.)
Ensure the receiver is turned off.
Press and hold the power switch for 5 seconds until the green light flashes rapidly.
Press the remote’s pairing/channel select button to pair the receiver.
Pairing is successful when the receiver beeps and the green light flashes slowly.
Managing Multiple Receivers (Two, Three, or Four Dog Systems)
(Note: This section applies if you are using additional receiver collars.)
Part I: Pairing Additional Receivers
- Receiver: Turn off the receiver, then press and hold the power switch for 5 seconds until the green light flashes fast.
- Remote: Press and hold the channel button, simultaneously rotating the level regulator to select the desired dog icon (e.g., Dog 2). Then, press the remote’s pairing/channel select button to pair the receiver.
Part II: Receiver Switching
You can train up to four dogs simultaneously. Press and hold the channel button while rotating the level regulator to select the dog you wish to train.
Part III: Resetting Paired Receivers
To reset all paired receivers:
- Ensure the remote is powered on.
- Press and hold both the static level button and the vibration level button simultaneously while turning the regulator switch from OFF to ON. All paired receivers will be removed, and the Dog 1 icon will flash.
- You will then need to re-pair the receivers.
Frequently Asked Questions
Q: How do I change the longer prongs for my Lab’s thick hair?
A: Part the hair or trim it slightly around the contact points. Ensure the remote is off, then start with a low stimulation level and gradually increase it. If there’s no response, repeat the steps, making sure to turn off or lock the remote.
Troubleshooting Guide
My pet is not responding to beep, vibration, or static commands:
- Check if the Receiver Collar is turned on.
- Verify the battery levels of both the remote and receiver.
- Use the Test Light Tool to confirm the Receiver Collar is delivering stimulation.
- Increase the correction level. Refer to the “Find the Best Stimulation Level For Your Dog” section.
- Ensure the Receiver Collar’s contact points are snug against your pet’s skin.
The Receiver Collar will not turn on:
- Confirm that the Receiver Collar has been charged.
The Receiver Collar is not responding to the Remote Transmitter:
- Verify that the Receiver Collar is turned on.
Compliance Information
FCC Statement: This device complies with Part 15 of the FCC Rules. Operation is subject to two conditions: (1) this device may not cause harmful interference, and (2) this device must accept any interference received, including interference that may cause undesired operation.
CAUTION: Modifications or changes to this equipment not expressly approved by Radio Systems Corporation may void the user’s authority to operate the equipment.
This equipment has been tested and found to comply with the limits for a Class B digital device, pursuant to Part 15 of the FCC Rules. These limits are designed to provide reasonable protection against harmful interference in a residential installation. This equipment generates, uses, and can radiate radio frequency energy and, if not installed and used in accordance with the instructions, may cause harmful interference to radio communications. However, there is no guarantee that interference will not occur in a particular installation. If interference occurs, try to correct it by reorienting or relocating the receiving antenna, increasing the separation between the equipment and receiver, connecting the equipment to an outlet on a different circuit, or consulting customer care or an experienced technician.
Resources
Videos
NVK Dog Training Collar Review Video
Documents
Download Manual
You can download the full PDF version of the Nvk Dog Training Collar User Manual, which may include additional safety instructions, warranty information, and FCC rules.
Download NVK Dog Training Collar User Manual
Available Languages
This manual is available in multiple languages.