
Bringing a new kitten home is an exciting time, filled with cuddles, playful pounces, and, of course, teaching them the ropes of proper etiquette. One of the most crucial lessons for young felines is mastering the litter box. For tiny kittens, usually around three to four weeks old, the high sides of standard litter boxes can be insurmountable obstacles, making the learning process challenging. Whether you’re a first-time kitten owner, fostering a litter, or facing an unexpected emergency, creating a temporary cardboard litter box can be a simple, effective solution to help Kittens Using Litter Box successfully from the start.
This practical DIY project offers a low-cost, accessible way to provide a comfortable and appropriate space for your small feline friends to do their business. It’s also incredibly useful for adult cats in specific situations, such as during travel, after surgery, or in emergency evacuations where a traditional litter box isn’t immediately available. While not a permanent fixture, a well-made cardboard litter box can offer a temporary, clean, and easily replaceable option, ensuring your kittens learn good habits without unnecessary stress. For more essential kitten care tips, you might also find our guide on how to teach a kitten to drink water helpful.
Why a Temporary Cardboard Litter Box is a Smart Choice
The primary advantage of a DIY cardboard litter box lies in its adaptability, especially for young kittens. Their small stature means they need a litter box with much lower sides than an adult cat. Cardboard boxes allow you to customize the height precisely, giving kittens easy access and encouraging them to use the designated area. This ease of access is fundamental in preventing accidents and reinforcing positive litter habits from a very early age.
Beyond just height, cardboard boxes are often readily available and free, making them an economical choice. This is particularly beneficial for foster parents or those managing multiple kittens, where acquiring several standard-sized litter boxes can be costly. Furthermore, in emergencies like moving, evacuations, or even a sudden illness where a cat needs isolation, a temporary and disposable solution prevents contamination and offers a quick setup without a fuss. The disposable nature means you don’t have to worry about deep cleaning; simply replace it when needed, making hygiene management straightforward and stress-free for both you and your cat.
Gathering Your Materials for a DIY Litter Box
Creating a functional temporary litter box is incredibly simple and requires only a few common household items. The most important component is, of course, an appropriate cardboard box. For small kittens, a sturdy box from pet food deliveries or even a medium-sized shipping box will work well. If you have an adult cat needing a temporary solution, opt for a larger, more robust box to accommodate their size and provide enough space for them to move comfortably. You’ll want a box that allows your cat to turn around and scratch without feeling cramped.
To prepare your box, you’ll need heavy-duty scissors or a box cutter for clean cuts. A roll of durable duct tape is essential; it will be used for reinforcing the box’s edges and protecting against moisture. Finally, you’ll need a supply of cat litter. While optional, potty pads are highly recommended for lining the bottom of the box, especially if it will be used multiple times. They add an extra layer of absorption and make cleanup significantly easier.
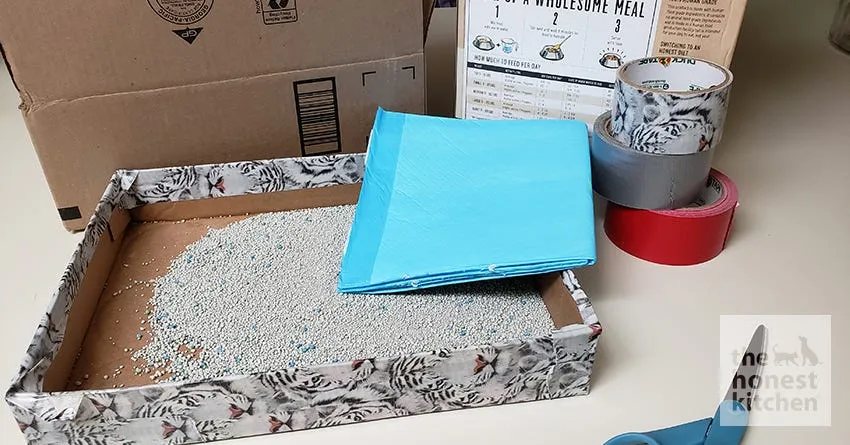 A collection of materials needed for a DIY cardboard litter box, including a cardboard box, scissors, duct tape, potty pads, and cat litter
Step-by-Step Assembly: Creating Your Kitten’s First Litter Box
Assembling your DIY cardboard litter box is a straightforward process that anyone can do. Start by selecting the orientation of your box – decide which side will be the bottom and which will be the top. This will help you visualize the final structure. Next, determine the desired height for the sides. For tiny three-week-old foster kittens, the sides may only need to be a couple of inches high, providing easy entry and exit. For an adult cat, you might want the sides to be four to five inches tall, or even higher, to contain litter effectively. Carefully cut the sides down to your chosen height using your heavy-duty scissors or box cutter.
Once the sides are cut, take your duct tape and cover the raw edges, both inside and outside the box. Folding a strip of tape over the cut edges will provide reinforcement, making the walls sturdier and offering some protection against moisture absorption from urine. Additionally, inspect the bottom of the box for any folded edges or weak spots that could compromise its integrity. Apply duct tape over these areas to create a more secure and robust base. This step is crucial for preventing leaks and extending the box’s temporary lifespan, ensuring your kittens have a reliable place to go. If you’re also working on other aspects of kitten behavior, check out our article on sleep train kitten for helpful tips.
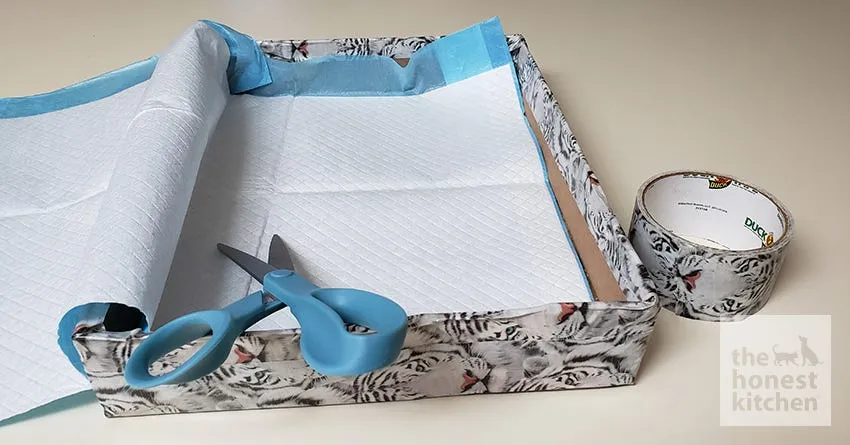 A cardboard box with its sides cut and taped, alongside a potty pad being trimmed to fit inside the box
Optimizing with Potty Pads and Just Enough Litter
The way you prepare the inside of your cardboard litter box can greatly impact its effectiveness and ease of maintenance. If the box is intended for a single, short-term use, such as during a car ride, you can simply add a layer of litter directly to the bottom. However, for a temporary litter box that will be used over several days, lining it with a potty pad is highly recommended. Cut the potty pad to fit snugly in the bottom of the box, trimming any excess material. This extra layer provides superior absorption, protecting the cardboard from moisture and odor, and making cleanup much more manageable.
For cats that love to scratch and dig vigorously in their litter, you might want to secure the potty pad with a couple of small pieces of duct tape to prevent it from bunching up. When adding litter, resist the urge to fill the box too much. You only need enough litter to effectively absorb waste. Overfilling can lead to litter being scattered outside the box, and it also puts unnecessary strain on the cardboard, which might not be sturdy enough to hold a large volume of heavy litter. Scoop waste frequently to maintain cleanliness. For other training needs, consider our article on how to train cat to cuddle.
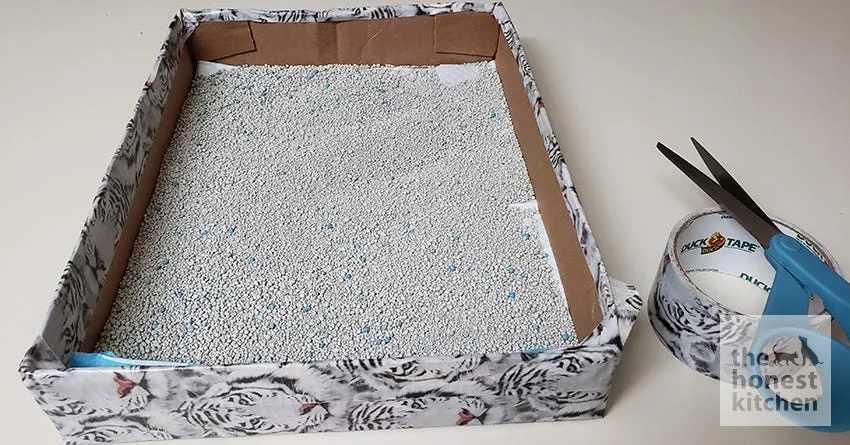 A prepared cardboard litter box with a trimmed potty pad at the bottom, covered with a thin layer of cat litter
Maintaining and Knowing When to Replace Your Temporary Litter Box
Even with the reinforcement of duct tape and the protective layer of potty pads, a cardboard litter box is a temporary solution and will eventually succumb to moisture and odor absorption. If your cat or kittens need to use this makeshift litter box for several days, be prepared to replace it frequently. A good rule of thumb is to replace the entire box as soon as you notice a strong odor or signs of significant moisture saturation in the cardboard, typically every one to three days depending on usage.
The ease of obtaining used cardboard boxes and the simplicity of assembly mean that replacing these temporary litter boxes is not a burden. This frequent replacement ensures a hygienic environment for your pets, which is crucial for their health and for maintaining positive litter box habits. Keeping the litter area clean and fresh encourages kittens to continue using it, preventing them from seeking alternative, less desirable spots in your home.
 A hand holding a scoop, cleaning a cardboard litter box that contains litter and a potty pad, highlighting the importance of regular cleaning and replacement
In conclusion, creating a DIY cardboard litter box is a practical and effective solution for helping kittens master the litter box, and it serves as an excellent temporary option for adult cats in various situations. With minimal materials and effort, you can provide a clean, accessible, and easily replaceable facility that supports your pet’s hygiene needs. This simple project demonstrates that sometimes the best solutions are the most straightforward, ensuring your feline friends are comfortable and well-cared for.