
Small cuts, scrapes, and minor abrasions are almost inevitable for our canine companions, especially the more adventurous ones. While not every injury requires an immediate trip to the emergency vet, knowing how to properly treat a small dog wound at home can prevent infection, alleviate discomfort, and promote quicker healing. As responsible pet parents, having the right knowledge and tools for pet first aid is invaluable. This guide will walk you through the essential steps to manage your dog’s minor injuries safely and effectively, ensuring they get the best immediate care.
Essential Pet First Aid Kit for Dog Owners
Being prepared is the first step in effectively treating any minor injury your dog might incur. A well-stocked pet first aid kit is crucial, allowing you to react quickly and confidently. You can purchase a pre-made kit or assemble your own based on recommendations from veterinary professionals. The American Veterinary Medical Association (AVMA) provides an excellent checklist of essential items. To properly address a wound, your kit should contain at least the following:
- Sterile gauze pads or bandages
- Pet-safe antiseptic cleansing solution (e.g., diluted povidone-iodine or chlorhexidine)
- Antibacterial ointment suitable for pets
- Blunt-tip bandage scissors
- Self-adhesive elastic wrapping or medical tape
- Fine-point tweezers
- A clean spray bottle (for wound irrigation)
- Clean towels or rags
- A pet-safe muzzle (for safety during treatment)
- Disposable gloves (for hygiene)
Step-by-Step Guide to Treating Your Dog’s Minor Wound
Treating a small dog wound requires a calm approach and careful execution. Even the most gentle dog can react unpredictably when in pain or fear, so always prioritize safety.
Prioritize Safety and Restraint
Before you begin, ensure you have a plan to keep your dog still and calm. If possible, have another person assist you by gently restraining your dog. If you are alone, or if your dog is particularly anxious or prone to snapping when in pain, consider using a muzzle. This is not a sign of aggression on your dog’s part, but a natural pain response, and preventing bites or scratches is paramount for both your safety and your dog’s. Understanding your dog’s body language is key to a smooth and safe process.
Control Bleeding Effectively
If the wound is bleeding, your immediate priority is to stop it. Place a clean towel or gauze pad over the wound and apply firm, direct pressure for several minutes. Avoid peeking too frequently, as this can disrupt clot formation. If the bleeding is profuse, spurting, or doesn’t stop after 5-10 minutes of continuous pressure, it indicates a more serious injury. In such cases, apply pressure and head immediately to a veterinary emergency hospital. For very minor bleeds, like a superficial scrape, gentle pressure might be enough.
Thoroughly Clean the Wound
Once any bleeding is under control, the next critical step is to clean the wound thoroughly to prevent infection. Even seemingly minor puncture wounds, such as those from a small bite or thorn, can introduce bacteria deep into the tissue. Fill a clean spray bottle with lukewarm, clean water (or sterile saline solution, if available). Gently spray the wound to flush out any visible debris, dirt, hair, or loose particles. Avoid scrubbing, which can further irritate the tissue. It’s important to be gentle to prevent further trauma.
Gently Remove Foreign Objects
After cleaning, carefully inspect the wound for any embedded foreign objects like small pieces of glass, tiny twigs, or thorns. Use sterile, fine-point tweezers to gently remove these. A magnifying glass can be helpful for spotting smaller debris. Ensure you remove all foreign material, as anything left behind can lead to infection or delay healing. If an object is deeply embedded or too large to remove easily, do not force it; this is a situation that warrants veterinary attention.
Disinfect with Pet-Safe Solutions
Disinfection is crucial to minimize bacterial contamination. Using a pet-safe antiseptic solution, such as diluted povidone-iodine (to the color of weak tea) or chlorhexidine solution, gently clean the injured area. These solutions are commonly found in pet first aid kits. It’s vital to avoid using rubbing alcohol or hydrogen peroxide directly on the wound. While these are common human antiseptics, they can be irritating, damage healthy tissue, and significantly delay the healing process for your dog. Focus on gentle application to the wound and surrounding skin.
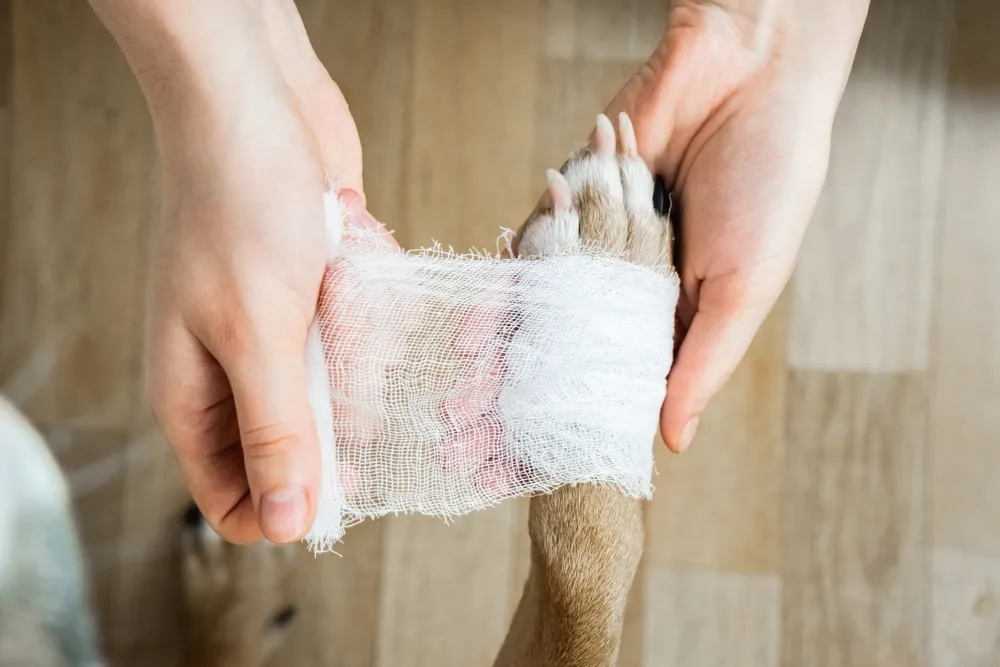 Owner bandaging a small dog's leg wound carefully
Apply a Protective Bandage
After disinfection, apply a thin layer of pet-safe antibacterial ointment to the wound. Then, cover the injury with a sterile gauze pad. This pad should be slightly larger than the wound itself. Secure the gauze in place using self-adhesive elastic wrapping or medical tape. Ensure the bandage is snug enough to stay on but not so tight that it restricts circulation or causes discomfort. You should be able to slide two fingers underneath the bandage comfortably. Proper bandaging protects the wound from further contamination and trauma. If the wound is on a paw, you might find specific guidance on how to treat a torn paw pad on dog helpful for securing the dressing.
Prevent Licking with an E-Collar
Dogs instinctively lick their wounds, but this can introduce bacteria from their mouths, leading to infection, and prevent the wound from healing. Repeated licking can also cause further irritation and lead to constant reapplication of bandages. To protect the wound site effectively, consider using an Elizabethan collar, commonly known as an E-collar or “cone of shame.” This simple device prevents your dog from reaching and licking the bandage, allowing the wound to heal undisturbed. This is especially important as certain skin conditions like hot spots on dogs can worsen significantly with excessive licking.
Aftercare and When to Seek Professional Veterinary Help
Once the initial treatment is complete, reward your brave canine with a small treat and plenty of praise. This helps create a positive association with the experience. You should typically remove the old bandage after 24 hours, gently clean the wound again, and apply a fresh one. Monitor your dog’s wound closely over the next few days for signs of proper healing or potential complications.
Watch for any of the following signs, which could indicate infection or that the wound is not healing properly:
- Increased bleeding or discharge
- Changes in the color of the wound (e.g., becoming redder, darker, or showing pus)
- Swelling around the wound site
- Heat or tenderness to the touch
- A foul odor emanating from the wound
- Your dog showing signs of pain, lethargy, loss of appetite, or fever
If you observe any of these symptoms, or if the wound simply isn’t improving after a couple of days, it’s crucial to contact your veterinarian immediately. They can assess the wound, provide appropriate medical treatment, and ensure there are no underlying issues, such as a deep infection. Sometimes, what seems like a minor issue can escalate, similar to how an untreated ear infection in dogs can become severe without professional help.
Knowing How To Treat A Small Dog Wound at home empowers you to provide immediate and effective care for your beloved pet. While many minor injuries can be managed with proper first aid, always err on the side of caution. Your veterinarian is your best resource for any concerns about your dog’s health or if you are unsure about the severity of an injury. Consistent monitoring and timely professional intervention when needed are key to your dog’s well-being. For more serious conditions, like a suspected torn ACL in a dog, prompt veterinary consultation is always recommended.