
Embarking on the journey of teaching a horse to jump is one of the most rewarding experiences in the equestrian world. It’s a dance of trust, a test of communication, and a thrill that’s hard to match. But before you imagine soaring over grand obstacles, it’s crucial to understand how to train a horse to jump safely and confidently from the ground up. This process is built on a strong foundation of flatwork, patience, and a deep understanding of your equine partner. Whether your goal is the show ring or simply having fun in the arena, these foundational steps will pave the way for a happy, willing jumper.
Before you even think about a fence, you must lay the groundwork. A successful jumping career for any horse begins not with height, but with solid flatwork. This is the bedrock of everything you will do. For those just starting, building this foundation is a critical first step, and understanding the costs and commitment involved can be aided by researching horse training near me prices to find qualified professionals who can guide you.
Before You Start: The Essential Foundations
Before a single pole is placed, a candid assessment of both horse and rider is necessary. Jumping asks for physical and mental readiness, and skipping this step is a recipe for frustration and potential injury.
Is Your Horse Ready to Jump?
Not every horse is immediately ready to start a jumping career. Key indicators of readiness include both physical maturity and training milestones. A horse should generally be at least four to five years old with mature bone structure. Vets can offer precise advice based on your horse’s individual development.
From a training perspective, your horse must have mastered the basics on the flat. This includes:
- Balanced Gaits: A steady, rhythmic walk, trot, and canter.
- Clear Transitions: Smooth and prompt transitions both up and down between gaits.
- Responsiveness: The horse should be responsive to your seat, leg, and rein aids without resistance.
- Straightness: The ability to travel in a straight line between two points is fundamental for approaching a fence correctly.
Essential Equipment for Jumping
Safety and comfort are paramount for both you and your horse. Using the right gear is non-negotiable.
- For the Rider: A certified and properly fitted helmet is the most important piece of equipment you will own. Paddock boots with half-chaps or tall boots with a proper heel are also essential. A safety vest is highly recommended.
- For the Horse: An English all-purpose or jumping saddle is designed to allow the rider the correct position and security. Avoid using Western saddles, which are not built for this discipline. Protective boots, such as splint or open-front boots, are crucial to protect your horse’s delicate leg structures from accidental knocks.
Step-by-Step Guide: How to Train Your Horse to Jump
With the foundations in place, you can begin the exciting part. This process is gradual, with each step building upon the last. Patience is your greatest tool; never rush your horse.
Step 1: Mastering Ground Poles (Polework)
Ground poles are the single most important tool in your early jumping training. They teach a horse to think about its footwork, regulate its stride, and develop rhythm without the pressure of an actual fence.
Start with a single pole on the ground. Lead your horse over it at a walk until he is completely comfortable, then begin riding over it at the walk, trot, and eventually canter. Once one pole is mastered, you can arrange three to five poles in a line, spaced for your horse’s trot stride (typically around 4 to 5 feet apart). Ride through them consistently, focusing on maintaining a steady rhythm and a straight line.
Step 2: Introducing the Cross-Rail (First Jump)
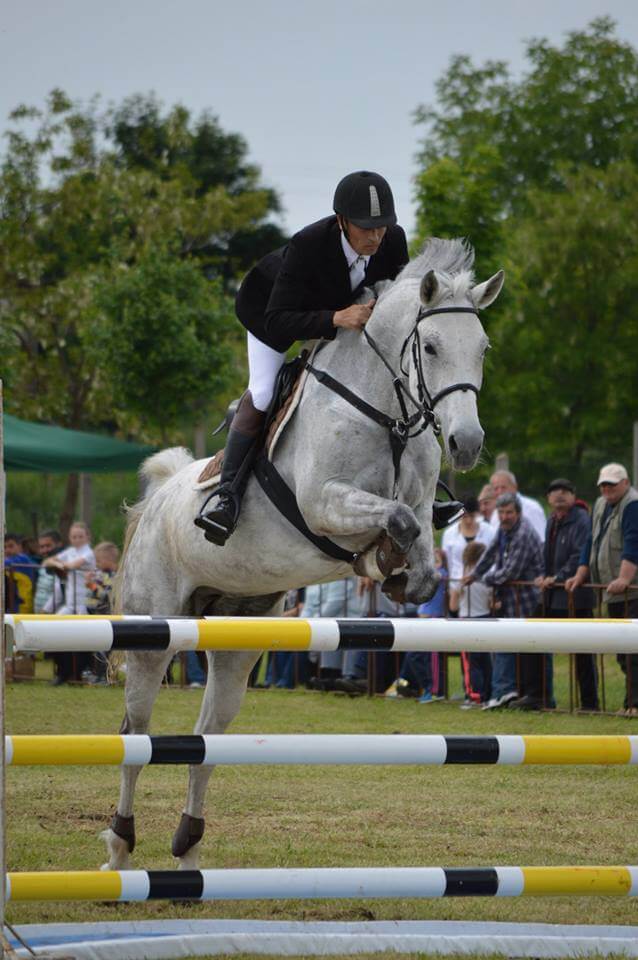
A cross-rail (or cross-pole) is the ideal first jump. Because the center is lower than the sides, it naturally encourages the horse to jump in the middle and helps build confidence.
Set up a single, low cross-rail. You can place a pole on the ground about 9 feet before it to help your horse find a good take-off spot. Approach at a steady, active trot. As you get close, adopt your “two-point” or “light seat” position (lifting your seat out of the saddle and balancing in your stirrups) to allow your horse freedom of movement over the jump. Let the horse look at the fence; don’t force them over if they are hesitant.
According to equine behaviorist Dr. Eleanor Vance, “The horse’s initial encounters with obstacles must be overwhelmingly positive. A scare or a bad experience at this stage can create lasting confidence issues that are far more difficult to fix than taking a little extra time in the beginning.”
Step 3: Building Confidence with Small Verticals
Once your horse is confidently trotting and cantering over cross-rails from both directions, you can introduce a small vertical. This is a simple fence where the poles are parallel to the ground.
Keep it low—no more than 18 inches high to start. The goal isn’t height; it’s consistency and form. Continue to focus on a straight approach, a steady rhythm, and a balanced canter after the fence. If your horse rushes or gets nervous, go back to polework or a cross-rail until their confidence returns. This methodical approach is a core principle in many successful programs, from local barns to specialized facilities like blackwater horse training.
Step 4: Creating Gymnastic Grids
Gymnastic grids are a series of small fences set at specific distances. They are an incredible tool for developing a horse’s jumping ability. A grid teaches the horse to think for itself, improve its balance, adjust its stride, and create a powerful, efficient jump—all without much interference from the rider.
A simple starting grid could be a cross-rail, followed by one canter stride (about 18-20 feet), and then a small vertical. As the horse becomes more adept, you can add more elements and vary the distances.
Common Jumping Problems and How to Fix Them
Even with the best training, you will encounter challenges. Understanding the cause is the first step to finding a solution.
Refusals and Run-Outs
A horse refusing or running out to the side of a jump is a sign of a problem. The cause could be fear, a lack of confidence, pain (check saddle fit and for any physical issues), or rider error, such as looking down or pulling on the reins. Never punish a refusal. Instead, circle back calmly and approach again. If the issue persists, lower the fence or go back to a more straightforward exercise to rebuild confidence.
Rushing Towards the Fence
Rushing is often a sign of anxiety or imbalance. The horse is trying to get the task over with as quickly as possible. To correct this, use calming exercises. Place a single ground pole just before the jump to encourage the horse to slow down and look. Ride frequent transitions (trot-canter-trot) on the approach to ensure the horse is listening to you, not just running at the fence. The goal is to make the jump feel like a natural part of a calm, balanced canter.
Knocking Down Poles
Occasional knockdowns are normal, but frequent occurrences may indicate a lack of fitness, laziness, or a need for better technique. Gymnastic grids are excellent for teaching a horse to be tidier with its legs. Varying the types of jumps and using fillers can also encourage the horse to be more respectful of the obstacles. For more advanced training techniques, observing the methods used in professional settings, which may be referenced by trainers like john lipari horse trainer, can provide additional insights.
Frequently Asked Questions (FAQ)
1. What is the right age to start training a horse to jump?
Most horses can begin light work over poles and small cross-rails around age four, with more serious training starting at five. This ensures their joints and growth plates have sufficiently matured.
2. How often should I practice jumping?
For a young or green horse, jumping sessions should be short and infrequent. One to two sessions a week is plenty. Over-jumping can lead to physical strain and mental burnout. The majority of your rides should still focus on flatwork.
3. What is the most important skill for a jumping horse?
Rhythm. A horse that can maintain a consistent, balanced rhythm is more likely to meet the jump at a good take-off spot, resulting in a safer and more efficient jump. This is more important than speed or scope, especially in the early stages.
4. How do I know if I’m ready to jump higher?
You should only increase the height when you and your horse are completely confident and proficient at the current height. This means you can canter to the jump, clear it in good form, and canter away smoothly and in balance almost every time.
5. Can any horse learn to jump?
Most sound horses can learn to jump small obstacles and enjoy it. While certain breeds are conformationally better suited for high-level competition, the basics of jumping are accessible to nearly any horse with proper training and a willing attitude. The experience shares similarities with other disciplines; even the high-energy environment of events like horse racing at brighton requires a deep foundation of trust and training.
The Journey is the Destination
Learning how to train a horse to jump is a marathon, not a sprint. It’s about building a partnership based on clear communication and mutual trust. By focusing on a solid foundation, progressing slowly, and always prioritizing your horse’s well-being, you will build a confident and enthusiastic jumping partner. Celebrate the small victories, be patient through the challenges, and enjoy the incredible feeling of flying together. Success in this discipline is not just about clearing the fence; it’s about the strong, trusting bond you build along the way, a foundation that is central to any form of equestrian sport, including horse show jumping training.