
Learning How To Shock Collar Train Your Dog is a journey that requires patience, understanding, and a commitment to responsible use. Often referred to as electronic collars or e-collars, these devices have evolved significantly from their early predecessors. When used correctly, a modern e-collar is not a tool for punishment but a sophisticated device for communication, capable of reinforcing commands and correcting unwanted behaviors from a distance. The goal is to enhance the bond with your dog through clear signals, not to cause fear or pain. For many, this training method opens up a new level of off-leash freedom and reliability. A great place to start is by understanding the mechanics of a remote shock dog training collar and its features.
What Exactly Is a Modern E-Collar?
Forget the old-school image of a harsh, punitive device. Today’s top-tier electronic collars are advanced training tools designed with a dog’s well-being in mind. They typically offer three modes of communication: an audible tone, a vibration, and static stimulation.
- Tone: A simple beep, often used as a warning or a marker for a correct behavior, similar to a clicker.
- Vibration: A gentle buzzing sensation, like a pager, used to get the dog’s attention.
- Static Stimulation: This is the feature that gives the collar its name. It’s not an electric shock in the conventional sense but rather a mild muscular stimulation, similar to what’s used in physical therapy. High-quality collars have dozens of levels, allowing you to find a setting that is just enough to get your dog’s attention—often a level so low a human can’t even feel it.
The purpose is to create an undeniable, non-emotional tap on the shoulder to say, “Hey, listen to me,” especially when the dog is distracted or at a distance.
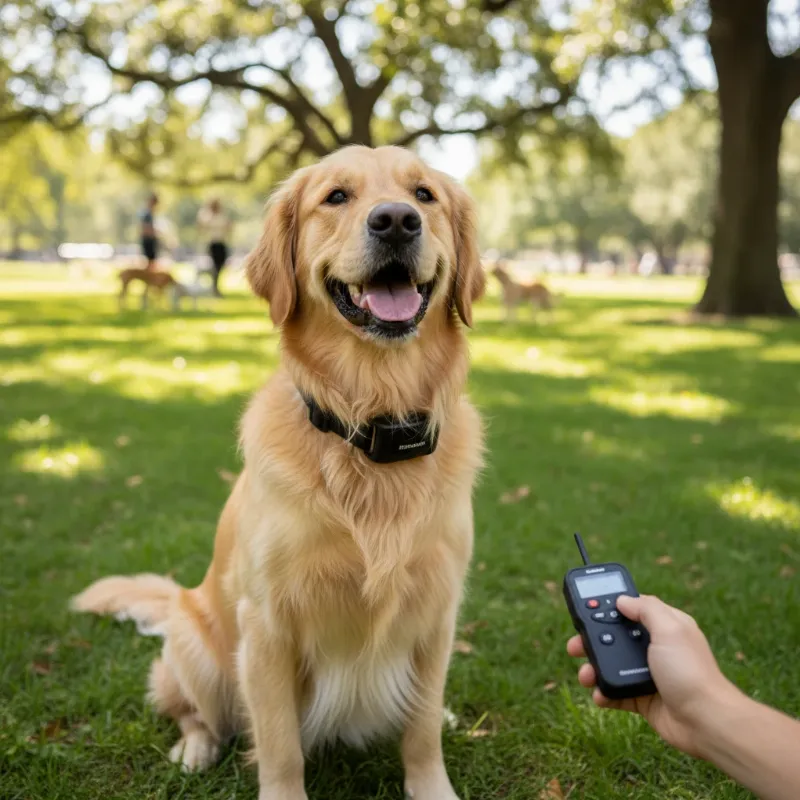 A close-up of a Golden Retriever wearing a modern e-collar correctly, high on its neck, looking calm and attentive to its owner.
Before You Begin: Is This the Right Tool for You?
Before you even think about putting an e-collar on your dog, a moment of honest assessment is crucial. This training method is not a one-size-fits-all solution. A dog’s temperament is a major factor; highly anxious, fearful, or reactive dogs may respond negatively to the stimulation, potentially worsening their behavioral issues.
The foundation of any successful training is a strong, trust-based relationship between you and your dog. An e-collar cannot fix a broken bond. It should be introduced only after you have established basic obedience and a positive rapport. If you’re unsure, consulting with a certified professional trainer is always the best first step. They can assess your dog and guide you on the most effective methods, which is a key part of learning how to train a dog with a shock collar safely.
As professional dog behaviorist Dr. Sarah Miller often states, “An e-collar doesn’t train the dog; the owner does. The collar is simply the tool that bridges the communication gap when voice commands aren’t enough.”
Getting Started: The Essential First Steps
Proper introduction and setup are non-negotiable for success. Rushing these initial stages can create confusion and anxiety for your dog, undermining the entire process.
Step 1: Choosing the Right Collar
Invest in a reputable brand. Cheaper, low-quality collars often have inconsistent stimulation levels and can be unreliable. Look for key features:
- A Wide Range of Levels: At least 100 levels allow for fine-tuned adjustments.
- Tone and Vibration Modes: These are essential for phasing out the static stimulation later.
- Waterproof and Durable: You’ll be training in all sorts of environments.
- Good Range: Ensure the remote can communicate with the collar over the distances you plan to train in.
Step 2: Ensuring the Perfect Fit
An improper fit is one of the most common mistakes. If the collar is too loose, the contact points won’t connect reliably, leading you to turn up the stimulation unnecessarily. If it’s too tight, it can cause skin irritation.
- Position: The collar should sit high on the dog’s neck, right behind the ears.
- Snugness: You should be able to fit two fingers snugly between the collar strap and your dog’s neck.
- Contact: The contact points must touch the skin. You may need to part the fur.
- Rotation: Remove the collar for at least 8 hours a day and check the skin to prevent pressure sores.
Step 3: Finding the “Working Level”
This is the most critical step. The goal is to find the lowest possible level of stimulation that your dog can just barely feel. You are looking for a subtle sign of recognition, not a yelp of pain.
- Put the collar on your dog and let them get used to it for about 20-30 minutes.
- Start with the stimulation level at zero and the remote in your hand.
- While your dog is slightly distracted, press the stimulation button and watch for a small reaction—an ear twitch, a slight head turn, or a brief change in expression.
- If you see no reaction, go up one level at a time until you do. This is your dog’s “working level.” This is the foundation of everything you will do moving forward.
The Core of the Training: Conditioning and Commands
With the groundwork laid, you can begin the actual training. Remember, the collar is used to reinforce commands, not to teach them from scratch.
Collar Conditioning
For the first week, have your dog wear the collar (turned off) for short periods every day without doing any training. Pair putting it on with something they love, like a treat, a meal, or a walk. The goal is for the dog to have a neutral or even positive association with wearing the collar itself. This process is central to learning how to train your dog on a shock collar without creating fear.
Introducing a Known Command
Start with a command your dog already knows well, like “Come.”
- With your dog on a long leash in a low-distraction area, say your recall command, “Come!”
- The instant you finish the word, apply a continuous tap at their working level.
- Gently guide your dog toward you with the leash.
- The moment your dog starts moving toward you, release the stimulation button.
- When they arrive, reward them enthusiastically with praise, pets, or a high-value treat.
This “pressure on, pressure off” method teaches the dog that they control the stimulation. Their compliance (coming toward you) makes the sensation stop, which is a powerful form of reinforcement. Consistency is key. You must apply this sequence the same way every single time.
 A person and their Border Collie in a park during a training session, with the dog happily running towards the owner.
Common Mistakes to Avoid
Using an e-collar effectively is as much about avoiding pitfalls as it is about proper technique. Steer clear of these common errors:
- Using a Level That’s Too High: This creates pain and fear, destroying trust. Always start at the working level.
- Using It for Punishment: Never apply stimulation because you are angry or frustrated. It is a communication tool, not a weapon. This is especially important when you need to fix dog aggression towards other dogs, which often requires professional guidance.
- Lack of Consistency: If you only sometimes enforce a command with the collar, you will confuse your dog.
- Poor Timing: The stimulation must be applied precisely when the unwanted behavior occurs or as the command is given. A delay of even a few seconds is too long.
- Forgetting Positive Reinforcement: The e-collar should be layered with praise and rewards. Your dog should be just as excited to work with you with the collar on as they are with it off. If you’re based in Tennessee and need hands-on help, seeking out professional dog training in Memphis can provide invaluable guidance.
Phasing Out the E-Collar
The ultimate goal is to not need the e-collar. Once your dog is responding reliably to commands, you can start to fade its use.
- Begin using the vibration or tone modes as a pre-warning before applying static stimulation. Soon, the dog will respond to the tone or vibration alone.
- Next, start giving the command without any stimulation. If the dog complies, reward them heavily. If not, re-apply the collar sequence as a reminder.
- Over time, your dog will internalize the commands, and the collar will become a background safety net rather than an active training tool.
Frequently Asked Questions (FAQ)
Is shock collar training cruel?
When used correctly and ethically, modern e-collar training is not cruel. It uses the lowest perceptible level of stimulation to communicate, not to inflict pain. Cruelty comes from misuse, such as using a level that is too high or applying it out of anger.
What behaviors can a shock collar help with?
E-collars are most effective for reinforcing off-leash reliability (like recall), stopping dangerous behaviors like chasing cars or wildlife, and preventing nuisance actions like jumping or counter-surfing.
At what age can I start using a shock collar?
Most professional trainers recommend waiting until a dog is at least six months old and has a solid understanding of basic commands. Using it on a very young puppy can be overwhelming and counterproductive.
Can a shock collar burn my dog’s neck?
This is a common myth. The marks sometimes seen on a dog’s neck are pressure sores, not burns. They are caused by leaving a collar on too tight for too long, which is why proper fit and removing the collar daily are essential.
How long should my dog wear the training collar each day?
Do not leave the e-collar on your dog for more than 8-10 hours at a time. It should be put on for specific training sessions or off-leash activities and removed afterward to allow the skin to breathe.
Your Path to a Better-Behaved Dog
Ultimately, learning how to shock collar train your dog is about opening up a new line of communication. It’s a powerful tool that, in the hands of a responsible and educated owner, can lead to a safer, more enriching life for your canine companion. By focusing on proper introduction, fair application, and consistent reinforcement, you can build a more reliable and responsive relationship, enjoying new levels of freedom and trust together.