
Embarking on a DIY project for your canine companion can be incredibly rewarding, especially when it results in a healthy and engaging treat. Inspired by a viral video, the idea of crafting homemade Himalayan Yak Chews, also known as Chhurpi, sparked an intriguing challenge. This ancient Tibetan delicacy, traditionally made from yak milk, has been a prized, long-lasting chew for dogs for centuries. While authentic Chhurpi boasts an impressive shelf life of up to twenty years and comes in hard and soft varieties, this guide focuses on recreating the hard version at home using readily available cow’s milk.
The allure of homemade treats lies not only in the potential cost savings but also in the control over ingredients. This article will guide you through the process of making your own yak chews, offering insights into the history and characteristics of Chhurpi, and providing a comprehensive comparison between homemade and commercially available options.
The History and Origins of Chhurpi
The journey of the Himalayan Yak Chew begins in the rugged terrains of Nepal, where it is known as Chhurpi. This hard cheese has been a staple for centuries, prized for its remarkable durability and nutritional value. Traditionally crafted from yak milk, the process has evolved to include milk from cows or a Chauri (a crossbreed of yak and cow). Chhurpi exists in two forms: a soft variety, often incorporated into cooking, and a hard variety, renowned as one of the world’s hardest cheeses. It is this hard Chhurpi that has gained international acclaim as a long-lasting, irresistible chew for dogs. Its unique texture allows dogs to soften it with their saliva and chew it like gum, providing hours of entertainment and dental benefits.
Crafting Your Own Yak Chews: A Step-by-Step Guide
While the traditional recipe calls for yak milk, this DIY version utilizes readily available cow’s milk. The process, though requiring patience, is straightforward and yields a rewarding result.
Ingredients:
- 1 gallon (3.79 liters) skim milk
- 1/2 cup lemon or lime juice
- 1 tsp salt
- Cheesecloth
Instructions:
Step 1: Heating the Milk
Begin by pouring the skim milk into a large pot and setting your burner to medium-low heat. It is crucial to stir the milk continually as it heats up to prevent scorching. Bringing a gallon of milk to a boil can take longer than anticipated, so patience is key. Consistent stirring is vital; burned bits can affect the taste and texture of the final product.
Step 2: Curdling the Milk
Once the milk reaches a boil, add the lemon or lime juice and salt. Continue stirring. You should observe the milk rapidly separating into solid curds and liquid whey. This transformation typically occurs within seconds of adding the acidic ingredient.
Step 3: Straining and Pressing the Curds
Carefully remove the cheese curds from the pot and place them into a cheesecloth-lined strainer. Using a strainer prior to the cheesecloth can help minimize cleanup. Allow the whey to drain. Fold the cheesecloth over the curds and apply significant pressure. Placing a heavy object, like a pot, on top of the cheesecloth-wrapped curds can help expel more liquid. The more pressure applied, the firmer the final chew will be. Let the curds press for 4-6 hours.
Step 4: Shaping the Chews
After pressing, unwrap the curds. They should be a cohesive, albeit still soft, mass. Trim any uneven edges and cut the mass into pieces suitable for your dog’s size. It’s generally safer to make them larger to avoid choking hazards.
Step 5: Baking the Chews
Preheat your oven to its lowest temperature setting, ideally around 150 degrees Fahrenheit (65 degrees Celsius). Arrange the cut pieces on a baking sheet. For optimal drying, using a wire rack placed on the baking sheet allows air to circulate around all sides of the chews. Bake for approximately 40 minutes.
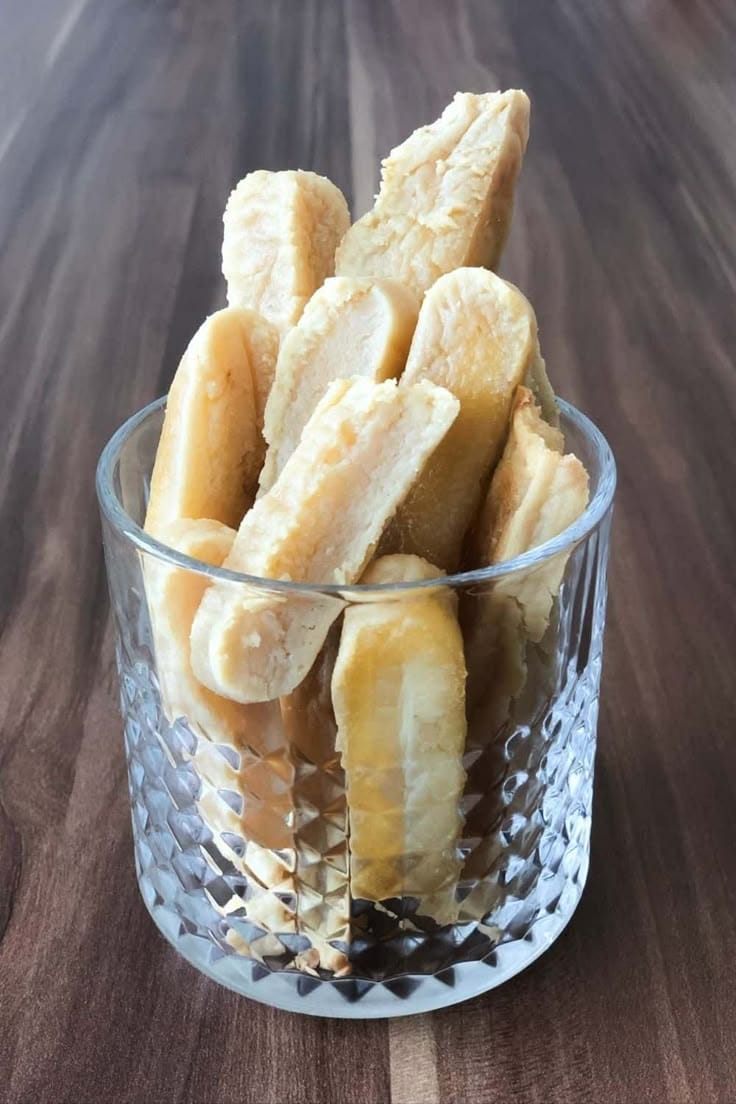
Step 6: Curing and Hardening
Following the initial bake, the chews may still feel somewhat soft and their color might not have changed significantly. Remove them from the oven and place them on a non-stick surface, such as parchment paper. Allow them to air dry for 24-36 hours. During this time, they will firm up considerably and darken in color, reaching the ideal consistency for a durable dog chew. Always supervise your dog while they enjoy any chew.
Homemade vs. Store-Bought: A Comparative Analysis
After creating your own yak chews, comparing them to commercially available options provides valuable insights into cost, ingredients, and overall value.
Price and Yield
Commercially produced Himalayan Pet Supply yak chews, a popular brand, can cost around $10.29 for a pack of three small chews. The cost of ingredients for the homemade version—milk, lemon juice, and salt—totaled approximately $7.67, yielding seven chews. While the exact weight comparison is difficult without a scale, the cost-effectiveness of the homemade option is apparent, especially considering the potential for leftover ingredients.
Ingredients
The ingredient list for store-bought chews typically includes skim milk, citrus juice, salt, and enzymes. The homemade version mirrors this closely, omitting only the enzymes, which are generally not considered essential for a basic dog chew.
Re-usability
A notable feature of many store-bought Himalayan chews is their re-usability. When the chew becomes small, it can be soaked in water, microwaved, and puffed up to a larger size, effectively creating a second chew. The re-usability of homemade chews has not been tested in this instance.
Messiness
Homemade yak chews may produce slightly more crumbs than their store-bought counterparts. This could be attributed to the softer texture achieved in the DIY process. However, it is believed that a firmer batch, achieved through more intense pressing, would result in comparable messiness levels.
Convenience
While the DIY process is time-consuming, with significant waiting periods between steps, it is not overly difficult. For those who enjoy cooking and have the time, making yak chews at home is entirely feasible. However, for sheer convenience, purchasing them from a store remains the quicker option.
The world of dog treats offers a wide variety of options, from puzzle toys designed to stimulate a dog’s mind to durable chews that satisfy their natural urge to gnaw. Exploring different types of best dog chew toys for power chewers can help you find the perfect fit for your pet’s chewing habits and preferences. Similarly, understanding the benefits of various chew toys for heavy chewing dogs ensures you provide safe and engaging options. For dogs that seem to chew everything in sight, a selection of specialized toys for dogs who chew everything can be invaluable.
Conclusion
Crafting your own Himalayan Yak Chews offers a cost-effective and engaging alternative to store-bought treats. While the process requires time and attention to detail, the satisfaction of providing your dog with a healthy, homemade chew is undeniable. By understanding the history, following the steps carefully, and comparing the results to commercial options, you can confidently create these long-lasting delights for your furry friend. Remember to always supervise your dog during chew time to ensure their safety.