
Every dog owner wants to shower their beloved furry companions with love, and what better way than with wholesome, homemade treats? While store-bought options abound, taking a few minutes to prepare healthy dog treats at home offers numerous benefits, from ensuring ingredient quality to saving money. These simple, nutritious snacks are a fantastic way to show your pup just how much you care, allowing you to control exactly what goes into their diet and avoid unnecessary additives or common allergens. Our easy 3-ingredient recipe for healthy dog treats is designed to be quick, affordable, and incredibly appealing to your canine friend. Ensuring your dog’s diet is balanced and safe is paramount, and if you ever have concerns about their health or what they consume, it’s always best to consult a professional at an animal medical center of jupiter.
Why Choose Homemade Treats for Your Dog?
Opting for homemade treats gives you complete control over the ingredients, ensuring your dog receives only the best. Many commercial dog treats contain fillers, artificial flavors, preservatives, and questionable by-products that can contribute to allergies, digestive issues, or other health problems. By making your own, you can avoid these hidden nasties and tailor the treats to your dog’s specific dietary needs, especially if they have sensitivities to common allergens like wheat. The high fiber content in ingredients like sweet potato and oats also aids in digestion, promoting overall gut health. Beyond the health benefits, preparing treats at home is incredibly cost-effective. You’ll be surprised at how much you can save compared to constantly purchasing expensive, often inferior, store-bought options. This simple act of preparation also deepens the bond with your pet, providing a rewarding experience for both of you.
The Simple Trio: 3 Key Ingredients for These Healthy Dog Treats
The magic of these wholesome snacks lies in their simplicity, requiring just three core ingredients that are likely already in your pantry or easily accessible. Each ingredient plays a vital role in both nutrition and taste, making these treats a delightful and healthy choice for your dog.
Sweet Potato
Cooked sweet potato forms the nutritious base of these treats. Rich in vitamins (A, C, B6), minerals (potassium, calcium), and dietary fiber, sweet potatoes are excellent for your dog’s digestive health and immune system. To prepare them, you can peel and boil cubed sweet potato until soft, then mash thoroughly. Alternatively, for a hands-off approach, bake whole sweet potatoes at 425 degrees Fahrenheit for 40-55 minutes until tender. Once cooled, remove the skin and mash. For future convenience, you can even freeze mashed sweet potato in individual portions.
All-Natural Peanut Butter
Peanut butter is a canine favorite, but it’s crucial to choose an all-natural variety. The only ingredient listed should be peanuts. Avoid peanut butter containing xylitol, an artificial sweetener highly toxic to dogs, or any added sugars, salts, or hydrogenated oils. Natural peanut butter provides healthy fats, protein, and vitamins B and E, making it a delicious and beneficial addition.
Oat Flour (or Whole Wheat Flour)
Oat flour is an excellent choice for dogs with wheat sensitivities, offering a gluten-free and easily digestible alternative. You can easily make oat flour by grinding regular rolled or quick oats in a food processor until it reaches a fine, flour-like consistency. If your dog doesn’t have a wheat sensitivity, whole wheat flour can be used as a convenient substitute, eliminating the need to grind oats.
 A whole sweet potato, peanut butter, and oat flour measured out on a white surface with a dog bone cookie cutter.
The Pumpkin Puree Alternative
For an even quicker option, or if sweet potatoes aren’t on hand, unsweetened canned pumpkin puree is a fantastic substitute for the mashed sweet potato. Dogs adore pumpkin, and it’s packed with fiber, promoting healthy digestion. Just like with peanut butter, it’s paramount to use pure pumpkin puree and not pumpkin pie filling, which contains added sugars and spices that can be harmful to your pet. Always double-check that pumpkin is the only ingredient listed on the can.
Step-by-Step Guide to Making the Dough
Creating the dough for these healthy dog treats is surprisingly straightforward, even for novice bakers. The entire process is designed to be user-friendly, ensuring a smooth and enjoyable experience as you prepare these special snacks for your canine companion. Should your dog ever exhibit an adverse reaction to a new food or treat, prompt veterinary attention is vital. Knowing where your nearest pet er near me or emergency animal hospital is can be life-saving.
Start by combining the mashed sweet potato (or pumpkin puree) with the all-natural peanut butter in a mixing bowl. Stir these two wet ingredients together thoroughly until they are well integrated, forming a consistent base.
Next, gradually add the oat flour (or whole wheat flour) to the wet mixture. Begin mixing with a spoon, but don’t hesitate to switch to using your hands. The dough will be slightly sticky, but using your hands often makes it easier to achieve a uniform consistency and fully incorporate all the flour.
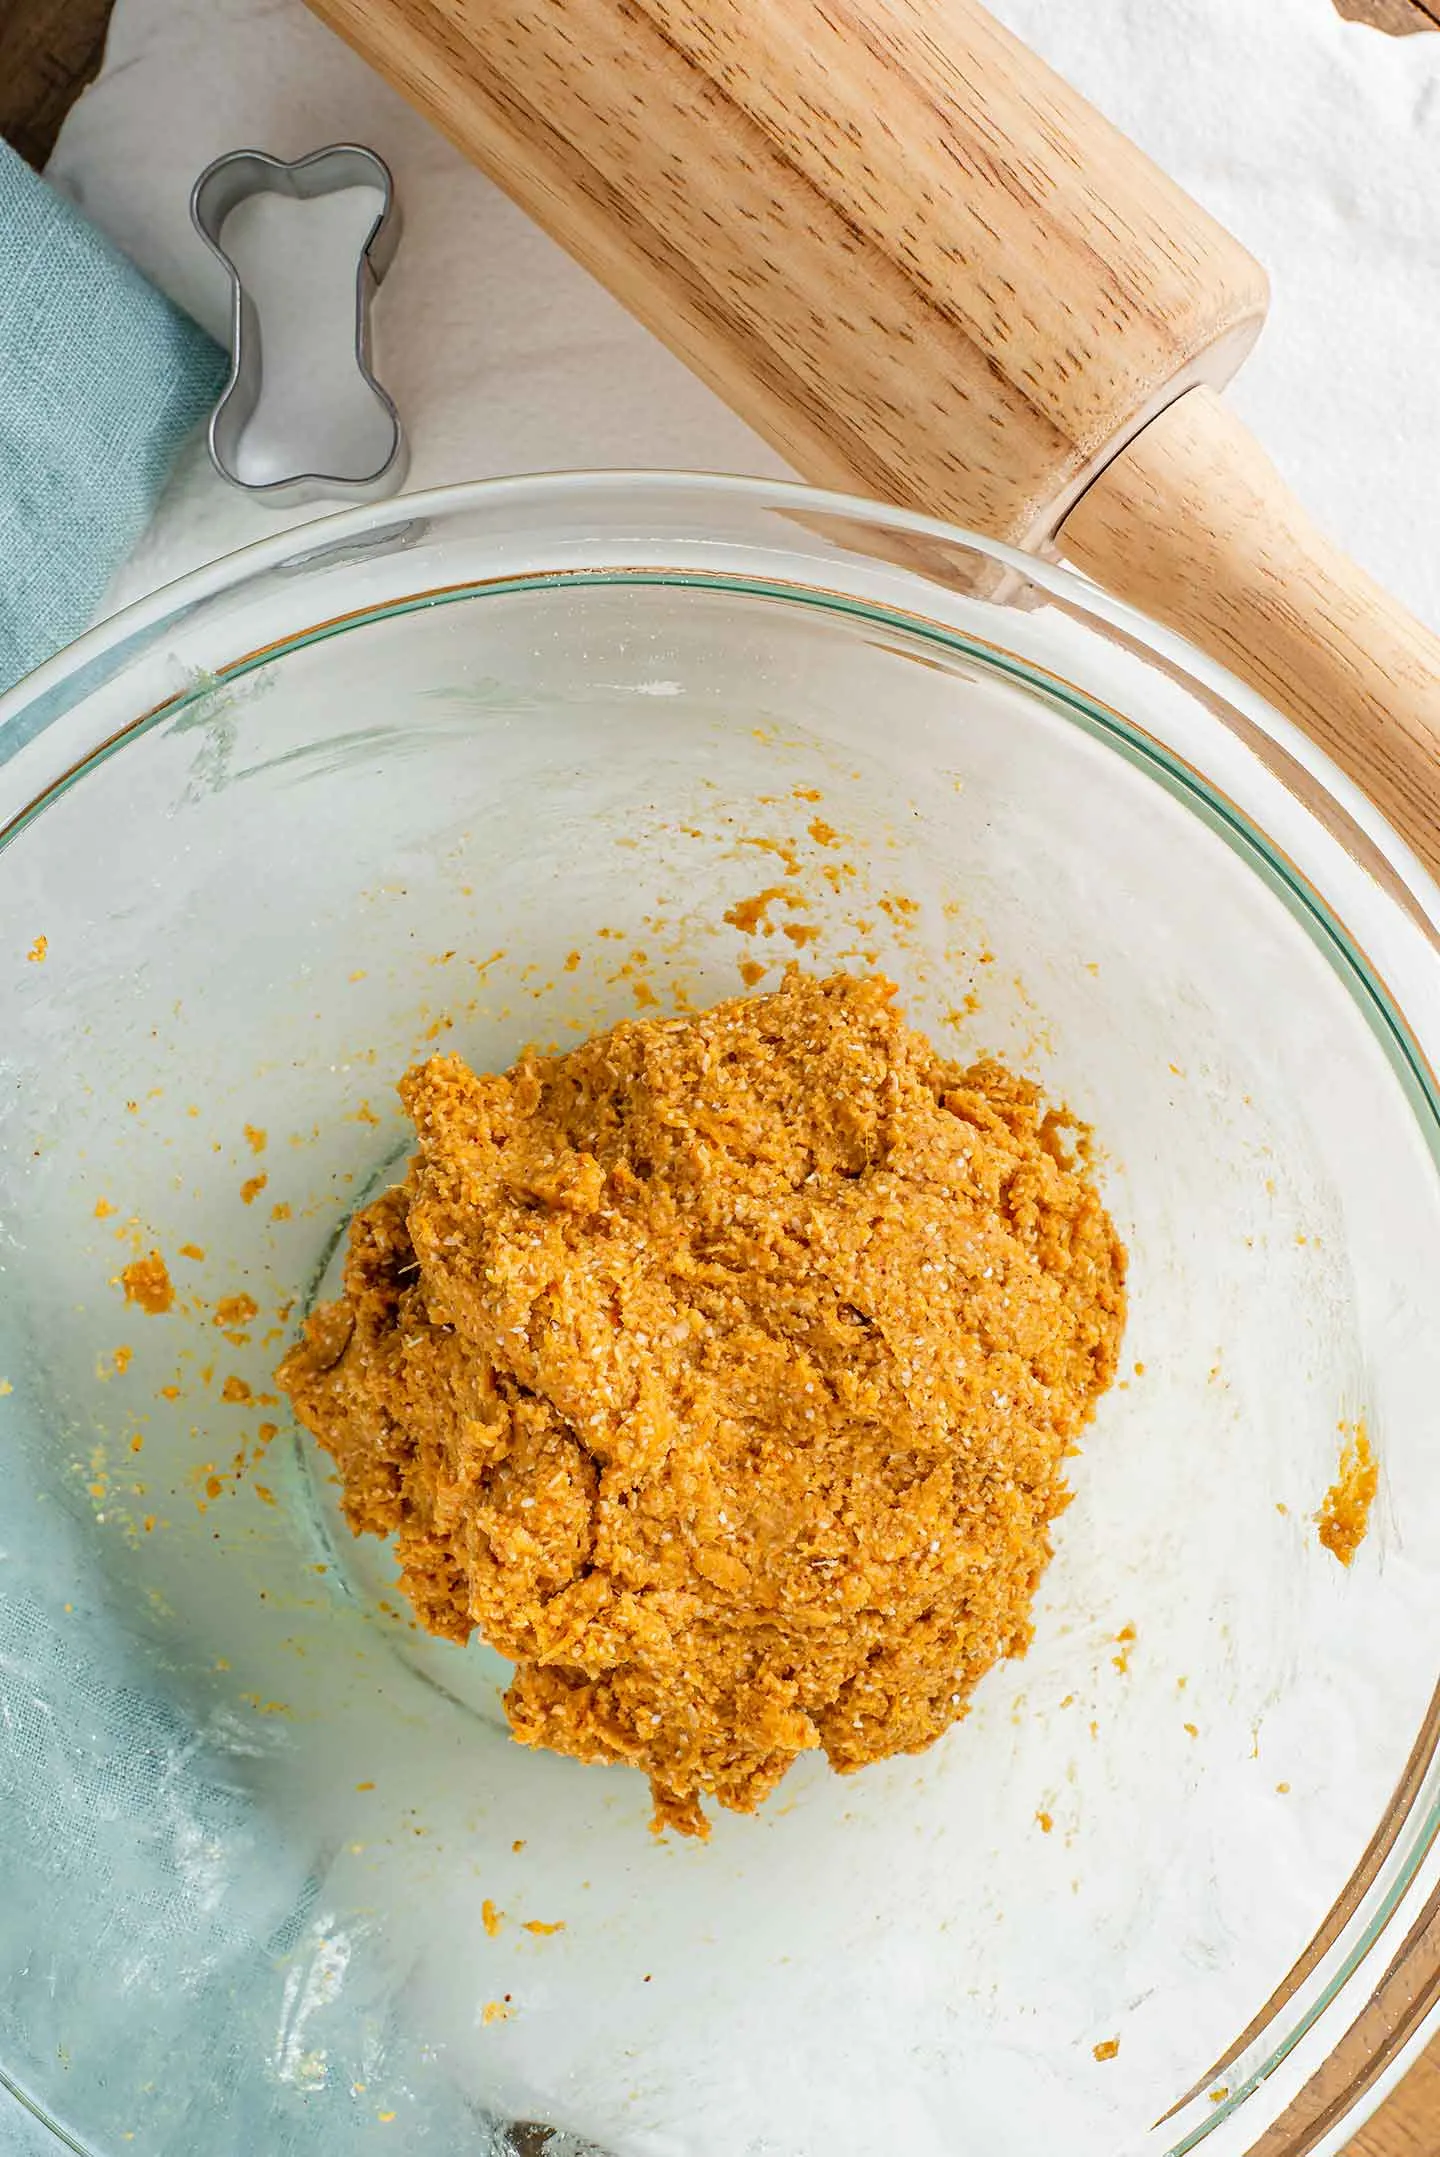 A perfectly kneaded ball of dog treat dough made from sweet potato, peanut butter, and oat flour.
Adjusting Dough Consistency
The perfect dough consistency is key for easy rolling. If your dough feels too dry and crumbly, you can add a small splash of water or unsweetened oat milk. A little extra peanut butter or mashed sweet potato can also help. Conversely, if the dough is too sticky and difficult to handle, simply add a dash more flour until it reaches a workable consistency. Don’t be afraid to experiment slightly to find the right balance.
Rolling and Shaping Your Dog’s Favorite Treats
Once your dough is perfectly mixed, it’s time for the fun part: rolling and shaping! This stage allows for plenty of customization to suit your dog’s size and preferences, making each batch unique.
Transfer your dough to a silicone mat or a piece of wax paper. Using a rolling pin, roll the dough out to an even thickness of anywhere between ¼ inch and ½ inch. Since these treats don’t contain any rising agents, the thickness you achieve at this stage will be the final thickness of your baked biscuits. If you find the dough is sticking to your rolling pin, simply place another piece of wax paper over the dough before rolling. For times when your pet needs urgent care, locating a 24hr animal hospital near me is crucial for immediate assistance.
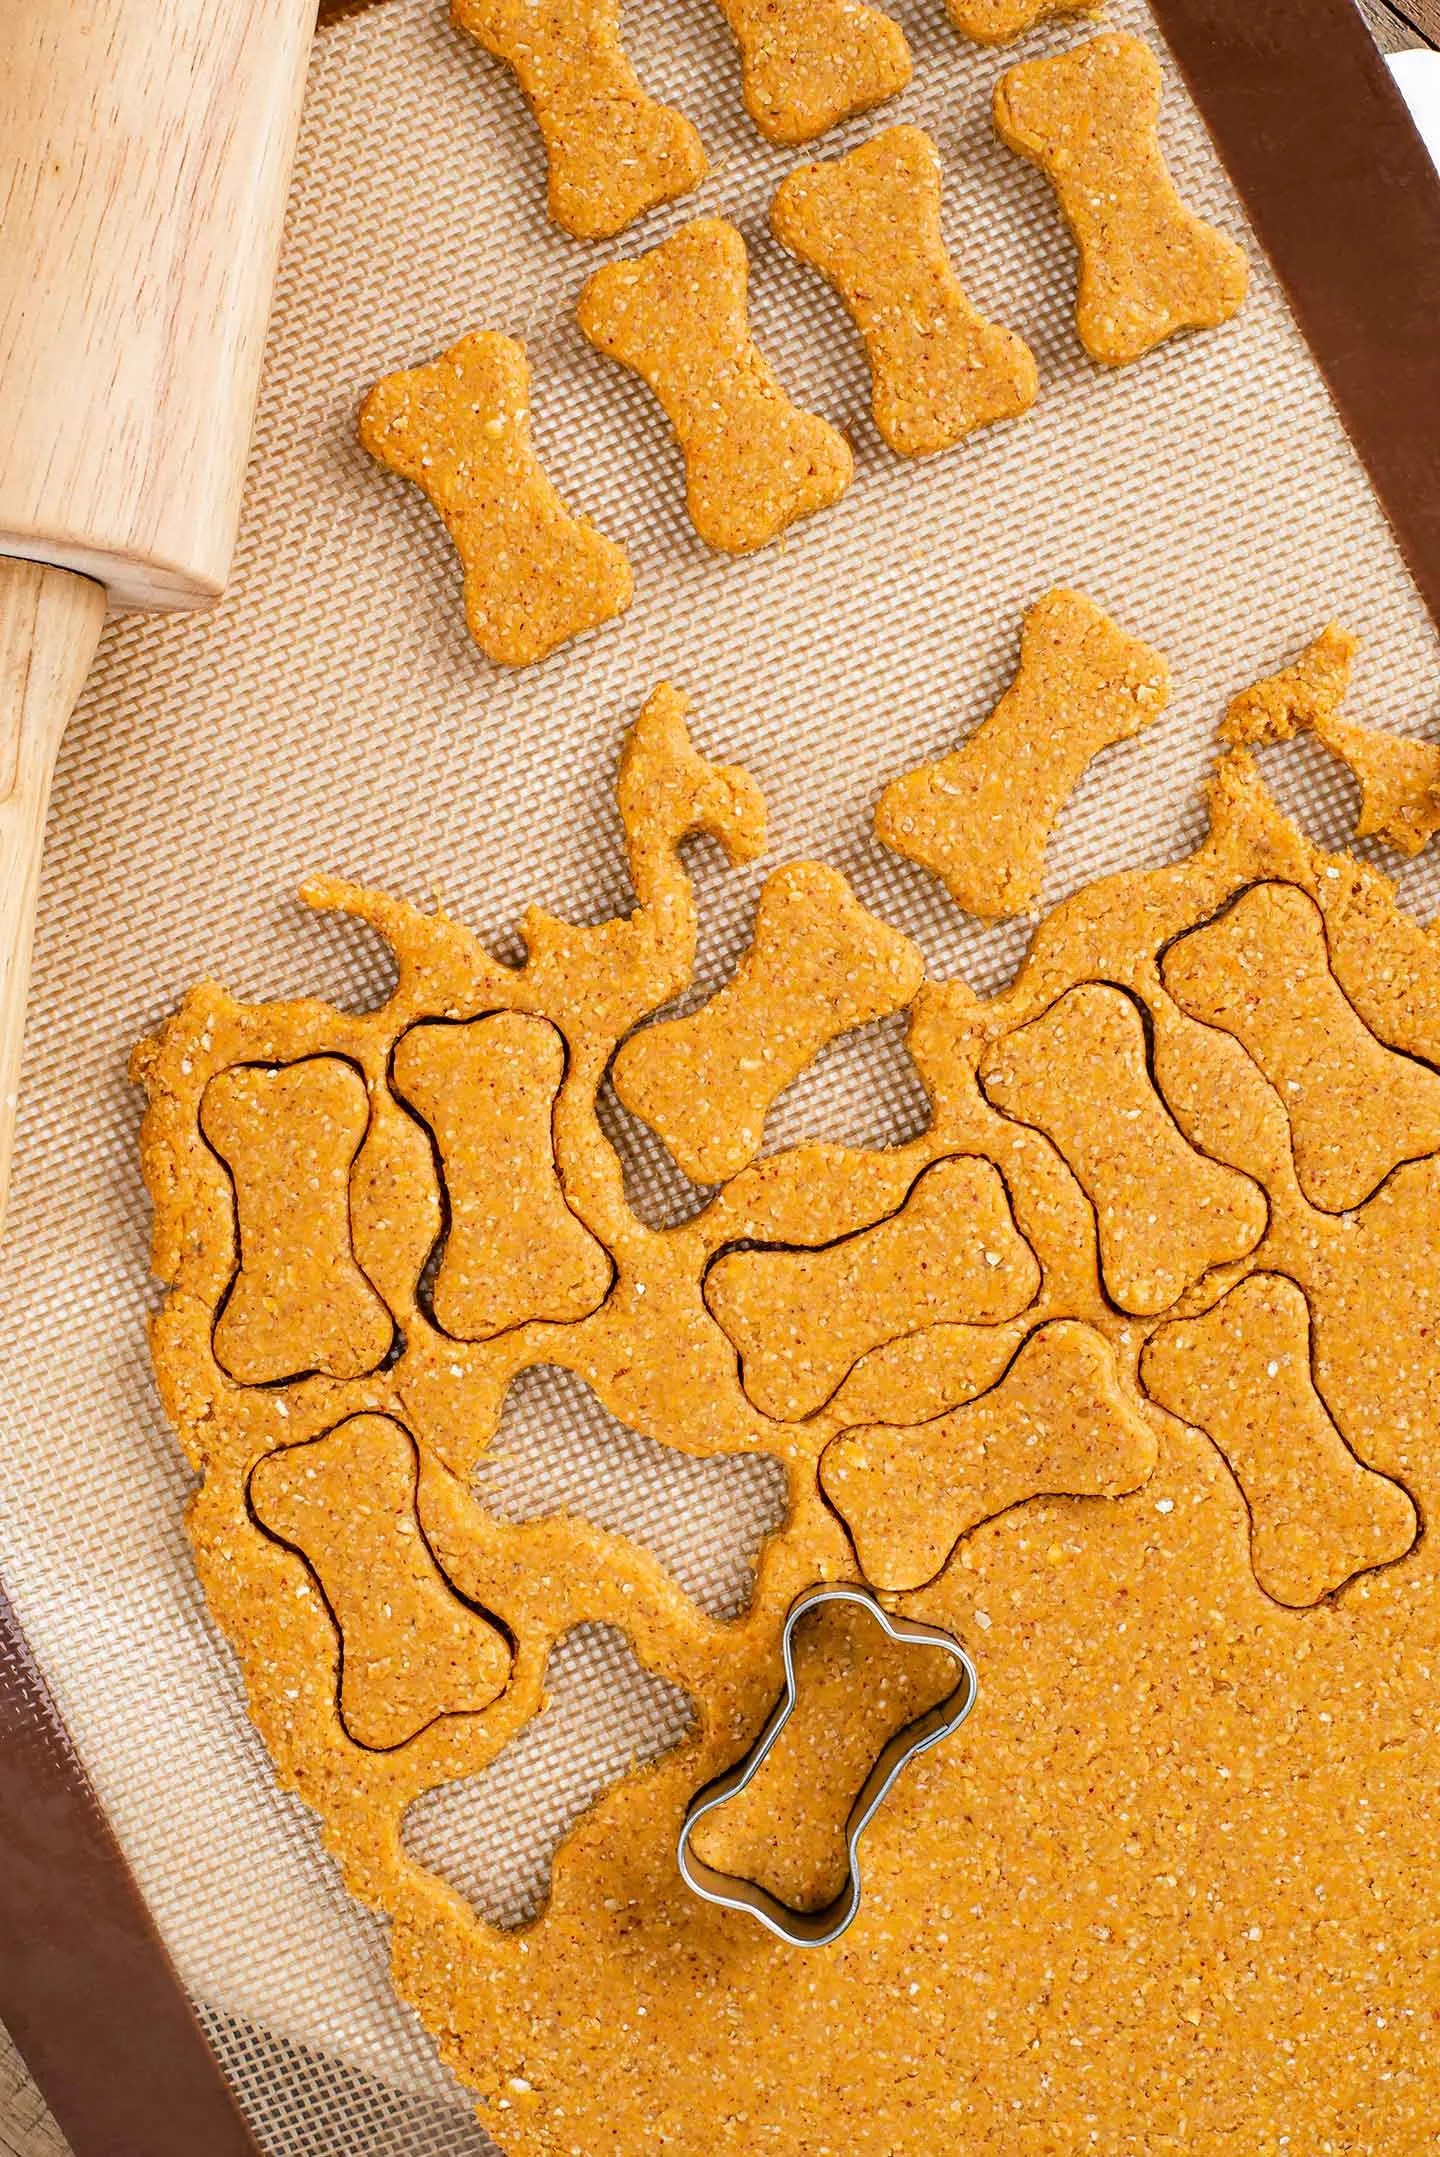 Dog treat dough rolled out on a silicone mat with a rolling pin and bone-shaped cookie cutters.
Customization and Troubleshooting
This is where you can truly personalize the treats for your dog. Use a larger cookie cutter for bigger breeds or smaller ones for more frequent, bite-sized rewards. You can also vary the thickness – thinner treats for a quicker crunch, or thicker ones for a longer-lasting chew. If you don’t have a cookie cutter, no problem! A simple knife can be used to slice the dough into small squares or rectangles. If, during rolling, the dough becomes too crumbly, don’t worry about overworking it; just gather it, add a bit more wet ingredient (water, oat milk, peanut butter, or pumpkin), and re-roll. Maintaining your dog’s optimal health often means being prepared for anything, including knowing the nearest [vca hospital near me](https://dogcarestory.com/vca-hospital-near me/) for comprehensive care.
Baking to Perfection: Soft or Crunchy?
The final step in crafting these healthy dog treats is baking, and this stage offers another fantastic opportunity for customization based on your dog’s texture preference. Whether your pup loves a soft, chewy snack or a satisfyingly crunchy biscuit, you can achieve it with a slight adjustment to baking time. Before you begin, preheat your oven to 400 degrees Fahrenheit (200 degrees Celsius) and line a baking sheet with parchment paper to prevent sticking. Carefully transfer your cut-out dough shapes onto the prepared baking sheet, ensuring they are not overcrowded. Understanding your dog’s individual needs extends to their diet and treats, and for any health concerns or dietary advice, visiting a reputable hospital animal near me for expert guidance is always recommended.
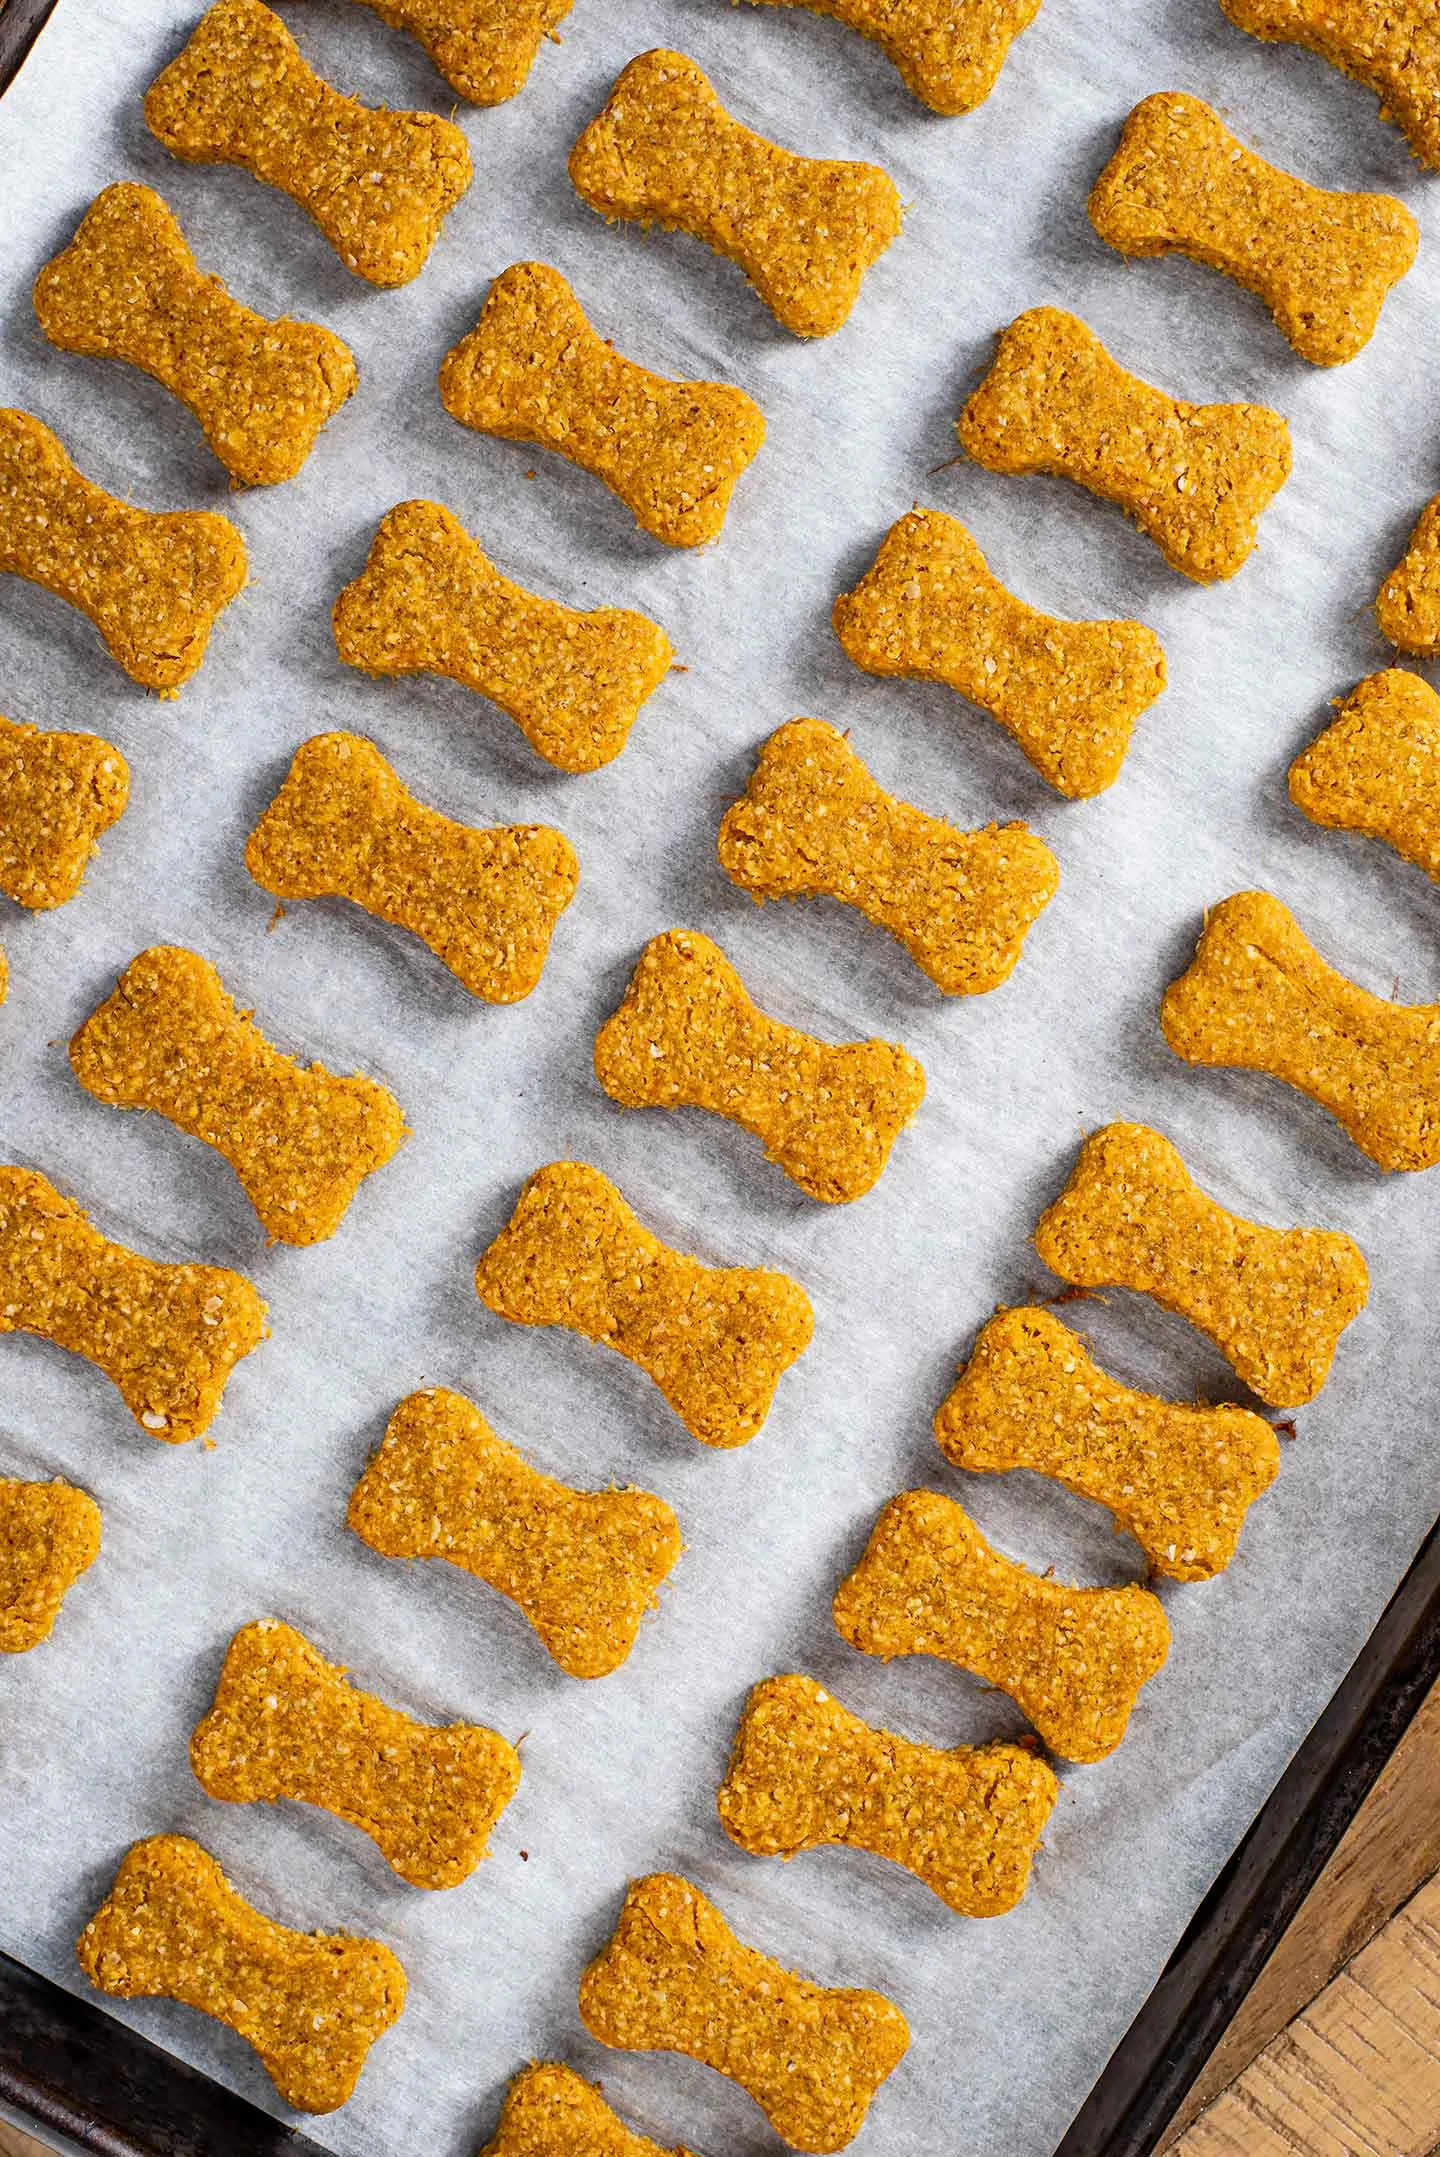 Freshly baked, golden-brown homemade dog treats, shaped like bones, neatly arranged on a baking tray.
Bake the treats for approximately 10-15 minutes. For dogs who prefer a softer, chewier treat that they can enjoy quickly, aim for the shorter end of this baking window, around 10-12 minutes. If your dog loves a good crunch that takes a bit longer to savor, extend the baking time to the full 15 minutes. The edges should be lightly golden, and the treats should feel firm to the touch. Once baked, allow the treats to cool completely on the baking sheet before handling and storing them. This cooling period is important for them to set properly and reach their desired texture.
Cost-Effective and Convenient Storage
One of the most appealing aspects of making your own healthy dog treats at home, aside from the nutritional benefits, is the significant cost savings. This simple 3-ingredient recipe costs approximately $0.83 CAD to produce 40-50 small dog bone treats, a stark contrast to the $10 or more you might spend on a single bag of comparable store-bought treats. This makes homemade treats a truly loving gesture for both your dog and your wallet.
Once the treats are completely cool, proper storage is essential to maintain their freshness and extend their shelf life. Store them in an airtight container in the refrigerator for up to one week. For longer preservation, these treats freeze beautifully and can be kept in the freezer for up to two months. Simply thaw them at room temperature or in the refrigerator before serving. Having a ready supply of these healthy, homemade snacks means you’ll always have a safe and delicious reward on hand for your furry friend.
Conclusion
Creating Healthy Dog Treats To Make At Home is a rewarding experience that benefits both you and your canine companion. This simple 3-ingredient recipe provides a wholesome, cost-effective, and customizable alternative to commercial treats, ensuring your dog enjoys delicious snacks free from unwanted additives and common allergens. By taking control of what goes into your dog’s treats, you’re not only fostering their well-being but also strengthening the incredible bond you share. We encourage you to try this easy recipe and discover the joy of homemade goodness. Share your experiences and any unique customizations with our community – we love hearing about your happy pups! For more valuable tips on pet care and nutrition, explore other articles on Dog Care Story.