
Have you ever watched a skilled dog handler command their canine companion with the grace of a silent conductor? There’s a certain magic to it—a quiet understanding that transcends words. This powerful, silent language is built on the foundation of Hand Signals For Dog Training. It’s more than just a party trick; it’s a profound way to deepen your communication and strengthen the bond you share with your dog. By learning to use non-verbal cues, you unlock a clearer, more effective training method that works in almost any situation, from a noisy park to the quiet of your home. Understanding the core principles is a great starting point, much like learning the basics of dog obedience commands and hand signals.
This comprehensive guide will walk you through everything you need to know, from the foundational benefits to the specific signals for essential commands, empowering you to become the clear, confident leader your dog needs.
Why Should You Use Hand Signals for Dog Training?
While verbal cues are common, integrating hand signals into your training regimen offers a multitude of advantages that can transform your relationship with your pet. It’s a versatile tool that enhances communication, making training more efficient and reliable.
- Universal Language for All Dogs: Hand signals are invaluable for dogs who are deaf or have become hard of hearing with age. It provides a consistent and clear way to communicate when verbal cues are no longer an option.
- Effectiveness at a Distance: A voice can get lost in the wind or drowned out by background noise at the dog park. A visual signal, however, can be seen clearly from a distance, allowing you to recall your dog or give a “stay” command without shouting.
- Strengthens Your Bond: Training with hand signals requires your dog to focus intently on you and your body language. This heightened attention builds a stronger connection and a more intuitive understanding between you and your canine partner.
- Promotes Better Focus: Dogs are naturally visual creatures. They often pay more attention to our physical cues than our words. Using signals taps into this innate ability, helping your dog stay more engaged and focused during training sessions.
- Discreet Communication: In certain situations, like when you have guests over or are in a quiet public space, you may want to give your dog a command without making a sound. Hand signals allow for silent, discreet communication.
As canine behaviorist Dr. Evelyn Reed notes, “Dogs communicate primarily through body language. When we incorporate hand signals into our training, we are essentially learning to speak their language. This creates a bridge of understanding that verbal commands alone sometimes cannot build.”
Getting Started: The Core Principles of Signal Training
Before you start teaching specific commands, it’s crucial to understand the fundamental principles behind training with hand signals. A successful outcome depends on consistency, patience, and positive reinforcement.
First, always pair the new hand signal with the verbal cue your dog already knows. For example, say “Sit” while simultaneously making the hand signal for “sit.” When your dog performs the action, immediately reward them with a high-value treat and praise. Repetition is key here.
After several successful repetitions, you can begin to fade the verbal cue. Start by using just the hand signal. If your dog responds correctly, give them a jackpot reward—an extra special treat or lots of praise—to reinforce the behavior. If they hesitate, simply reintroduce the verbal cue alongside the signal for a few more repetitions before trying again.
Keep your training sessions short, upbeat, and fun, aiming for just 5-10 minutes a couple of times a day. Always end on a positive note with a command your dog knows well. This ensures they stay motivated and look forward to your training sessions.
10 Essential Hand Signals Every Dog Should Know
Consistency is the most critical element when you’re teaching hand signals. Everyone in the household should use the exact same signal for each command to avoid confusing your dog. While you can invent your own, starting with standardized signals is often easier. For those looking for standardized cues, a great place to start is with guides on the akc hand signals for dog training.
Here are ten foundational hand signals for dog training and how to teach them.
1. Sit
The “sit” command is often the first one a puppy learns. It’s a fundamental behavior that serves as a building block for more complex commands.
- The Signal: With your palm facing up, sweep your hand upwards from your dog’s nose towards their head. This motion naturally encourages the dog to look up and back, causing their rear to lower into a sit position.
- How to Teach It: Hold a treat near your dog’s nose. Use the hand signal motion, moving the treat over their head. As their head goes up, their bottom will go down. The moment they sit, say “Yes!” and give them the treat. Repeat this, pairing the verbal “Sit” with the signal.
2. Stay
A reliable “stay” is crucial for your dog’s safety. This command teaches them self-control and can prevent them from darting into dangerous situations.
- The Signal: Hold your hand out in front of you with your palm facing forward, much like a traffic police officer signaling “stop.”
- How to Teach It: Ask your dog to sit. Give the “stay” signal and say the word “Stay.” Take one step back. If they hold their position, step forward and reward them. Gradually increase the distance and the duration of the stay over many training sessions.
3. Down (or Lie Down)
“Down” is a calming position and an excellent command for managing an overly excited dog in various situations.
- The Signal: With your hand open and palm facing down, move your hand straight down from your dog’s nose toward the floor.
- How to Teach It: From a sit, hold a treat near your dog’s nose. Use the hand signal, lowering the treat between their paws. To follow it, they will have to lie down. Mark the behavior with a “Yes!” and the treat as soon as their elbows touch the ground.
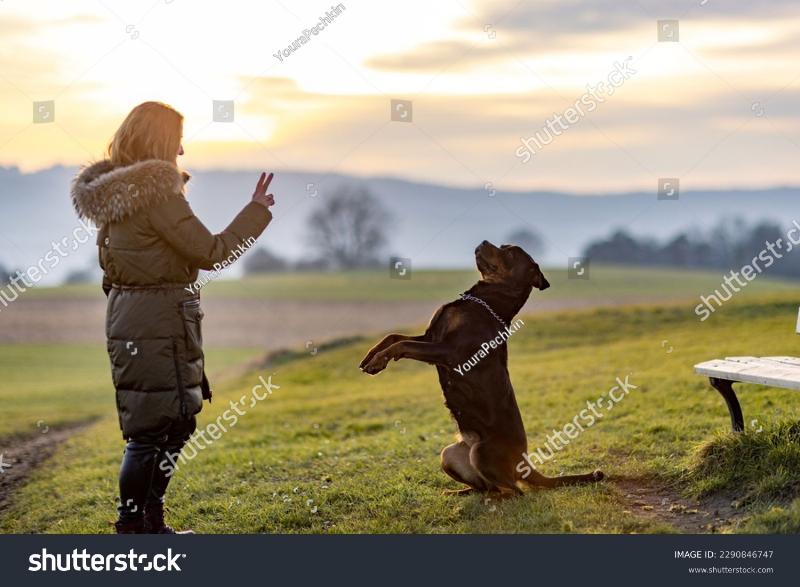 An owner using a clear hand signal for 'sit' with an attentive golden retriever in a park, showcasing positive hand signals for dog training.
4. Come (or Recall)
Recall is arguably the most important command your dog will ever learn. A strong recall can keep your dog safe and allow them more off-leash freedom.
- The Signal: Start with your arm extended out to your side, then swing it in towards your chest or thigh. This large, inviting motion encourages your dog to come toward you.
- How to Teach It: When your dog is a short distance away, say “Come!” in an excited tone while making the signal. When they start moving toward you, praise them enthusiastically. Reward them with a very high-value treat as soon as they reach you.
5. Heel
“Heel” means your dog should walk beside your left leg, not pulling ahead or lagging behind. It’s essential for polite leash walks.
- The Signal: Gently tap your left hip or thigh with your left hand. This tells your dog where they should be positioned.
- How to Teach It: With your dog on your left side, hold a treat in your left hand against your leg. As you walk, say “Heel” and make the tapping signal. Reward them every few steps for staying in the correct position. This is one of the more advanced hand signals to train your dog.
6. Leave It
This command can be life-saving, preventing your dog from ingesting something harmful or toxic off the ground.
- The Signal: Make a motion as if you are sweeping something away with the back of your hand.
- How to Teach It: Place a low-value treat on the floor and cover it with your hand. When your dog sniffs or licks your hand, say “Leave it.” The moment they pull their head away, praise them and reward them with a much better treat from your other hand.
7. Watch Me (or Focus)
Teaching your dog to focus on you is the foundation for all other training. If you have their attention, you can guide them through any situation.
- The Signal: Point to your eye with your index finger.
- How to Teach It: Hold a treat up to your eye and give the verbal cue “Watch me” while making the signal. When your dog makes eye contact with you (not just the treat), mark and reward the behavior.
8. Drop It
This teaches your dog to release whatever is in their mouth. It’s useful for games of fetch and for safety if they pick up something dangerous.
- The Signal: Start with your hand open, palm up, then quickly turn it over so the palm faces the floor.
- How to Teach It: During a game of tug, when you want your dog to release the toy, say “Drop it” and show them a high-value treat. They will have to drop the toy to eat the treat. Once they do, give them the reward.
9. Stand
The “stand” command is useful for grooming, vet examinations, or putting on a harness.
- The Signal: With your dog in a sit or down position, hold your hand flat, palm facing your dog, and sweep it forward away from their chest.
- How to Teach It: From a sit, hold a treat in front of your dog’s nose and slowly pull it straight forward. They will have to stand up to follow it. Mark and reward as soon as all four paws are on the floor.
10. Quiet
Teaching a “quiet” cue is invaluable for managing excessive barking. The best hand signals for dog training are often the most intuitive ones.
- The Signal: Bring your index finger to your lips, just like the universal human signal for “shush.”
- How to Teach It: When your dog is barking, say “Quiet” in a calm, firm voice while making the signal. The moment they pause, even for a second, praise them and offer a treat. Gradually increase the duration of silence required for the reward.
Common Mistakes to Avoid in Training
When embarking on your journey with hand signals for dog training, it’s easy to make a few common mistakes. Being aware of these pitfalls can help you stay on track.
- Inconsistent Signals: Using a slightly different hand motion for the same command can confuse your dog. Ensure everyone in the family uses the exact same signal.
- Phasing Out Verbal Cues Too Quickly: Don’t rush to drop the verbal command. Make sure your dog has a strong association between the word and the action before you start relying solely on the signal.
- Impatience and Frustration: Training takes time. If your dog isn’t getting it, take a break. Your frustration can create a negative association with training.
- Forgetting to Reward: Positive reinforcement is the engine of dog training. Always reward a correct response to a hand signal, especially in the early stages.
Frequently Asked Questions (FAQ)
What if I want to create my own hand signals?
You absolutely can! The most important thing is consistency. As long as you use the same unique signal for the same command every time, your dog will learn what it means.
Is it better to use verbal cues or hand signals?
The best approach is to use both. Teaching your dog to respond to both a word and a signal makes your communication more robust and versatile. You can use whichever is more appropriate for the situation.
Can I teach hand signals to an older dog?
Yes, old dogs can definitely learn new tricks! The process is the same as with a puppy. It might take a bit more patience and repetition, but senior dogs are just as capable of learning hand signals for dog training.
How long does it take to train a dog with hand signals?
This varies greatly depending on the dog’s age, breed, and previous training experience, as well as the consistency of your efforts. Some dogs might pick up a new signal in a single session, while others may take a few weeks of regular practice.
What should I do if my dog isn’t responding to the signals?
Go back a step. Re-pair the hand signal with the verbal cue your dog already knows well. Use higher-value treats to increase motivation, and make sure your training sessions are short and engaging.
Your Journey to Silent Communication
Embracing hand signals for dog training is about more than just teaching commands; it’s about building a deeper, more intuitive partnership with your dog. It encourages you to be a more observant and patient trainer, while teaching your dog to be more focused and attentive to you. Start with one or two basic commands, stay consistent, and celebrate every small success along the way. Before you know it, you and your canine companion will be communicating with a simple glance and a flick of the wrist.