
Embarking on a journey of training with your canine companion is one of the most rewarding experiences a dog owner can have. It strengthens your bond, builds confidence (for both of you!), and provides essential mental stimulation. While there are many tools of the trade, a simple, sturdy training platform is one of the most versatile. A Dog Training Platform Diy project not only saves you money but also allows you to create a piece of equipment perfectly tailored to your dog’s size and needs. This guide will walk you through everything you need to know to build a safe, effective, and durable training platform from scratch. For those looking to take their skills to the next level, exploring options for home agility training for dogs can be a fantastic next step after mastering platform work.
Why Build a DIY Dog Training Platform?
Before we grab the power tools, let’s talk about the “why.” What makes a simple raised box so effective, and why build it yourself? A training platform, often called a “pause box” or “place board,” serves as a clear, defined target for your dog. It’s an invaluable tool for teaching a variety of skills.
- Clarity and Focus: The raised boundary makes it crystal clear to your dog where they are supposed to be. This is incredibly helpful for teaching stay, send-aways, and distance work.
- Body Awareness: Training on a platform encourages dogs to become more aware of their body positioning, especially their rear feet. This “proprioception” is crucial for dog sports and general coordination.
- Confidence Building: For timid dogs, mastering the act of getting on and staying on a platform can be a huge confidence booster. It’s a simple task with a high rate of success.
- Cost-Effective: Commercial training platforms can be surprisingly expensive. A DIY approach cuts costs significantly, often using materials you might already have.
- Customization: You can build a platform to the exact dimensions your dog needs—not too big, not too small. You also control the height, surface, and overall look.
- The Bonding Experience: Building something for your dog is a special kind of project. It’s an act of love that infuses your training with an extra layer of connection.
Essential Tools and Materials
The beauty of this project is its simplicity. You don’t need a professional workshop to get it done. Here’s a list of what you’ll typically need.
Tools:
- Measuring tape
- Pencil
- Safety glasses
- Drill with Phillips head and various drill bits
- Circular saw or miter saw (a handsaw can work in a pinch, but it’s more labor-intensive)
- Staple gun (optional, for securing the surface material)
- Sander or sandpaper (medium grit)
Materials:
- One 4’x4′ sheet of 3/4-inch plywood: This will be for the top surface. Ensure it’s smooth and free of splinters.
- Two 8-foot long 2×4 lumber boards: These will form the frame and legs of your platform.
- 2.5-inch wood screws: For assembling the frame and attaching the legs.
- 1.25-inch wood screws: For securing the plywood top to the frame.
- Non-slip surface material: This is crucial for safety. Options include outdoor carpet, rubber matting (like a utility runner or horse stall mat), or high-traction paint mixed with sand.
- Adhesive: A strong construction adhesive or carpet glue to bond your surface material.
- Wood glue (optional but recommended): For stronger joints in the frame.
- Primer and outdoor paint (optional): If you plan to use the platform outdoors, sealing and painting the wood will protect it from the elements.
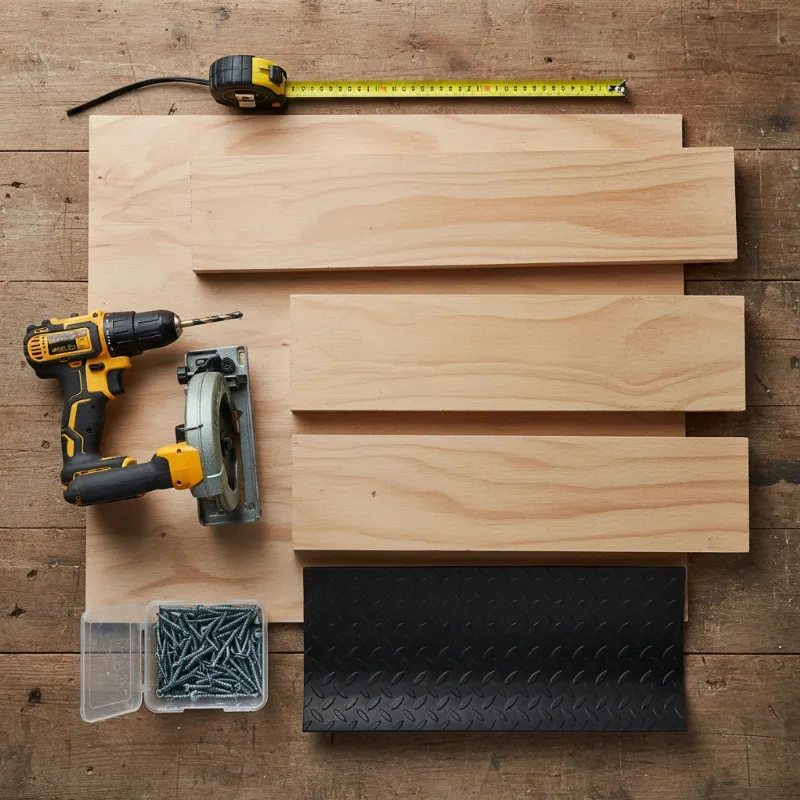 A collection of tools and materials for a dog training platform DIY project, including plywood, lumber, a drill, and a saw.
Step-by-Step Guide to Building Your Platform
Once you have your materials, it’s time to build. We’ll aim for a standard 36″x36″ (3’x3′) platform, which is a great size for most medium to large dogs. You can adjust these measurements for smaller or larger breeds.
Step 1: Determine the Height
The height of your platform depends on your dog’s size and your training goals.
- For puppies and small dogs: 4-6 inches is plenty.
- For medium to large dogs: 8-12 inches is a good general-purpose height.
- For advanced agility or conditioning: Heights can go up to 24 inches, but start low and work your way up.
For this guide, we’ll build a platform that is roughly 5 inches tall (the height of a 2×4 plus the 3/4″ plywood).
Step 2: Cut Your Wood
Safety first! Always wear safety glasses when cutting wood.
- The Top: Cut your 4’x4′ plywood sheet down to a 36″x36″ square.
- The Frame: From your 2×4 lumber, cut four pieces, each 33 inches long. Why 33 inches? Because when you build a square frame, the two end pieces will fit inside the two side pieces. (33″ board + 1.5″ side board + 1.5″ side board = 36″). This creates a 36″x36″ outer dimension for your frame, perfectly matching the plywood top.
- The Legs (Center Supports): Since this is a low platform, we don’t need corner legs. Instead, we’ll add center supports for stability. Cut two more pieces of 2×4 lumber, each 33 inches long.
Step 3: Assemble the Frame
- Lay out your four 33-inch frame pieces on a flat surface to form a square.
- Apply a bead of wood glue to the ends of the two “inside” boards.
- Press the pieces together tightly.
- Drill two pilot holes through the outside board into the end of the inside board on each corner to prevent the wood from splitting.
- Secure each corner with two 2.5-inch wood screws. You should now have a sturdy 36″x36″ square frame.
“A well-built frame is the foundation of a safe training platform. Take your time to ensure all your joints are flush and tight before proceeding.” – Dr. Michael Shaw, Canine Sports Medicine Specialist.
Step 4: Attach the Top and Supports
- Place the 36″x36″ plywood sheet on top of your assembled frame. Make sure the edges are perfectly aligned.
- Drill pilot holes every 8-10 inches around the perimeter of the plywood, down into the 2×4 frame.
- Secure the top to the frame using 1.25-inch wood screws.
- Flip the platform over. Place your two 33-inch support legs inside the frame, running parallel to each other and evenly spaced.
- Secure these supports by drilling down through the plywood top into them using 1.25-inch screws. Also, drive 2.5-inch screws through the outer frame into the ends of these supports for maximum stability.
Step 5: Add the Finishing Touches
- Sanding: Sand all edges and corners of the platform to remove any potential splinters. The last thing you want is a paw injury.
- Painting (Optional): If you plan to use it outdoors, apply a coat of primer followed by two coats of durable outdoor paint. Let it dry completely.
- Applying the Surface: This is the most important step for safety.
- Cut your non-slip material (carpet, rubber) to 36″x36″.
- Apply a generous layer of construction adhesive to the plywood top.
- Carefully lay down your material, smoothing it out from the center to remove any air bubbles.
- For extra security, you can wrap the material over the edges and use a staple gun to attach it underneath the platform’s lip.
Allow the adhesive to cure for the manufacturer’s recommended time before use. Your dog training platform DIY project is now complete!
Safety First: Critical Considerations
Building your own equipment is great, but safety must be the top priority.
- Stability is Non-Negotiable: Before you introduce it to your dog, test the platform yourself. Stand on it, shift your weight. It should not wobble or tip. If it does, you need to reinforce the frame or supports.
- The Surface Must Be Non-Slip: A painted wood surface, especially when wet, is dangerously slippery. The traction of your chosen surface is paramount to prevent injuries and build your dog’s confidence.
- No Sharp Edges: Double-check your work for any exposed screw heads or sharp, splintered wood edges. Sand everything smooth.
Just as a professional might seek out a specialized dog trainer in Northern Virginia, it’s wise to approach your DIY project with a similar level of care and professionalism to ensure your dog’s well-being.
Introducing Your Dog to the Platform
Don’t just expect your dog to jump on the new object in the room. Use positive reinforcement to make it a fun game.
- Curiosity: Place the platform on the floor and let your dog sniff and investigate it. Click and treat for any interaction.
- One Paw: Encourage your dog to place one paw on it. Click and treat.
- Two Paws: Raise the criteria to two paws. Click and treat.
- All Four Paws: Lure your dog all the way onto the platform. The moment all four paws are on, have a jackpot party with lots of treats and praise!
- Build Duration: Start asking for a simple “sit” or “down” on the platform, gradually increasing the duration they stay on it. Keep sessions short and positive.
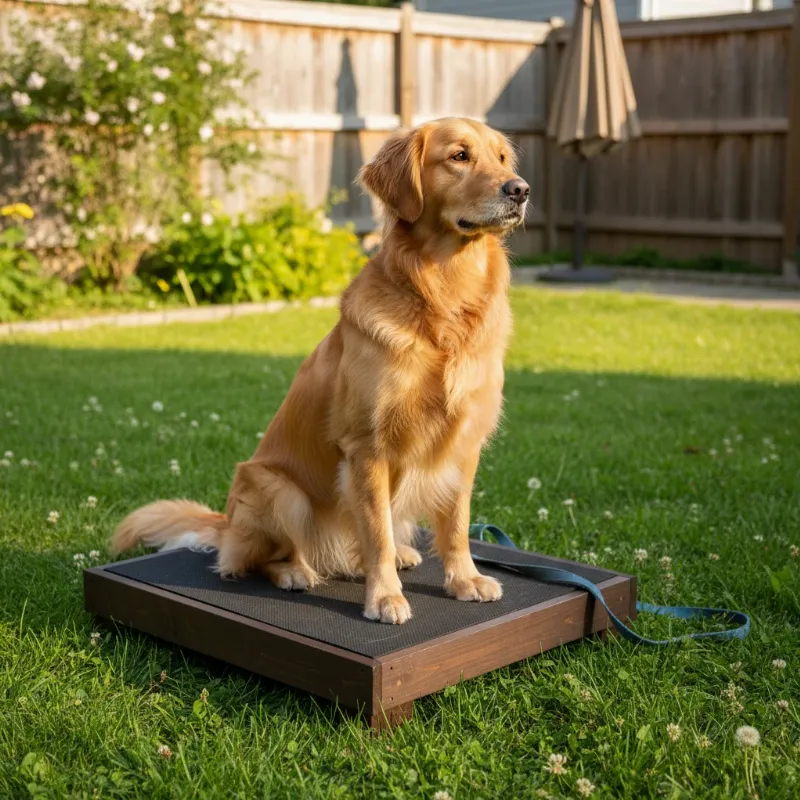 A happy golden retriever confidently sitting on a newly built DIY training platform in a backyard.
For structured learning environments, the principles are the same. Whether you’re in a park or attending dog training classes in Queens, a solid foundation of positive association with equipment is key.
Frequently Asked Questions (FAQ)
Q: What is the best surface for a dog training platform?
A: The best surface provides excellent grip even when wet. Rubber horse stall matting is a top-tier choice for durability and traction. High-quality outdoor carpet or rubber utility runners are also fantastic and often more accessible options.
Q: How big should my dog’s training platform be?
A: The platform should be large enough for your dog to comfortably sit, lie down, and turn around on, but not so large that they can easily shuffle their feet without stepping off. A good rule of thumb is a square that is slightly longer than your dog’s body length.
Q: Can I use this platform for puppy training?
A: Absolutely! A low-height platform is an excellent tool for puppies. It helps with body awareness, builds confidence, and is a great way to introduce the concept of “place” training from a young age.
Q: How do I protect a wooden platform for outdoor use?
A: To make your platform weather-resistant, use pressure-treated lumber for the frame. Seal the entire wooden structure with a quality outdoor primer and at least two coats of exterior paint before you attach the non-slip surface.
Q: Can a training platform help with dog anxiety?
A: Yes, it can be a very helpful tool. Giving an anxious dog a specific, safe place to go—their “spot”—can be very grounding for them. The clear boundaries of the platform can provide a sense of security during stressful situations. Understanding the cost of more intensive programs can also provide perspective; for instance, knowing service dog training prices helps owners weigh their options for different training needs.
Your Next Great Training Adventure
Building a dog training platform DIY style is more than just a weekend project; it’s an investment in your relationship with your dog. You’re creating a tool that will open up new avenues of communication and skill-building. By following these steps and prioritizing safety, you’ll have a durable, custom piece of equipment that will serve you and your furry partner for years to come. So go ahead, unleash your inner craftsman and build something amazing for your best friend.