
For many dog owners, car rides are an absolute joy—a chance for our furry companions to experience new sights and smells. However, the excitement of an open window or the simple act of shifting position can quickly turn your car’s interior into a battleground for dog claws and slobber. If you’ve ever spent hours scrubbing paw prints off your door panels or grimaced at new scratches on your pristine car interior, you know the struggle is real. While commercial dog car door protectors offer a convenient solution, crafting your own Diy Dog Car Door Protector can be a cost-effective, custom-fit, and highly rewarding project. Let’s dive into how you can protect your vehicle from even the most enthusiastic canine passengers.
Why Your Car Doors Need Protection from Your Dog
Dogs, bless their hearts, aren’t intentionally trying to damage your car. Their natural behaviors, however, can lead to significant wear and tear on your vehicle’s interior. Understanding these challenges highlights why protection is essential, whether you opt for a DIY solution or a store-bought one.
- Scratch Marks from Paws and Nails: As dogs adjust their positions, look out the window, or eagerly anticipate their destination, their nails can inadvertently scrape against the door panels. Over time, these small scratches accumulate, leading to noticeable damage and depreciation of your car’s interior. Trimming your dog’s nails regularly is a first line of defense, but even short nails can cause scuffs during enthusiastic moments.
- Drool and Wet Nose Marks: Breeds prone to drooling, or simply an excited dog on a long journey, can leave wet marks and slobber on your car doors. These aren’t just unsightly; they can be tough to clean and, if left unchecked, might lead to lingering odors or even stains on fabric or porous surfaces.
- Mud and Dirt: After a fun outing at the park or a muddy trail, your dog’s paws are often the culprits for tracking dirt and mud into your car. A quick shake or rub against the door can transfer grime directly onto your car’s vulnerable surfaces.
- Preserving Your Car’s Resale Value: A well-maintained interior contributes significantly to your vehicle’s overall value. Protecting your doors from pet-induced damage ensures your car remains in better condition, potentially saving you money in the long run.
The Benefits of a DIY Dog Car Door Protector
While there are many excellent commercial car door protectors available, taking the DIY route offers unique advantages, especially for the hands-on pet owner looking for a personalized touch.
- Cost-Effective Solution: The primary appeal of a DIY project is often the savings. By using readily available materials, you can create a high-quality protector for a fraction of the cost of a store-bought one.
- Custom Fit for Your Car: Every car model has slightly different door dimensions and contours. A DIY protector can be tailored precisely to fit your vehicle’s unique design, ensuring maximum coverage and a snug fit that store-bought options might not achieve.
- Personalized Style and Materials: You have complete control over the fabric, color, and features (like pockets for storage) of your protector. This allows you to match it to your car’s interior, your dog’s personality, or simply choose materials that you know are durable and easy to clean.
- Sense of Accomplishment: There’s a certain satisfaction that comes from creating something functional and beneficial with your own hands. Plus, you’ll know exactly what went into making it, ensuring it meets your specific standards for safety and durability.
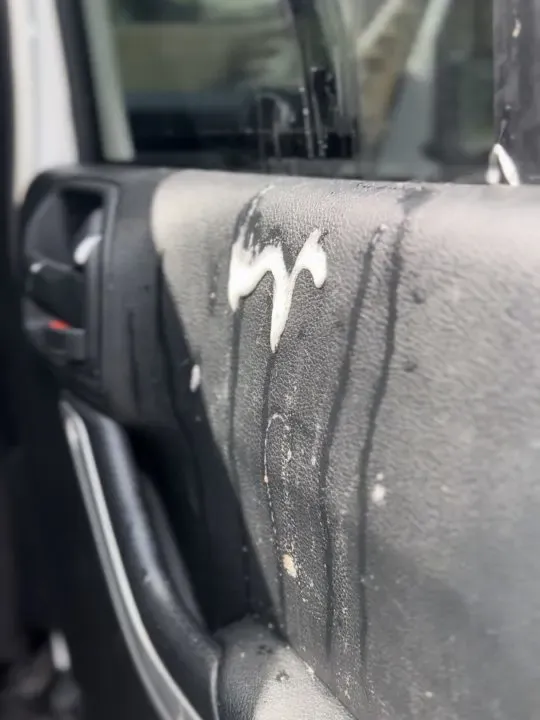 Dog car door protector installed on a vehicle door, safeguarding against pet scratches and drool
Materials You’ll Need for Your DIY Dog Car Door Protector
Before you begin, gather your supplies. The good news is that most of these items are inexpensive and might even be found around your house.
- Heavy-Duty, Waterproof Fabric: This is the most crucial component. Look for durable, washable, and waterproof materials like:
- Heavy-duty canvas
- Vinyl fabric
- An old shower curtain (for lighter duty)
- A durable tarp or heavy-duty outdoor fabric
- Old denim or thick upholstery fabric (if you can add a waterproof backing)
- Measuring Tape: For accurate measurements of your car doors.
- Scissors or Utility Knife: Sharp tools for cutting your fabric cleanly.
- Marking Pen or Chalk: To outline your cut lines on the fabric.
- Fastening Options: To secure the protector to your car door. Consider:
- Velcro Strips: Adhesive-backed Velcro for easy attachment and removal.
- Suction Cups: Great for windows, some protectors use them directly on the door panel or window glass.
- Plastic Slats/Tabs: These slide between the window and door panel, offering a secure hold. You can cut these from sturdy plastic sheets or use stiff cardboard for a temporary solution.
- Elastic Bands/Cord: For looping around seatbelts or headrests for extra stability.
- Clips/Carabiners: To attach to existing car features.
- Optional: Sewing machine (or needle and thread for hand-stitching), fabric glue, grommets, and grommet tool (for more permanent attachment points).
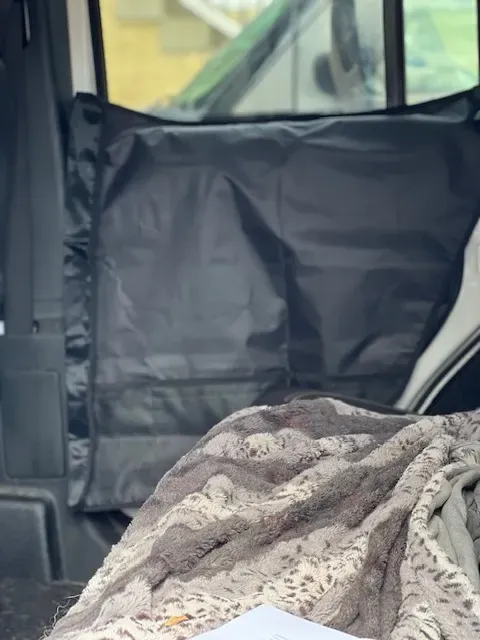 Close-up of a DIY or store-bought dog car door protector featuring storage pockets, installed to prevent dog scratches and drool
Step-by-Step Guide: How to Make Your Own Dog Car Door Protector
Creating your own dog car door protector is simpler than you might think. Follow these steps for a functional and effective solution.
Step 1: Measure Your Car Door
Open your car door fully. Use your measuring tape to determine the desired coverage area.
- Width: Measure from the back edge of the door to the front, considering how far you want the protector to extend.
- Height: Measure from just below the window line down to where your dog’s paws typically reach, or even lower for full coverage.
- Add Seam Allowance: Add an extra 1-2 inches to all sides for hemming (if sewing) or for creating reinforced edges.
- Consider Window Opening: If your dog likes to put their head out the window, you might want the protector to extend slightly above the sill, or ensure your fastening method doesn’t impede window operation.
Step 2: Cut Your Fabric
Lay your chosen fabric flat and mark your measurements using a pen or chalk. Carefully cut the fabric to your desired dimensions. If you’re planning to sew, hem all edges for a clean, durable finish. If not sewing, you can use strong fabric glue to create a reinforced edge or simply leave it raw if the material doesn’t fray easily.
Step 3: Add Fasteners
This is where your chosen fastening method comes into play.
- For Suction Cups: Attach suction cups with loops or holes directly to the fabric, usually along the top edge. Ensure they’re spaced evenly for a secure hold.
- For Plastic Slats/Tabs: Create pockets along the top and/or sides of your fabric where stiff plastic slats can be inserted. These slats then slide down into the window channel, holding the protector in place. This is a very common and effective method for both DIY and commercial protectors.
- For Velcro: Apply the hook side of adhesive Velcro strips to the back of your protector, in areas that will align with accessible, flat surfaces on your car door (e.g., along the top edge or side panels). The loop side can be attached to the car door if necessary, though some protectors rely on the weight of the fabric and window tabs.
- For Elastic Bands/Clips: If you want to secure the bottom or sides, attach elastic loops or straps that can hook around the seat base, car seat frame, or existing anchor points.
Step 4: Install and Test
Once your fasteners are in place, install your new DIY dog car door protector.
- Window Slats: Carefully roll down your window a few inches, slide the plastic slats into the window channel, and then roll the window back up to secure.
- Suction Cups: Press firmly onto clean, dry surfaces on the window or door panel.
- Velcro: Adhere the protector to the chosen points on your door.
Test the fit by having your dog get in the car. Observe how they interact with the protector. Does it stay in place? Does it offer sufficient coverage? Make any necessary adjustments.
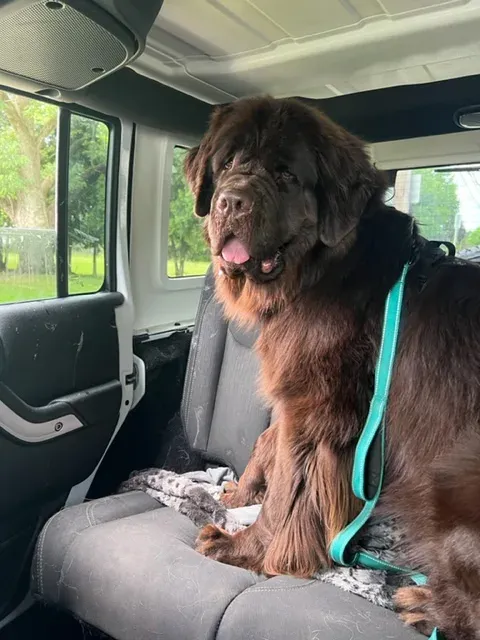 A large brown dog with noticeable drool, comfortably seated in the back of a car, highlighting the need for car protection from pets
Other DIY and Cost-Effective Solutions to Protect Your Car
While a dedicated door protector is ideal, there are other simple, low-cost ways to minimize pet-induced car damage.
Regular Nail Trimming: The First Line of Defense
This cannot be stressed enough. Keeping your dog’s nails trimmed short significantly reduces the potential for scratches. If you’re uncomfortable doing it yourself, ask your vet or a professional groomer for assistance. Regular walks on hard surfaces can also help naturally wear down nails.
Old Towels or Blankets: Quick & Easy
For a truly impromptu solution, drape an old towel or blanket over the car door where your dog typically rests their paws. While not as secure or durable as a dedicated protector, it offers a temporary barrier against drool and light scratches. Keep a stash of microfiber towels in your car for quick clean-ups of drool and paw prints.
DIY Dog Bibs: For the Droolers
If excessive drooling is your main concern, consider making or buying a dog bib, especially for breeds prone to slobber. A simple fabric bib can catch most of the drool before it reaches your car’s interior. You can easily craft one from an old shirt or sturdy fabric with a simple tie or Velcro closure.
Training and Containment
While training a dog not to scratch or drool might be challenging as it’s often accidental, containing them can help.
- Dog Seatbelts or Tethers: These keep your dog in a specific area, limiting their movement and reducing the chance of them interacting with the car doors. Ensure any harness or seatbelt attachment is crash-tested and comfortable for your dog.
- Cargo Area Barriers: If your car has a cargo area, a barrier can keep your dog safely confined there, away from the passenger doors.
 Dog car door protector with visible fasteners (suction cups or tabs) securing it to a car window, offering protection against dog scratches
Beyond DIY: When to Consider a Commercial Dog Car Door Protector
While DIY solutions offer many benefits, there are times when a commercially manufactured protector might be a better fit.
- Lack of Time or Skills: If you don’t have the time, tools, or inclination for a DIY project, buying a protector is the easiest path.
- Specific Car Models: Some vehicles have complex door designs or features that make a custom DIY fit more challenging. Commercial products often come with universal designs or model-specific options.
- Maximum Durability and Features: Store-bought protectors often use advanced, ultra-durable, and fully waterproof materials, sometimes with additional features like reinforced edges, dedicated storage pockets, and superior attachment systems that might be harder to replicate with basic DIY methods.
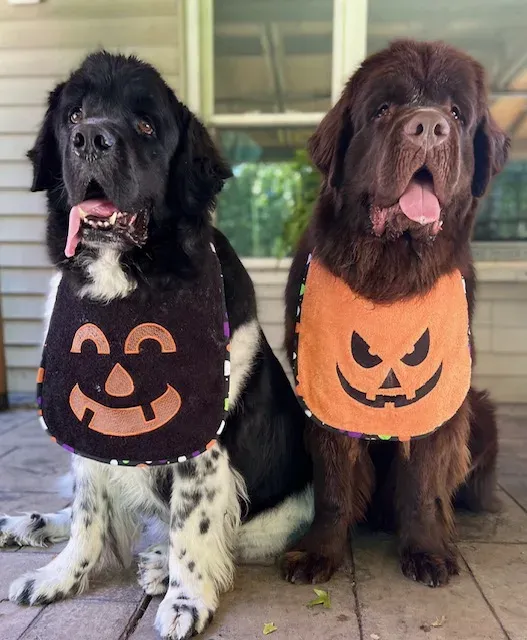 A large dog wearing a festive drool bib, illustrating a simple DIY or temporary solution for managing dog drool in vehicles
Conclusion
Protecting your car’s interior from your beloved canine companion doesn’t have to be a costly or complicated endeavor. Whether you choose to invest in a pre-made solution or take on the rewarding task of creating a DIY dog car door protector, the goal remains the same: to enjoy stress-free car rides with your pet while preserving the cleanliness and integrity of your vehicle. A handmade protector offers a custom fit, material choice, and the satisfaction of a job well done, all while saving your car doors from inevitable scratches and drool. So, roll up your sleeves, gather your materials, and embark on this simple project to ensure many more happy, protected journeys with your best friend!