
Welcoming a new furry friend into your home or struggling with an enthusiastic leash-puller? The Canny Collar offers a gentle yet effective solution for training your dog to walk politely by your side. Designed to stop pulling without pain or discomfort, the Canny Collar works on a simple “pressure and release” system that encourages good behavior. However, its effectiveness hinges entirely on correct fitting and proper use. This comprehensive guide will walk you through each crucial step, from securing the collar to mastering the art of a loose-leash walk, ensuring a comfortable experience for your dog and a more enjoyable walk for both of you.
Understanding the Canny Collar’s Innovative Design
The Canny Collar distinguishes itself from traditional head halters by attaching the leash behind your dog’s head, rather than under the chin. This design provides better steering control and prevents the collar from being pulled up into your dog’s eyes. It applies gentle pressure across the bridge of the nose when your dog pulls, which is immediately released when they stop. This clear communication helps your dog learn to associate pulling with discomfort and walking calmly with comfort, effectively training them to walk on a loose leash.
Step-by-Step Guide to Fitting Your Canny Collar
Proper fitting is paramount for the safety and effectiveness of your Canny Collar. Follow these instructions carefully to ensure your dog experiences maximum comfort and you gain optimal control.
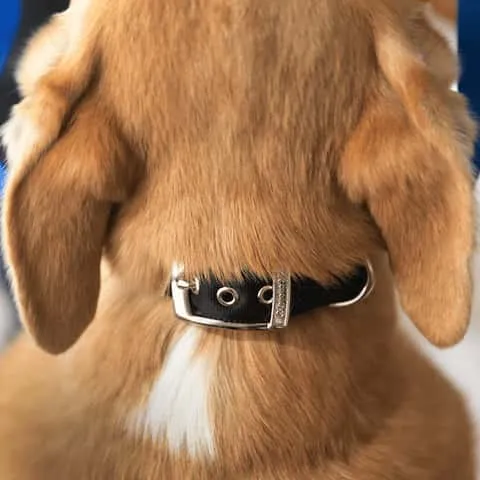 Dog wearing a Canny Collar with the buckle secured behind the ears, showing correct high neck placement
Step 1: Secure the Neck Strap High and Snugly
Begin by fastening the main collar strap around your dog’s neck. The buckle should rest just behind their ears, at the very top of the neck. Ensure any excess strap is neatly folded and tucked under the buckle’s lip. Unlike a standard collar, the Canny Collar needs to sit higher on the neck – almost like a necklace – for optimal control and to prevent it from slipping down.
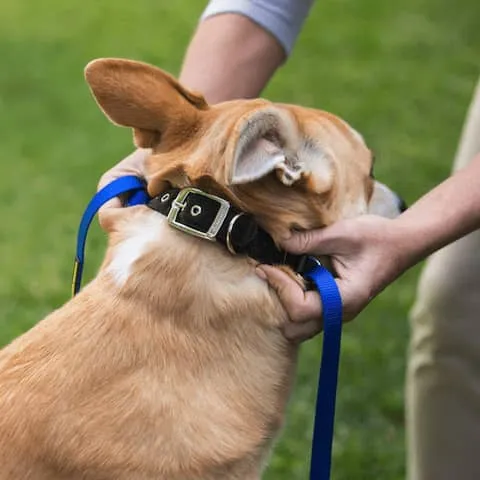 Dog owner testing the snug fit of a Canny Collar by gently trying to pull it over the dog's head
Step 2: Test for a Secure Fit
A snug fit is crucial to prevent the Canny Collar from coming off during walks. To test this, stand facing your dog and try to gently pull the collar over their head. If fitted correctly, it should be impossible to remove. If it slips off, tighten the neck strap and re-test. This ensures your dog’s safety and prevents them from escaping the collar.
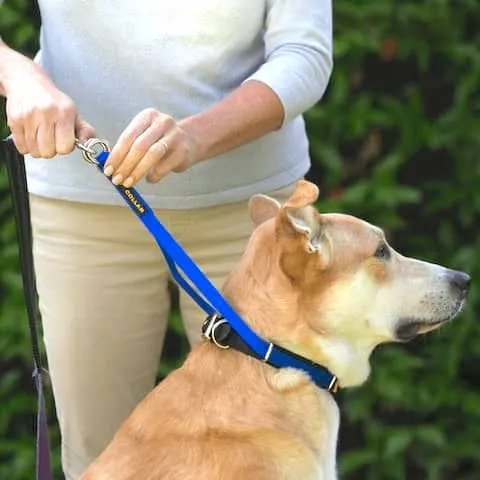 Close-up of a dog owner attaching a leash to both D-rings of the Canny Collar behind the dog's head
Step 3: Attach Your Leash to the D-Rings
Take both ends of the thin nose band and pull them behind your dog’s head. You will find a ‘D’ ring at the end of each side. Attach your lead to both of these ‘D’ rings simultaneously. This dual attachment ensures the pressure is evenly distributed and the collar functions as intended.
 Hand guiding the Canny Collar's nose band over a dog's snout, ensuring it is not twisted
Step 4: Position the Nose Band Carefully
Thread the nose band through the small yellow plastic guider located at the front of the Canny Collar, then gently place it over your dog’s snout. For some breeds, you might find it easier to place the nose band before attaching the leash. Always take care to ensure the nose band is not twisted before positioning it on your dog’s nose, as twisting can cause discomfort and reduce effectiveness.
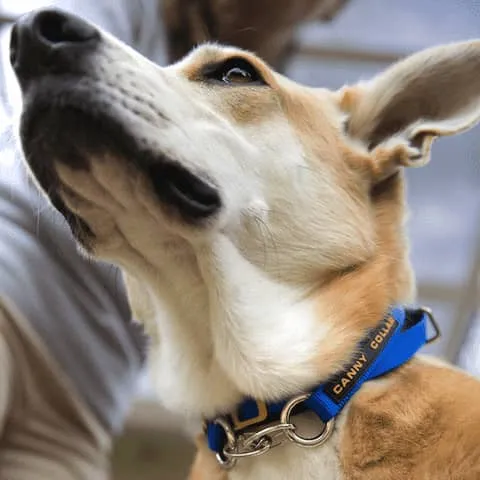
 Detailed view of the yellow plastic guider of the Canny Collar correctly positioned and snug under the dog's chin
Step 5: Ensure the Plastic Guider is Under the Chin
This step is absolutely critical for the Canny Collar to work correctly. The small yellow plastic guider must remain under your dog’s chin. If this guider is not kept in this position, the collar will not apply pressure effectively and will lose its no-pull functionality. Double-check its placement before every walk.
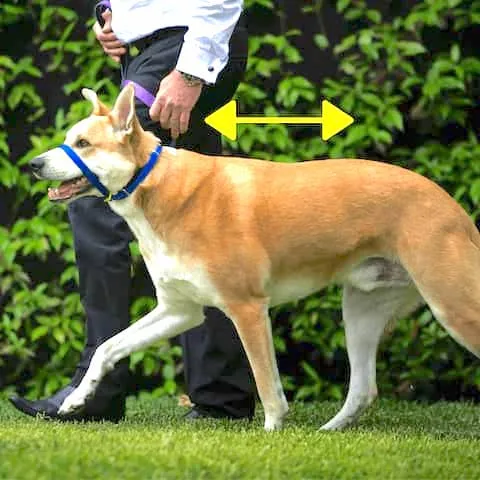 Person walking a dog with a Canny Collar on a short, loose leash, demonstrating effective no-pull training
Step 6: Understand the Pressure and Release System
When your dog starts to pull on the leash, apply gentle, consistent backward pressure. The key to the Canny Collar’s training system is the instant release of this pressure the moment your dog stops pulling and walks nicely. This immediate positive reinforcement teaches your dog that loose-leash walking is comfortable and rewarding, encouraging them to self-correct their pulling behavior.
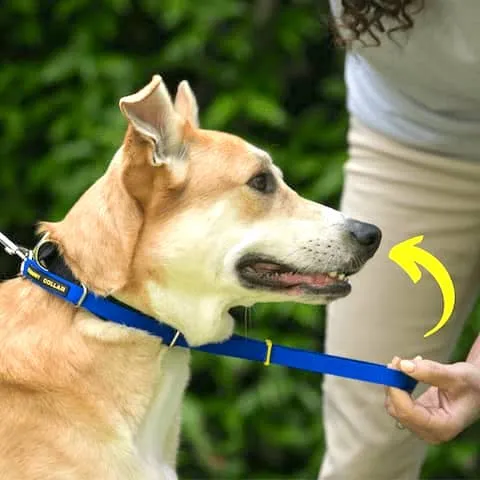
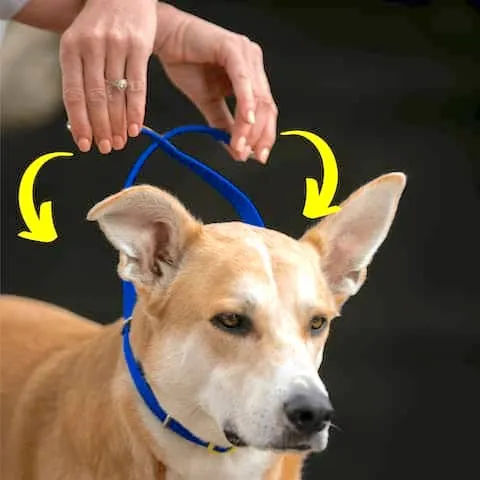 Woman demonstrating how to cross and drop the Canny Collar's nose band behind a dog's head for off-leash use
Step 7: Preparing for Off-Leash Activity
When it’s time to let your dog off-leash for play or exercise, the Canny Collar can remain on. Simply remove the nose band from their snout and pull it out fully. Then, cross the nose band behind your dog’s head and let it drop on either side, as shown in the image. This prevents the nose band from interfering with their natural movements.
 Close-up of a dog's Canny Collar D-rings secured together under the chin with carabiner clips for off-leash activity
Step 8: Securing the D-Rings for Off-Leash Freedom
After removing the nose band from your dog’s snout, bring the two ‘D’ rings together underneath their chin. You can then use one or two of the optional carabiner clips (often sold separately or included with some models) to secure these ‘D’ rings together. This keeps the collar neat and prevents the loose straps from snagging. Important: Never attach your leash to these carabiners; they are solely for securing the D-rings when off-leash.
Walking Successfully with Your Canny Collar
The first few walks with the Canny Collar are crucial for setting the right foundation.
Begin by immediately going for a walk after fitting the Canny Collar. Keep your leash short but loose, aiming to maintain your dog in a ‘heel’ position close to your side. A training lead around 4 feet (approximately 1.2 meters) long is ideal for this purpose, providing optimal control without excessive slack. Give your dog plenty of enthusiastic verbal praise the moment they start walking calmly without pulling. This positive reinforcement helps them understand what you want.
When you first place the nose band over your dog’s nose, some dogs may try to resist it, pawing at their face to remove it. This is a common initial reaction to any head halter, similar to how we might react to wearing a wristwatch for the first time. If your dog exhibits this behavior, try to desensitize them to the collar slowly indoors first, then gradually build up to going for a walk. During the walk, continue moving forward so your dog focuses on the activity rather than the Canny Collar. If they paw at it, gently lift the leash and offer verbal encouragement to follow.
The initial minutes of your walk are vital. Pay close attention to ensure your dog keeps their head upright, the nose band remains loose around their mouth, and your leash is short enough to prevent the nose band from slipping off the front of their nose, yet loose enough to avoid constant tension. These early moments are an excellent opportunity to connect with your dog, focusing intently on training them to walk well. A good start in the first five to ten minutes often means a much smoother and more enjoyable walk thereafter.
The Art of a Loose Leash: Reinforcing Good Behavior
Once your dog starts walking nicely without pulling, instantly lower the leash to release all pressure on the Canny Collar. At this point, you should also give them a little more slack on the leash and continue to offer plenty of vocal praise while keeping moving. It is essential for your dog to learn that good behavior (not pulling) is immediately rewarded with comfort and freedom from pressure; otherwise, they may continue to pull against consistent tension.
If your dog tries to remove the Canny Collar again, repeat the action of gently lifting the leash. Because the leash is connected behind their head, they won’t be able to get a paw over it effectively to stop the walk. The collar also cannot be pulled off over their head if the leash is maintained in the correct position. Sometimes you may need to briefly let the leash out if your dog lags behind, pulling it back in once they catch up to maintain the ideal loose-leash length. Once any initial resistance to wearing the Canny Collar subsides, continue walking your dog for a short distance, then stop and reward them with praise and affection. Consider using treats or clicker training if your dog responds well to these methods to further reinforce calm walking and positive association with the Canny Collar.
Key Benefits of the Canny Collar for Dog Owners
The Canny Collar offers numerous advantages for dog owners seeking to improve their dog’s leash manners. Its unique behind-the-head leash attachment provides superior steering, preventing the common issue of the collar riding up into the dog’s eyes. It’s designed to be gentle, working on a humane pressure-and-release system that teaches rather than punishes. Once properly fitted, it can be an incredibly effective tool for stopping even the strongest pullers, making walks more enjoyable and safer for both pet and owner. With consistent use, many dogs quickly learn to walk calmly, transforming stressful outings into pleasant adventures.
By diligently following these fitting instructions and incorporating the suggested walking techniques, you can unlock the full potential of your canny collar, fostering a more harmonious relationship with your pulling pup. Consistent practice and positive reinforcement are key to successful leash training, paving the way for many happy walks together.