
Navigating the world of dog training tools can feel like a huge task, especially when you encounter equipment surrounded by debate and strong opinions. One such tool is the electronic collar, or e-collar. If you’re exploring the Best E Collar Dog Training methods, you’ve likely heard a mix of success stories and cautionary tales. The truth is, modern e-collars are sophisticated communication devices that, when used correctly, can open up a new level of understanding and freedom between you and your dog. They are not about punishment but about providing clear, gentle, and consistent cues from a distance.
This guide is designed to cut through the noise. We’ll explore what makes a quality e-collar, how to introduce it humanely, and the techniques that professional trainers use to reinforce known commands and ensure off-leash reliability. Forget the outdated “shock collar” myths; today’s technology focuses on vibration, tones, and micro-level static stimulations that act as a simple tap on the shoulder to get your dog’s attention. By the end of this article, you’ll have the confidence and knowledge to use an e-collar as a powerful tool for positive communication, strengthening your bond and ensuring your dog’s safety.
What is an E-Collar and How Does It Really Work?
Before we dive into training techniques, it’s essential to understand the tool itself. An electronic training collar is a system composed of a wireless remote transmitter held by the handler and a lightweight receiver worn on the dog’s collar. It’s designed to give your dog information from a distance, which is crucial for off-leash training and for correcting behaviors when a leash isn’t practical.
Modern e-collars are a far cry from the crude devices of the past. High-quality models today offer a range of communication methods:
- Audible Tone: This is often a simple beep. Trainers use the tone as a marker or a warning cue, much like a clicker in clicker training. For example, the tone can mean “look at me for a command” or serve as a recall signal.
- Vibration: This function provides a sensation similar to a pager or a vibrating cell phone. It’s a non-static way to get a dog’s attention and is highly effective for many dogs, especially those who are sensitive or deaf.
- Static Stimulation: This is the most misunderstood feature. It is not an electric shock designed to cause pain. Instead, it’s a mild electrical stimulation, often described as a tingling sensation or a tiny muscle contraction, similar to what you might feel from a TENS unit used in physical therapy. The best e collar dog training practices involve using the absolute lowest level of stimulation that your dog can perceive—often just a slight ear twitch or turn of the head is the only sign they feel it.
The goal is never to startle or punish, but to communicate. The remote allows you to control the type and intensity of the cue, ensuring it’s always appropriate for the situation and your dog’s specific temperament. When looking for the best remote dog training collar, features like multiple stimulation modes and a wide range of intensity levels are paramount.
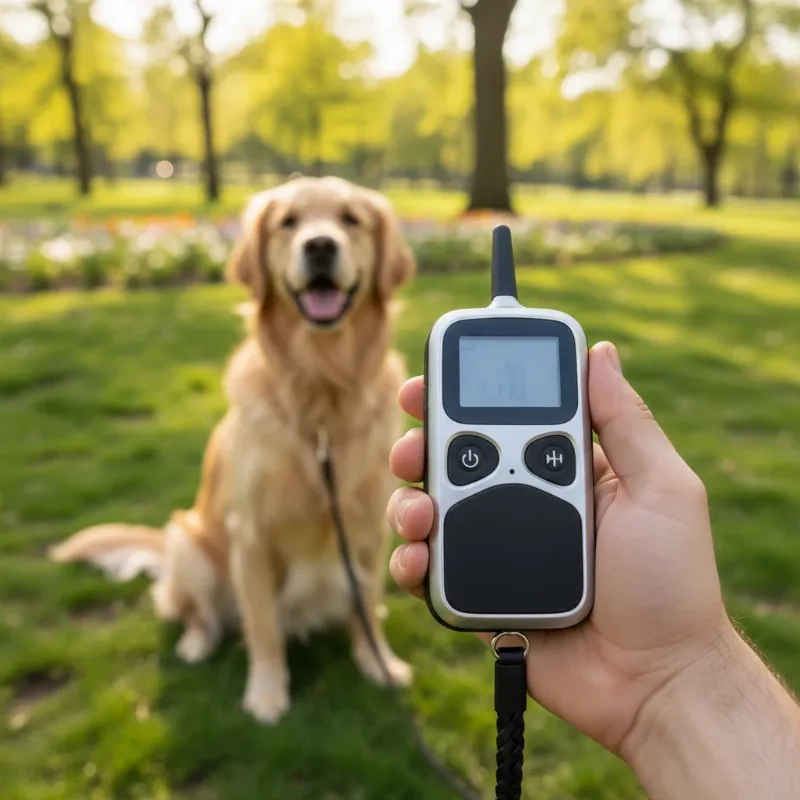 A person holding a modern e-collar remote with a happy, well-behaved golden retriever in the background, showcasing responsible dog training.
The Great Debate: Are E-Collars Safe and Humane?
The controversy surrounding e-collars is understandable, given the history of primitive “shock collars.” However, leading trainers and veterinarians now widely recognize that modern, high-quality e-collars are safe and humane when used as a communication tool, not a punitive one.
The key lies in the word “training.” An e-collar is not a magic wand to stop bad behavior. It’s a tool to reinforce commands your dog already knows. The philosophy behind effective e-collar use is to apply a low-level, annoying stimulation that stops the instant the dog complies with a command. The dog learns that its own action (e.g., coming when called) turns off the sensation, giving it complete control over the stimulation. This is a form of pressure-and-release training, similar to how a leash works.
According to Dr. Ethan Bennett, a specialist in canine behavior, “The conversation has shifted from ‘if’ we should use e-collars to ‘how’ we should use them. Modern devices with 100 or more levels of stimulation allow us to find a barely perceptible setting that serves as a silent request for attention. It’s more humane than yanking on a leash or yelling, which can create anxiety and damage the owner-dog relationship.”
Safety also comes from the physical design. Reputable brands ensure the contact points are smooth and hypoallergenic. Proper fit is crucial to prevent chafing, and the collar should never be worn 24/7. It’s a training tool, not permanent jewelry.
How to Choose the Best E-Collar for Your Dog
With a saturated market, selecting the right e-collar can be daunting. Not all e-collars are created equal. Investing in a quality device is non-negotiable for the safety and well-being of your dog. Here are the critical features to look for:
- Wide Range of Stimulation Levels: This is the most important feature. Look for collars with at least 100 levels. This precision allows you to find the “working level” for your dog—the lowest possible stimulation they can feel. Budget collars with only 10 or 20 levels often have significant jumps between settings, going from unnoticeable to far too strong.
- Multiple Stimulation Modes: A quality collar must have tone, vibration, and static options. Many training scenarios can be managed with just tone and vibration, reserving static for more critical situations like ensuring safety from traffic.
- Waterproof and Durable: Dogs will be dogs. They run through puddles, swim in lakes, and roll in the mud. A waterproof receiver (and ideally, a waterproof remote) is essential for reliability in all conditions.
- Reliable Range: Consider your lifestyle. For most city dwellers and suburbanites, a range of a half-mile is more than sufficient. If you engage in hiking, hunting, or training in large rural areas, a longer range of up to a mile will provide peace of mind.
- Ergonomic and Intuitive Remote: During a training moment, you need to be able to deliver a correction without looking down at the remote. Look for a design with distinct buttons for each function and a dial that is easy to adjust. A “lock” feature is also beneficial to prevent accidental stimulation.
- Proper Fit and Size: The receiver should be appropriate for your dog’s size and weight. A bulky collar on a small dog is uncomfortable and ineffective. Many brands offer specific models, like a pet training collar for small dogs, which is designed for a better fit and lower stimulation range.
Your Step-by-Step Guide to Effective E-Collar Training
Introducing and using an e-collar requires patience, consistency, and a focus on positive communication. Rushing this process is the biggest mistake owners make.
Step 1: Collar Introduction and Acclimation (1-2 Weeks)
The first step has nothing to do with the buttons on the remote. The goal is to create a positive association with the collar itself.
- Just Wear It: Have your dog wear the e-collar (turned off) for short periods every day during fun activities. Put it on right before a meal, a walk, or a game of fetch. Take it off when the fun ends.
- Ensure Proper Fit: The collar should be snug on the upper part of the dog’s neck, just below the ears. It should be tight enough for the contact points to touch the skin, but you should be able to fit two fingers between the strap and your dog’s neck.
- Rotate Position: To prevent skin irritation, slightly rotate the receiver’s position every couple of hours of wear.
Your dog should think the e-collar is the “fun collar” that predicts good things are about to happen.
 A close-up view of an e-collar correctly fitted on a German Shepherd's neck, showing the two-finger rule for snugness.
Step 2: Finding the “Working Level”
This is the most critical step in humane e-collar use. Your goal is to find the lowest level of stimulation your dog can perceive.
- Start at Zero: With the dog on a leash in a low-distraction environment like your backyard, set the stimulation to level 0.
- Observe Closely: Press the continuous stimulation button. Increase the level by one increment at a time.
- Look for a Small Sign: Watch for any subtle sign of recognition: an ear flick, a slight turn of the head, a change in expression, or a brief pause. This is your dog’s working level. For most dogs, this happens between levels 5 and 15 on a 100-level device. If your dog yelps or jumps, the level is far too high.
Step 3: Overlaying with a Known Command (The “Come” Command)
Now, you will teach your dog how to “turn off” the stimulation by complying with a command they already know well, like “Come.”
- Get a Long Leash: Use a 15-30 foot long line for this exercise.
- Apply Stimulation: Let your dog wander to the end of the leash. Say your recall command (“Come!”) and immediately apply the continuous stimulation at their working level.
- Guide and Release: The moment your dog starts moving toward you, release the stimulation button. Use the long line to apply gentle guidance if needed.
- Praise and Reward: When they arrive, praise them enthusiastically and give them a high-value treat.
Repeat this process. The dog quickly learns: “When I hear ‘Come’ and feel that tiny tingle, I can turn it off by moving toward my human, and then I get a reward!” This puts the dog in control, which is the foundation of the best e collar dog training. For more advanced options, some owners explore a dog gps training collar which integrates location tracking with training features.
Step 4: Generalizing to Other Behaviors
Once your dog masters the recall command with the e-collar, you can apply the same principle to other known commands like “Sit,” “Place,” or “Heel.” The formula is always the same:
- Give the command.
- Apply low-level, continuous stimulation.
- The moment the dog complies, release the stimulation.
- Praise and reward.
The e-collar becomes a clear, non-emotional cue that bridges the communication gap, especially when distractions are high. This is where you can truly appreciate the benefits of the best training e collar for dogs.
Common Mistakes to Avoid
- Using it as a Punitive Tool: Never use the e-collar to punish a dog for unwanted behaviors like jumping or barking out of frustration. It is for teaching and reinforcing known commands.
- Starting with a Level That’s Too High: This is the quickest way to create fear and anxiety, destroying the tool’s effectiveness. Always find the lowest working level.
- Inconsistent Use: The collar only works if you do. Consistency is key for your dog to understand the “rules” of this new communication method.
- Becoming a “Remote Control” Owner: Don’t forget to use your voice! The e-collar should support your verbal commands and praise, not replace them. Your relationship is the most important tool you have.
Ultimately, the goal of the best e collar dog training is to use the collar less and less over time. As your dog becomes more reliable, the collar serves as a safety net—an insurance policy for those critical moments when a reliable recall could prevent a tragedy. It empowers you to give your dog more freedom to explore its world safely, solidifying the trust and bond you share. This tool, in the right hands, is about creating a more confident and obedient companion for a lifetime of adventures.